Monday, August 27, 2018

COLOR OF THE MONTH CLUB CARD:

Hello there! This is the fun card you'll get with your Color of the Month Club packet this month. I used the Stitched All Around Bundle this month, along with all 4 patterns of the In Color DSP. I started with a Lovely Lipstick base and added pieces of Grapefruit Grove, Pineapple Punch, Blueberry Bushel, Call Me Clover & a strip of Lovely Lipstick DSP.

Or you might get a Grapefruit Grove version...which one will you get??? I then cut the label from Grapefruit Grove & Lovely Lipstick Cardstock using the Stitched Labels Framelits. I stamped the background on each with Grapefruit Grove & Lovely Lipstick ink. I stamped the sentiment with the same inks onto Whisper White Cardstock and used the medallion die from the framelits to cut it out.

I added strips of Grapefruit Grove & Lovely Lipstick Grosgrain Ribbon to the DSP with Glue Dots, and added the label layers on top with Dimensionals. I used the In Color Markers to color each letter for the small tag and adhered it to the medallion with a Glue Dot and an In Color Mini Binder Clip.

I finished it off with a few sequins from the Iridescent Sequin Assortment using tiny drops of Liquid Tombow, and tied a bow around the clip with Whisper White Solid Baker's Twine.

This is the third month for the Color of the Month Club, but you can join anytime! Each month you'll get 8 products featuring a designated color from the new 2018-2020 In Colors. In 5 months you'll have the entire collection!

For $45 a month, you'll get the following:
   *8 1/2" x 11" Pack of Cardstock
   *8 sheets of DSP
   *Stampin' Pad
   *Ink Refill
   *Roll of 1/8" Grosgrain Ribbon
   *Jar of Embossing Powder
   *Stampin' Write Marker
   *5 In Color Mini Binder Clips
   *Free Embellishment
   *Project made with In Color products

If you were to purchase all of these products it would cost you well over $200, but by joining the Color of the Month Club, it will be spread out over 5 months. Plus you'll get a surprise embellishment for FREE every month and a fun project featuring the In Color products!

The Color of the Month Club is a 5 month committment of $45 a month, which includes tax & shipping. If you're not local there will be additional shipping to send your packet to you. At the end of the Club you'll have 5 packages of 8 1/2" x 11" Cardstock, a whole package of DSP, 5 Stamp Pads, 5 Ink Refills, 5 rolls of Ribbon, 25 Mini Binder Clips, 5 Jars of Embossing Powder, with the tube and 5 Markers with the case. Plus 5 fun projects and 5 surprise Embellishments for FREE!

The payment is due by the 15th of each month.

For any who are interested, we'll continue the Club with the new colors SU! introduced for $30 a month.

Let me know today if you're interested in being a part of this fun Club! Thanks so much for stopping by:)

Saturday, August 25, 2018

DARLING LABEL FAVOR:

Hello there! This is the sweet little favor I made for everyone attending Coffee Break today. I've had a lot going on this week...Elise's 3rd birthday party, TNT!, my Team Meeting & Coffee Break today. I needed a quick & easy favor and this was it! I'm so thankful to Deann, one of my downline who shared this adorable idea at out meeting!

What's really cool about this is that you don't need adhesive to assemble this little box, so it was easy for me to just open it up and make a template! I started with a piece of 4" x 7" Petal Pink Cardstock. I scored it at 2", 2 1/2", 4 1/2" & 5" on the long side. On the short side I scored it at 1/2", 1", 3" & 3 1/2".

I laid Deann's template on top of mine and put an 'X' on all the sections that needed to be cut off. I then used my Paper Snips and cut up to the second score line as shown.

I then cut off all the sections that were marked.

I tapered each of the small tabs and used the Detailed Trio Punch to round the outside corners of the big tabs. I couldn't get the cardstock to fit into the punch for the inside corners, so I just rounded them with my Paper Snips.

I folded on all the score lines and added a 2" x 2" piece of Petal Promenade DSP to the front with Liquid Tombow. The front of the box will be the middle section-see the top template. I then used the 3/4" Circle Punch to cut out the notch. Next, fold the right side in first, then the left. Fold the small tabs down and then tuck the bottom tab inside. Put a treat inside and then tuck in the top tab. So easy!

I wrapped a piece of Tranquil Tide Mini Ruffled Ribbon around the box and secured it in place with Glue Dots. I then stamped the label with the Darling Label Stamp Set using Tranquil Tide ink onto Whisper White Cardstock. I punched it out with the Darling Label Punch. I colored the flower with a Petal Pink Marker and attached it with Mini Dimensionals.

I tied a bow with the ribbon and attached it with a Glue Dot. I strung a piece of Silver & Petal Pink Baker's Twine through a couple of In Color Flower Buttons and tied a knot in the back. I then attached them with Mini Dimensional pieces.

I copied Deann again and put a Milky Way Fudge Mini inside:) I'm thinking a couple of the mini Ghiradellis would work well too:)

I hope you'll give this fun little treat holder a try! Think of all the possibilities with the new Halloween goodies from the Holiday Catalog...can't wait!!! Thanks so much for stopping by:)

Friday, August 24, 2018

DARLING LABEL FAVOR:

Hello there! This is the favor I made for everyone who attended TNT! earlier this week. The focus was on fun background techniques, and for this tag topper I used the Rainbow Emboss Resist Technique.

I started by filling a 2" x 8" Cellophane Bag with candy. I added a piece of Crushed Curry Cardstock measuring 2" x 3" and scored it in half. I folded the bag down about 1/2", folded the topper in half and stapled it onto the bag. I then took a piece of Whisper White Cardstock and stamped it with the Post Script Background Stamp using Whisper White Craft ink. I added White Embossing Powder and set it with a Heat Tool.

I then used Sponge Daubers with Crushed Curry, Coastal Cabana, Flirty Flamingo & Gorgeous Grape stamp pads and applied the ink in a circular motion. I overlapped some the colors slightly to get a full rainbow of colors. I then wiped off the excess ink from the embossed  image to make it pop. I used the same inks on the sentiment from the Darling Label Stamp Set included in the Punch Box Tin, starting with Coastal Cabana at the top into Flirty Flamingo, then Crushed Curry and Gorgeous Grape at the bottom. I punched out the labels using the Darling Label Punch, included with the tin.

I cut the Whisper White Cardstock down to smaller pieces and adhered them to the tag toppers with Liquid Tombow. I looped a piece of Bermuda Bay & Gorgeous Grape Mini Striped Ribbon under the label and stapled it to the topper. I then added a couple of the Tropical Elements with Glue Dots, adding a piece of Whisper White Solid Baker's Twine through the holes of the flower.

The Tropical Elements were a perfect compliment to these favors as the tags do have an exotic, tropical feel to them. Maybe I'll need to bring a bunch with me when I travel to the Greek Isles next year!!! One can hope! Thanks so much for stopping by:)


Thursday, August 23, 2018

ANIMAL OUTING CARD:

Hello there! Here's the second card we made at TNT! the other night. The focus was on fun backgrounds and this card features the Crinkle Technique. I was going for a lot of texture to resemble the rhino's skin. I started with a Call Me Clover base and added a strip of Animal Expedition DSP to the left.

Next, I scrunched & crinkled a piece of Crumb Cake Cardstock. I lightly ran a Soft Suede Stamp Pad across it. I then crunched it up some more, making sure to get some creases in different places, and ran the stamp pad across it again. I repeated the process with a Smoky Slate Stamp Pad. I then spritzed it with some alcohol & scrunched it up one final time.

I then smoothed it out and stamped some texture on it using Timeless Textures and Soft Suede ink. On top of that I stamped the dot image with a Whisper White Craft pad. I adhered the crinkle layer on top of the DSP with Liquid Tombow. I looped a piece of Leaf Ribbon and secured it in place with Glue Dots. I then stamped the rhino with Memento Black ink onto Whisper White Cardstock. I colored him with Watercolor Pencils and blended them with a Blender Pen. I used the Stitched Shapes Framelits to cut it out.

I then stamped the sentiment with Call Me Clover ink and used the framelits to cut it out. I added the rhino & sentiment with Dimensionals. I used the Cookie Cutter Builder Punch to punch out the little heart from Poppy Parade Cardstock. I attached it to a Corrugated Element with Liquid Tombow and attached a Linen Thread bow with a Glue Dot. This was another fun technique and I'm sure I'll be putting it to use again! Stop back tomorrow for another fun background technique. Thanks so much for stopping by!

Wednesday, August 22, 2018

ROOTED IN NATURE CARD:

Hello there! This is one of the cards we made at TNT! last night. I demonstrated a couple of background techniques, and this card features a Sponged Background Technique. It's very quick & easy but produces a lovely effect. I started with a Soft Suede base and stamped the background image with Soft Suede ink as well.

For the background, I started with a strip of Whisper White Cardstock. I used 3 different ink pads and had a Stamping Sponge wedge designated for each color. Working in a circular motion, I started with Bermuda Bay ink at the top. I tried to apply a light, even layer, and covered the top third of the cardstock. Underneath the Bermuda Bay I added Flirty Flamingo ink, overlapping the colors a bit to blend them. Next I added Pumpkin Pie, filling in the bottom third of the cardstock. I then added grass along the bottom edge by sponging some Bermuda Bay over the Pumpkin Pie.

Next, I stamped the trees from Rooted in Nature with Memento ink over the top. I went back in with the Bermuda Bay ink to add some extra shading to the bottom of the trees so they didn't look like they were floating. I adhered the cardstock to a piece of Nature's Poem DSP, and to the card base with SNAIL. I then ran a strip of Suite Season Washi Tape from the Holiday Catalog underneath.

I attached a piece of Petal Pink Metallic Ribbon on top with Glue Dots. I stamped the sentiment with Memento ink onto a strip of Very Vanilla Cardstock and attached it with Mini Dimensionals. I stamped 2 leaf images with Soft Suede ink onto Vellum Cardstock and ran them through the Big Shot using the Nature's Roots Framelits. I tucked them under the sentiment with Glue Dots and finished it off with one of the gorgeous Tea Room Copper Stickers. Like I mentioned, this is a really quick & easy technique, but it has a big wow factor. I hope you'll give it a try! Stop back tomorrow for another fun background technique. Thanks so much for stopping by!

Friday, August 17, 2018

TIME FOR TEA CLASS TO GO:

Hello there! We still have almost 3 weeks to go until you can order from the Holiday Catalog, so I'm offering a fun new class to keep you busy until then! As you know I'm working really hard to earn the SU! Incentive Trip to the Greek Isles, and I'm needing your help! I'm offering this 7 project class to you at a great value of $50. You'll get it all for the price of the bundle, which is discounted 10% and tax & shipping are already included in the price!

You're going to get one of the adorable Copper Tea Tins, which you'll decorate, and includes these 4 sweet 3" x 3" cards that fit inside. There'a little extra room inside so you could tuck some chocolate or tea bags or other treat inside as well. Perfect for a teacher gift or to give to a dear friend!

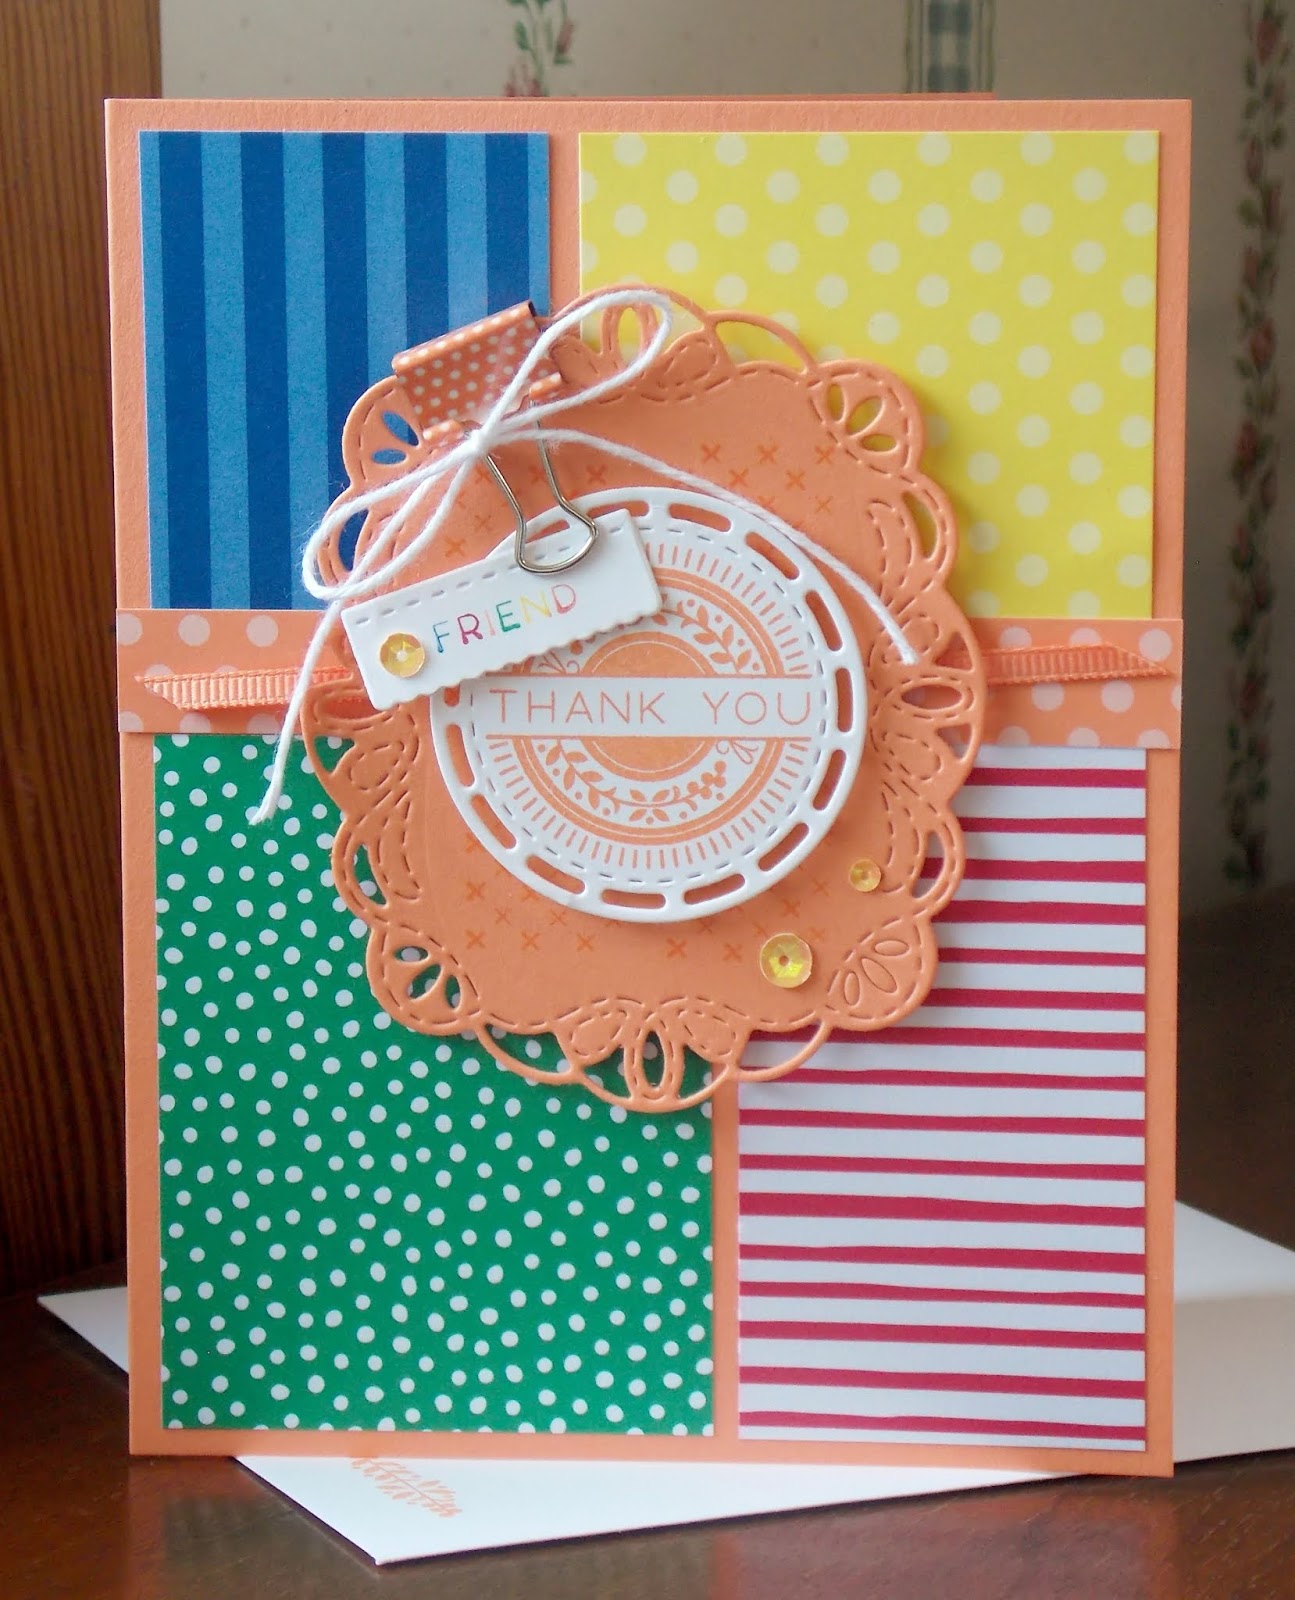
You'll also make this standard-sized card, with all the embellishments included, along with envelopes for all the cards. You'll get to play with all the amazing products from the Tea Room Suite!

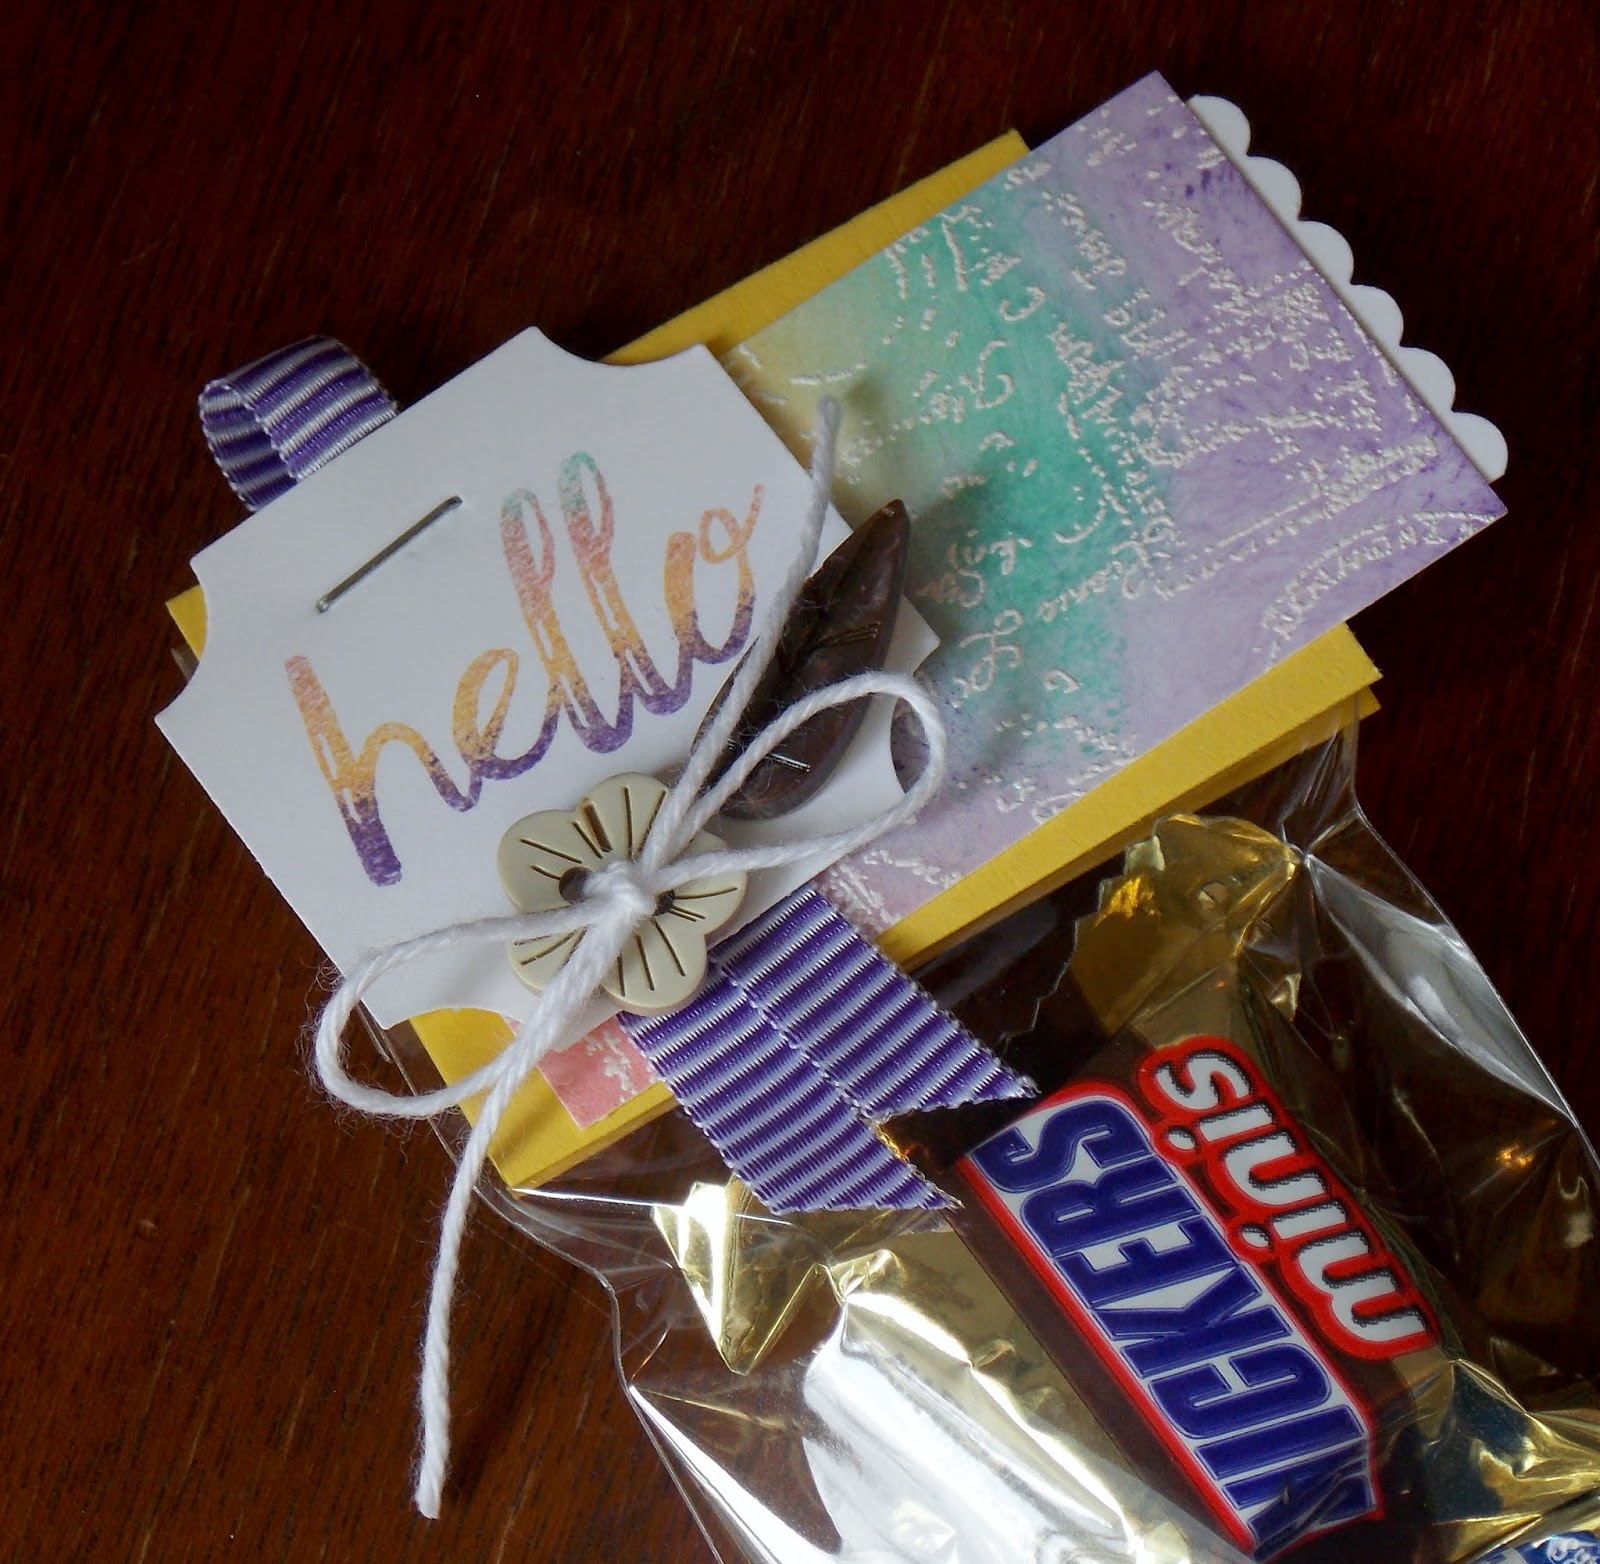
You'll also make this fun little Time For Tea Crate. This would make the perfect favor for a tea party or other get-together with friends! The little Cello Bag is the perfect size for tea bags or you could easily substitute chocolate, cookies or a gift card. What a fun little surprise for someone special!

Here is what is included in the Time For Tea Class to Go:
   *Time For Tea Photopolymer Stamp Set
   *Spot of Tea Framelits
   *Copper Tea Tin
   *Color Tutorial with step-by-step instructions
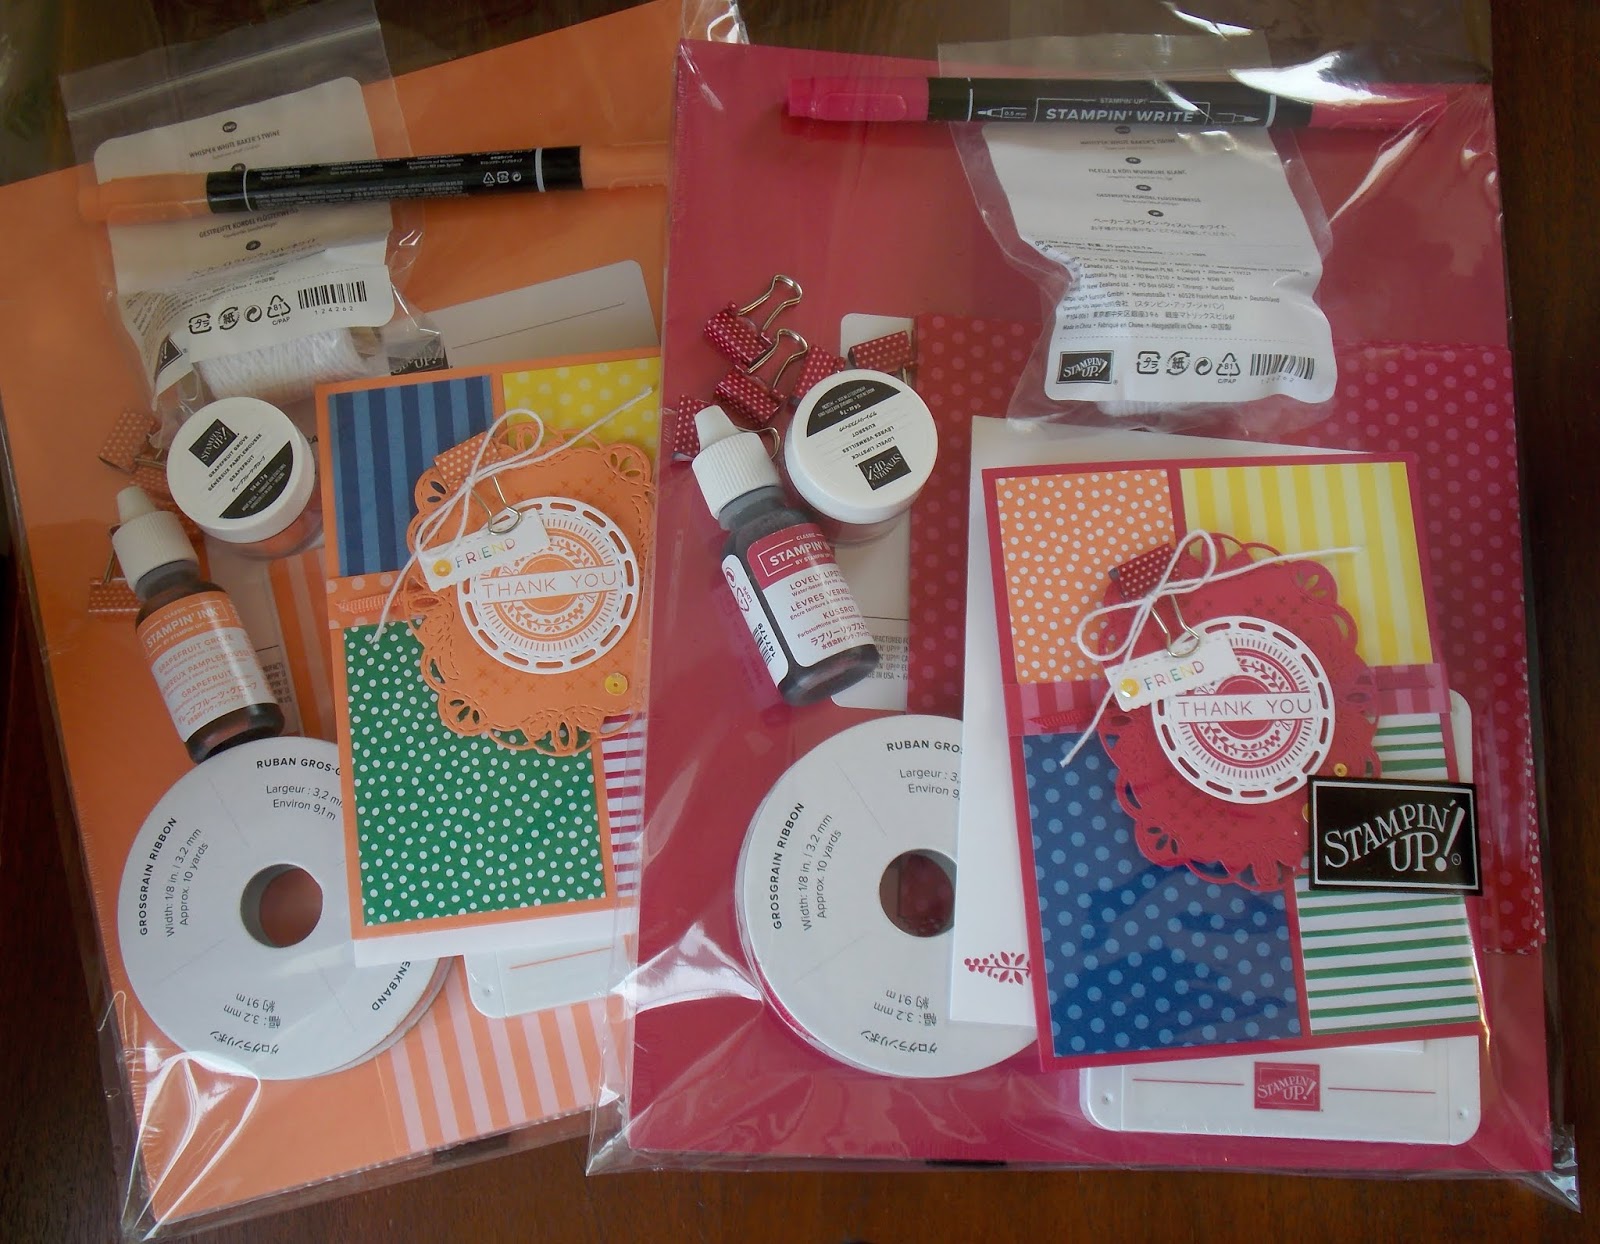
   *Kits for 7 projects
   *Tea Room Copper Vinyl Stickers for FREE!

Again, you're only paying for the Time For Tea Bundle, which is already discounted 10%! I'm throwing in the 13 page color tutorial, 7 project kits and Copper Stickers FOR FREE!!!

The deadline to sign up & pay for the Time For Tea Class to Go is Monday, August 27th. The cost is $50, with tax & shipping already included in price!

You can go to my Facebook Group Page SU!P FRIENDS and see videos demonstrating these projects! Or come back here to see each project up close & personal:)

I've included all the measurements in the color tutorials so you can duplicate more of these projects!

The best part about a Class To Go is that you get to do it in the comfort of your own home, whenever you want, even in your jammies if you want to!

You'll get all the cardstock, envelopes, DSP, ribbon & embellishments included in your project kits. You'll just do the stamping & cutting. You'll need some additional supplies to complete these projects as shown: a Big Shot, various Stampin' Pads, clear blocks, adhesives and miscellaneous products listed after each project. I will list them below, but you can always substitute with what you have.

Here's the additional supplies you'll need to complete the projects as shown:
*Old Olive,Coastal Cabana, Rich Razzleberry, Crushed Curry, Memento Black & Soft Suede Stamp Pads
*Watercolor Pencils, Blender Pens, stapler, x-acto knife
*At Home with You & Bouquet Blossoms(optional-you can substitute what you have)

Thank you so much for your support & encouragement so far!!! I couldn't do this without you! I'm at 115,000 points but need to get to 160,000 by the end of September. I still have a ways to go but I'm optimistic I'll get there...with your help! I'm going to be offering lots of great deals and incentives over the next 6 weeks and I hope you'll take advantage of the savings, while helping me out! Thank you so much for stopping by, and stay tuned!

Thursday, August 16, 2018

SANTA'S WORKSHOP GOODIE BAG:

Hello there! This is the sweet little Goodie Bag that I had for each of the attendees at my BINGO BLAST! last week-end. I started with one of the cute little Santa Bags from the Holiday Catalog, and I made a stencil from a Window Sheet using the snowflake dies from Santa's Signpost Framelits. I then used a Sponge Dauber with Coastal Cabana ink to add the background to the bags.

I made the tag from a strip of Santa's Workshop DSP and flagged the bottom. I used the framelits to cut out the little elf and signpost from the DSP-could it get any easier? I wrapped a piece of Garden Green Baker's Twine around the bag and tied a bow.

I stapled the tag to the bag and attached the cut-outs with Dimensionals. I cut out the candy cane from the DSP with Paper Snips & attached it with a Dimensional sliver. I finished it off with a couple snowflakes from Santa's Workshop Enamel Shapes.

I added a package of Festive Farmhouse Elements and a roll of Garden Green Baker's Twine that they used for their Make & Takes projects, and then were able to take the leftovers home with them:) And of course there was chocolate:) These were so much fun to make and you could easily make a bunch for your Holiday gift-giving. You could tuck a gift card or cash inside and fill the bag with candy or shreds, or add jewelry or cookies...so many ideas! Make sure to stop back tomorrow for a fun Class To Go that I'm offering. Thanks so much for stopping by!