Thursday, December 19, 2013

SAB BANNER PUNCH CARD:

Hello there! Popping in quick with a sneak peek of one of this year's SAB offerings...the Banner Punch. Super cute and petite for all kinds of projects. I made this card in a snap using A Dozen Thoughts and my all time fave DSP Gingham Garden. I started with a Crumb Cake base and added the pink DSP to the top. Then I added the pennants to the yellow DSP, wrapped some Island Indigo Baker's Twine around it and then adhered it to the card.


I made a little Whisper White border using the Tasteful Trim Die and Big Shot and tucked it behind. I added a banner with the sentiment and a little flower using the Itty Bitty Shapes Punch Pack and a Candy Dot with base to the center.

This really came together quick and would surely brighten someone's day~especially in this weather:) Well, off to mail the rest of my packages and start baking~it's the most wonderful time of the year:) Thanks so much for stopping by!

Tuesday, December 17, 2013

CRAZY MIXED UP LOVE CARD:

Hello there! For a change I am way ahead of the game and have a Valentine's Day card to share with you! I got my sister-in-law's name for our gift exchange and she asked for as assortment of my cards~how awesome is that! I've had so much fun knocking out all sorts of cards the past few days:) I made this with Crazy Mixed Up Love and Tags For You. I started with a Whisper White base and added a layer of Polka Dot Parade DSP in Real Red.


I stamped the blender in Pool Party and then again in Real Red. I cut out the hearts and adhered them over the Pool Party. I stamped the lid again, cut it out and popped it up with Dimensionals. I made a frame using the Squares Collection Framelits with Silver Glimmer Paper and attached it with Dimensionals as well. I stamped the sentiment in Real Red and punched it out with the Label Bracket Punch~I think that's what it's called~I'm not 100% sure of the names of everything in this post~My catties are upstairs and I'm just too lazy to go get them. I used the Bitty Banner Framelits to cut out the Pool Party strip and popped it up with Dimensionals also.


This is a terrible picture of the inside, but you get the idea:) Such a fun and easy card to 'whip up'!

I'm excited to be getting some stuff from the new Occasions and SAB catties today, so stay tuned~can't wait to share! Off to finish up my shopping and wrapping today hopefully:) Thanks so much for stopping by!

Sunday, December 15, 2013

DECEMBER PAPER CRAFTERS SAMPLER~SNOW DAY SURVIVAL KIT:


Hello there! Today I have my project for the December Paper Crafters Sampler to share with you. This month's theme is Naturally Winter, so winter thoughts 'naturally' go to hot chocolate! At least in my mind they do:) Here's my little Snow Day Survival Kit that will come in handy this time of year:)
 
This is all I can give you, but trust me, he's pretty cute:) Go check out all the other projects included in this month's subscription, by clicking on the Paper Cratfers Sampler Button to the right. And then sign up! Thanks so much for stopping by!                                                                          

Monday, December 9, 2013

WINTER FROST GIANT GIFT BOXES!:

Hello there! I wanted to share what I made for my downline with you. I can't show you what's inside because I haven't delivered them yet, but I'll share the outside:) I ordered some of the Extra-Large Gift Boxes, but it should be more like Enormous Gift Boxes! They hold alot! I wrapped a band of Winter Frost DSP around the box and tucked a decorative strip made with the Scallop Trim Border Punch under the flap. I used a Velcro dot to keep the lid closed.


I ordered the Festive Flurry Ornament Kit and added one to the top of the box. The sentiment is stamped with the Endless Wishes Photopolymer Stamp set that I was lucky enough to get before they sold out:)


For the inside, I stamped some tissue paper, tucked all their goodies inside, and added a Silver Glimmer Bow made with the Gift Bow Die and added another ornament. That's as much as I can show you...sorry-don't want to ruin the surprise:)

I added a foil sheet under the ornament and dressed up the front with some Silver Ribbon and a Frosted Finishes Embellishment. There were plenty of jumbo Rhinestones left over from the kit, so I added a little extra bling. Santa needs to finish up and make some deliveries! Thanks so much for stopping by:)

Sunday, December 8, 2013

SPECIAL SEASON CARD:

Hello there! Another Christmas card idea for you. I used the sets Special Season and More Merry Messages...I think. I started with a Crumb Cake base. I rounded the corners of a piece of Season of Style DSP and attached a strip of Cherry Cobbler Stitched Edge Ribbon, before I adhered it to the base.


On a piece of Whisper White Cardstock, I stamped the tree image with Pear Pizzazz ink and added a little depth with an Always Artichoke Marker, then stamped. I stamped the sentiment in Chocolate Chip. I used a ruler and drew a faux line of stitching with a Chocolate Chip Marker. Next, I punched out a piece of Crumb Cake Cardstock using the Ticket Builder Punch. I added some detail with the Occasions Paper-piercing Pack, Mat & Tool, and folded it in half. I wrapped it around the edge and added a Regals Button with Cherry Cobbler Baker's Twine anchoring it down with a Glue Dot.  I attached the stamped piece with Dimensionals.

This was another super easy and quick card to put together. I'll be back tomorrow with pictures of gifts I made for my downline, so make sure to stop back. Thanks so much for stopping by! Stay warm:)

Saturday, December 7, 2013

COLOR ME CHRISTMAS CARD:

Hello there! Popping in quick to share another Christmas card with you. I made this with Color Me Christmas and Christmas Messages~two super fun sets from the Holiday Catalog. I started with a Whisper White base and added a layer of Cherry Cobbler Cardstock. On top of that I layered a piece of Season of Style DSP. I stamped the cute little critter onto Baked Brown Sugar with Early Espresso ink. I stamped his sweater again onto Whisper White Cardstock and colored it in with Cherry Cobbler, Crumb Cake and Old Olive Markers. I cut it out and attached it with Dimensionals.


I added a few strips of Season of Style Washi Tape and an Old Olive Simply Styled Embellishment and called it done. Super quick and easy and wouldn't be too hard to knock out a bunch of these for all the young at heart on your Christmas card list.

Sorry to keep this so short and sweet, but this girl's had a long day of shopping and I'm done for today. Thanks so much for stopping by:)

Friday, December 6, 2013

CALM CHRISTMAS CARD:

Hello there! Back again with another Christmas card to share with you. Sorry, I couldn't get a very good picture. I used the set Calm Christmas and started with a Coastal Cabana base. I stamped the image and sentiment with Silver Metallic ink. I added strips of Winter Frost DSP and Silver 1/8" Ribbon.


I stamped another wing with the silver ink, used Silver Embossing Powder and heat set it. I cut the embossed wing out, popped it up with Dimensionals and added a Frosted Finishes Embellishments with a Glue Dot.

I wish I could have got a better picture for you, but you get the idea. Thanks so much for stopping by:)

SNOW DAY CARD:

Hello there! So sorry I missed you yesterday, but I got slammed hard with the flu. I bet I'd gone 10 years without getting it and now 3 times this year! I need a plastic bubble. This card was made with Snow Day and Joy To The World. I started with a Very Vanilla base and added a layer of Midnight Muse Cardstock. I stamped the snowman and snowflakes in Whisper White Craft Ink and embossed the snowman with White Embossing Powder. I stamped his face and arms with Black StazOn and filled in where needed with a black Sharpie.


I added another layer of Very Vanilla that I ripped the top off of and added some glue and glitter to. I stamped the sentiment in Midnight Muse and attached it with Dimensionals. I added some Basic Rhinestones that I colored with a black Sharpie. I punched a heart out of Real Red using the Owl Builder Punch and a Crushed Curry star using the Merry Minis Punch Pack. I stamped his nose in Pumpkin Pie ink, cut it out and glued it in place.

I finished it off with a dot of Dazzling Details to the center of the snowflakes and a sprinkling of Dazzling Details Glitter for fun! I just love this little snowman and hope to get a bunch more cards made with him before he goes away:( I may stop back later with another card for you to make up for missing yesterday, so stay tuned. Thanks so much for stopping by!

Wednesday, December 4, 2013

POP & PLACE GOODIE BAGS:

Hello there! Here's the last of my Pop & Place projects. I stuffed the Muslin Bags with as much sinful goodness as I could and finished them off with a tag tied with Cherry Cobbler Baker's Twine.


I have to apologize for the pictures. It was really hard to snap a picture before the bag fell over. Hopefully if you click on the photos you can see a little more detail.


I added some Candy Dots to the tags for a little extra fun along with bits of Season os Style DSP.


I stamped the tags in Old Olive, Cherry Cobbler and Baked Brown Sugar ink.


I stuffed the bags with Lindor Truffles...


Christmas bears...


 and Ghiradelli Peppermint Bark. I need to hurry up and finish my downline gifts-it's not good having all of this chocolate around!

I hope you got some inspiration for how to use these tags for the holidays. Check back tomorrow for some Christmas cards. Thanks so much for stopping by:)

Tuesday, December 3, 2013

MORE POP & PLACE STUFF:

Hello there! Got some more Pop & Place to share with you. Are you sick of it yet? It took me a little time to warm up to them, but once I started playing with all the pieces, they've grown on me. Like I mentioned earlier, the booklet didn't fit in these Tag A Bags, so I had to resort to Plan B. I punched the smaller tags out and put them in the gift boxes I shared yesterday. Some of the bigger tags wouldn't fit, so I put them in these bags along with the coordinating Photopolymer stamp set. I added a little Season of Style Washi Tape and Cherry Cobbler Baker's Twine, and they were good to go!


All the tags are printed on both sides, so you have the option of a solid color or a fun pattern.


So quick and easy and lots of fun!


The tags have a blank spot where you can stamp a sentiment...and they coordinate perfectly with the stamps:)

I have one more Pop & Place project to share with you tomorrow and then I'll move on to some Christmas cards. I'm finishing up my downline gifts, so I'll have them to share too...stay tuned! Thanks so much for stopping by:)

Monday, December 2, 2013

CHRISTMAS TAG A BAG GIFT BOXES:

Hello there! Back again with some more Christmas gift ideas for you. I used the Tag A Bag Gift Boxes and made some fun little gift holders.


I covered the boxes with Season of Style DSP and then put the box in the plastic sleeve.  I cut the cover out of cardstock, scored the sides and used the Scallop Edge Border Punch along the sides. I attached it to the sleeve with Glue Dots.


I used various punches, ribbons and buttons to decorate the boxes.


I was stumped as to how to make the antlers. I ended up using the Boho Blossoms Punch and cutting them out of the smallest flower.


The Red Glimmer Paper makes a perfect nose for Rudolph:)


These little guys were so much fun to make.


I had some Googlie Eyes left over from last year and I put them to good use.


Again, the Boho Blossom Punch came to the rescue for his nose and the penguin's feet-or flippers or whatever they're called.


I used these fun little boxes to hold the tags from the Pop & Place Holiday Tags that I gave my Club Members.


Oops, I didn't get this photo cropped...but you get the idea.

I hope I inspired you to have some fun with these versatile boxes. I'll have some more ideas for the tags for you tomorrow. Thanks so much for stopping by!

Sunday, December 1, 2013

POP & PLACE ORGANIZER:

Hello there! Sorry to have been away for so long, but I've been busy working on stuff for my Club Members and Downline. I'm so thankful for them and this just seems like the perfect time of year to let them know it. I decided to give each Club Member the Pop & Place Holiday Tag Bundle and hopefully they would put it to good use over the holidays. I initially planned on putting the Bundles in the Tag A Bag Gift Bags and Boxes, but they didn't fit, so this project took on a whole new life:) I didn't realize just how darn cute the folder was that held the tags, so I had to find a use for it after I took out the tags:


Each of the covers have a pocket, so I thought they would be perfect to hold coupons and receipts.


After I removed the tags, there were these cute little border pieces left, so I cut 5 pieces of Whisper White Cardstock in half and glued them to the borders. I ended up having to trim about 1/4" off of each side so the pages fit inside the covers. (You'll want to do that before you glue them in-ask me how I know!)

I labeled each of the pages as follows: Stores to Shop, Things To Do, Places To Go, People To See, Card Ideas, Ideas, Ideas, Supplies, Names, &, Addresses, Gift Ideas, Ideas, Ideas, Ideas, Menu, Grocery List, Memories, Memories, Memories. I was really wishing I knew my way around MDS better; it would have been MUCH easier than stamping, punching and glueing all those letters-next year!


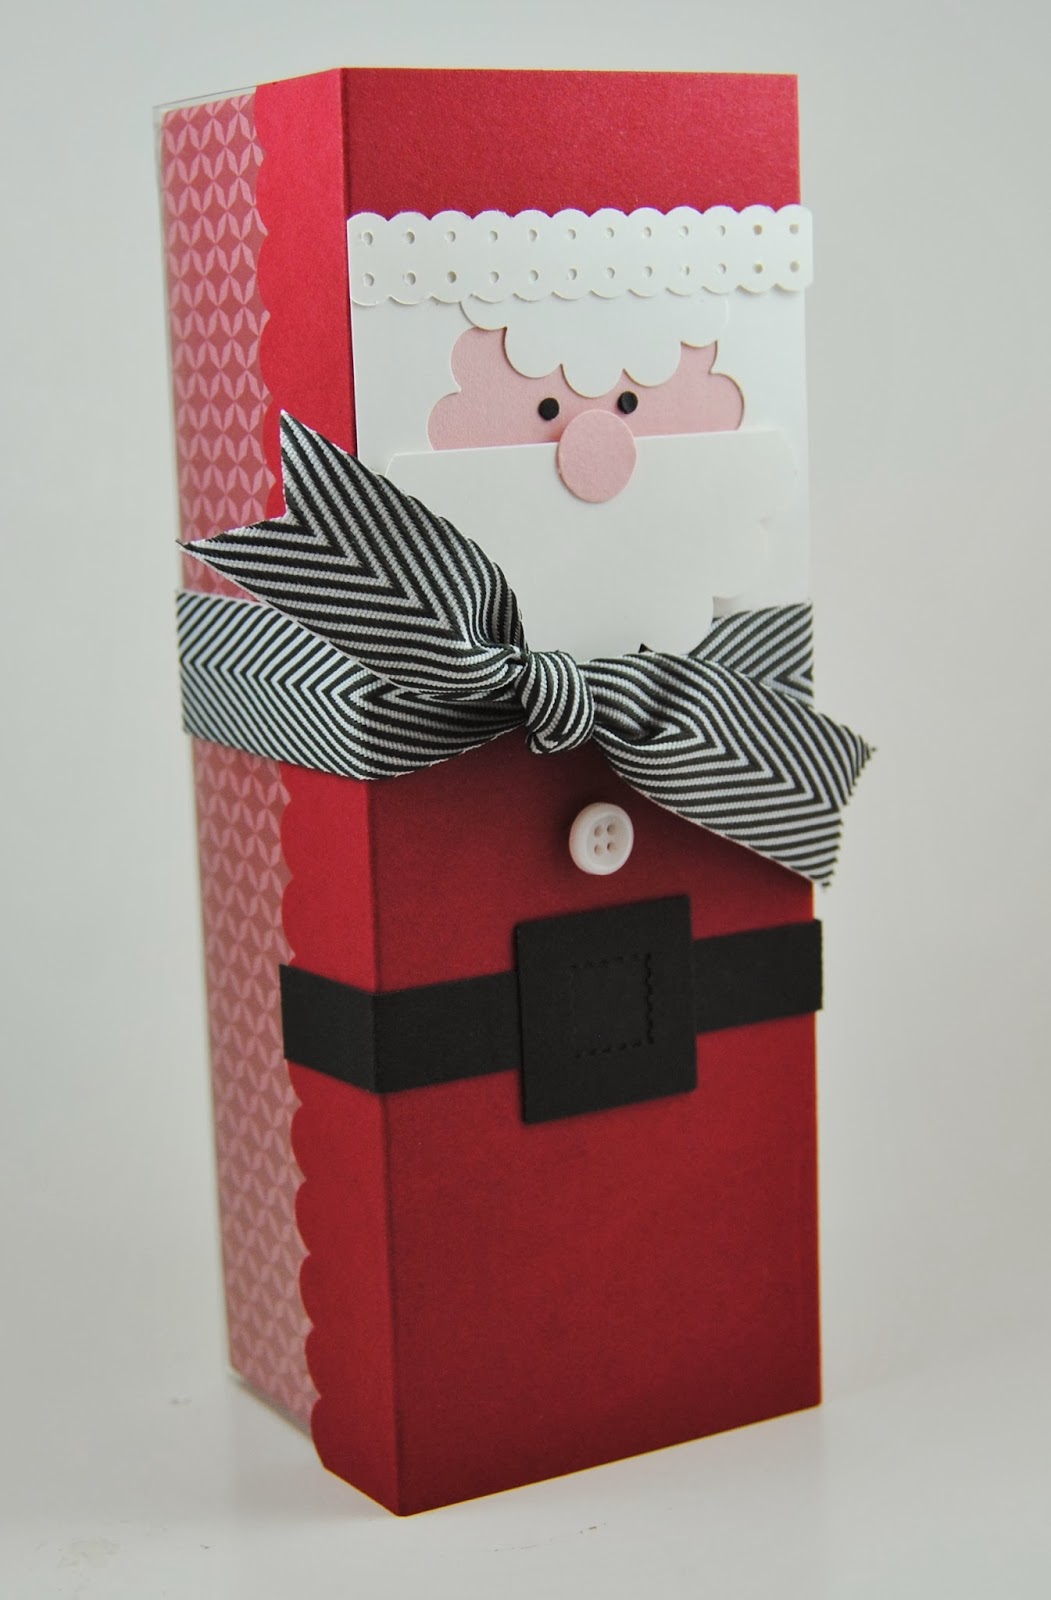
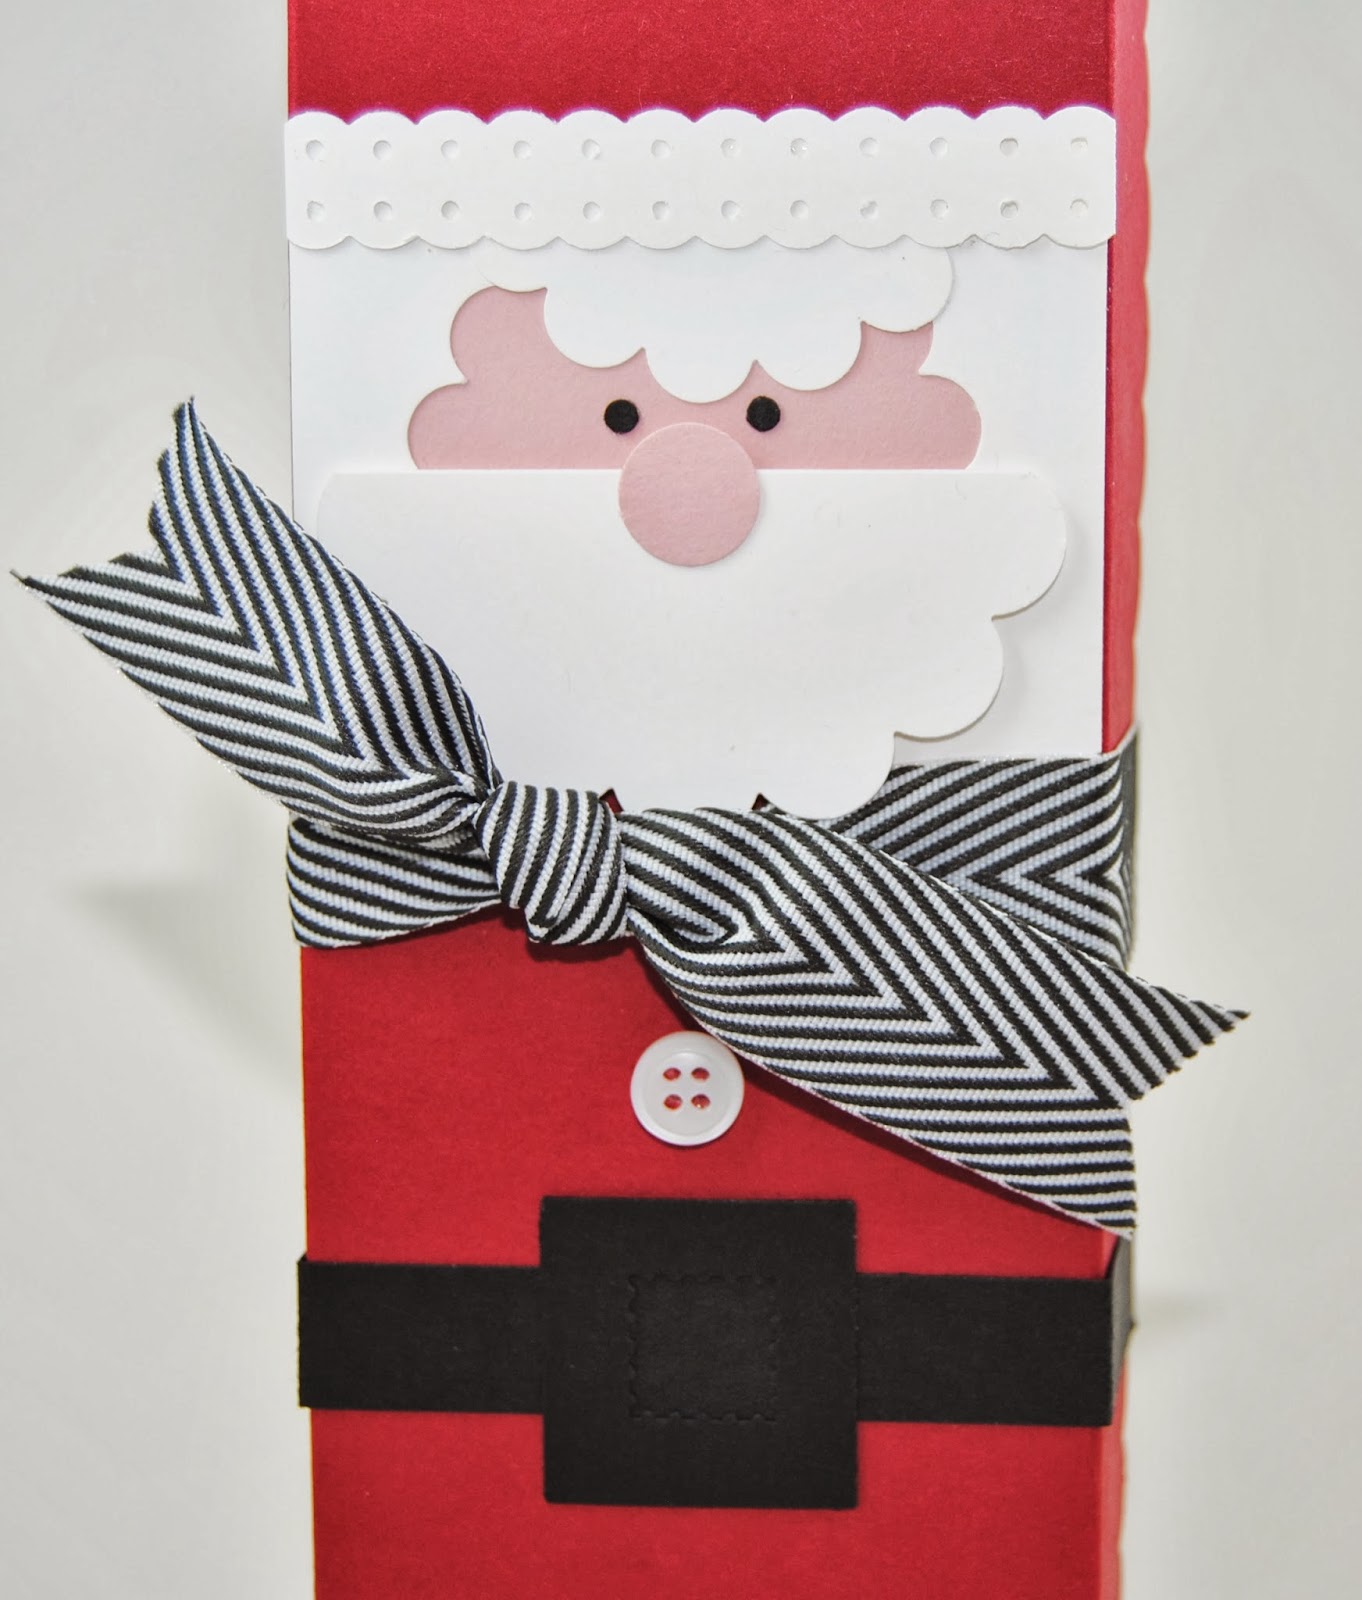
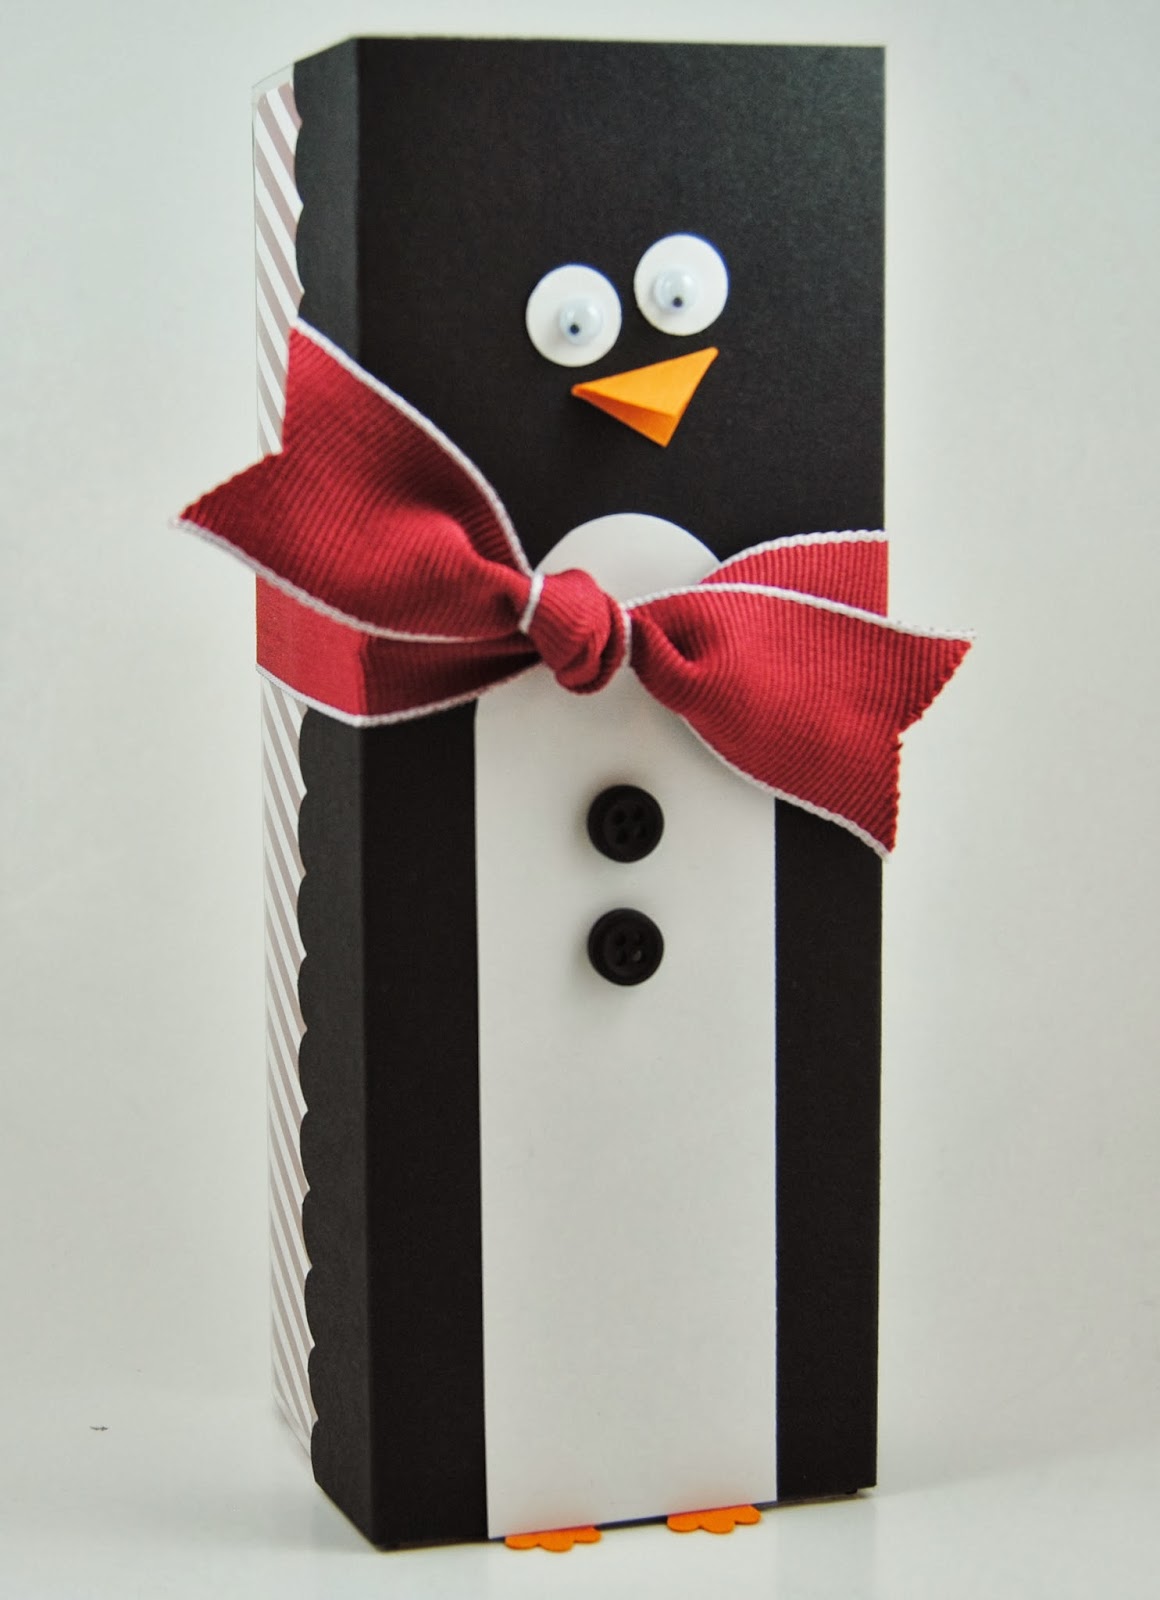
I made 8 different designs, so here's lots of ideas for you...


Not sure if you're still with me...but if so, I hope I could help out with some ideas for you. I was a little overwhelmed at first with all the pieces and just sat and stared for awhile. I have lots and lots to share with you so make sure to stop back again tomorrow! Thanks so much for stopping by:)