Friday, June 21, 2013

EPIC DAY HOSTESS GIFT:

Hello there! Is it hot enough for you today? I think I'm melting. Quinten and me walked all over town today in 90 something degrees. We did luck out and find a sprinkler which was heavenly! This is the gift I made for my hostess this month. I'm slowly converting my wood sets to the new stamp cases and was trying to come up with something to do with the old cases. I thought it made a cute little suitcase!

I covered the outside with This & That Epic Day DSP and used the Natural Trim for a handle. I folded the trim under on each side and stuck an Antique Brad through on both sides. I added Sticky Strip to the bottom of the brads and attached the handle to the top of the case-well, actually the side.

I used the Essentials Paper-piercing Pack, Mat and Tool for the faux stitching around the edge, and used an Early Espresso Marker to connect the dots. I then decorated the front with some of the fun Epic Day Stickers.


For the inside, I just added a belly band that I scored in a couple of places, added some of the Crisp Cantalouple Stretch Ruffle Trim, and Sticky Stripped it in place.

Of course, I filled it with chocolate, which hopefully isn't melting all over the place like me. I hope you like today's project and gives you some ideas for ways to use any cases you may have laying around. Thanks so much for stopping by!

Thursday, June 20, 2013

REALLY GOOD GREETINGS CARD:

Hello there! As you've figured out, I didn't make it back yesterday. Our son and his new girlfriend-love her!, came over for supper and it turned into a late night. So to make it up to you, I've got 2 posts for you today! The first is a card made with Really Good Greetings. I started with a Summer Starfruit base and used the Birthday Basics DSP again. I absolutely adore this pattern. It jumped out at me the first time I went through the new catalog-love it!


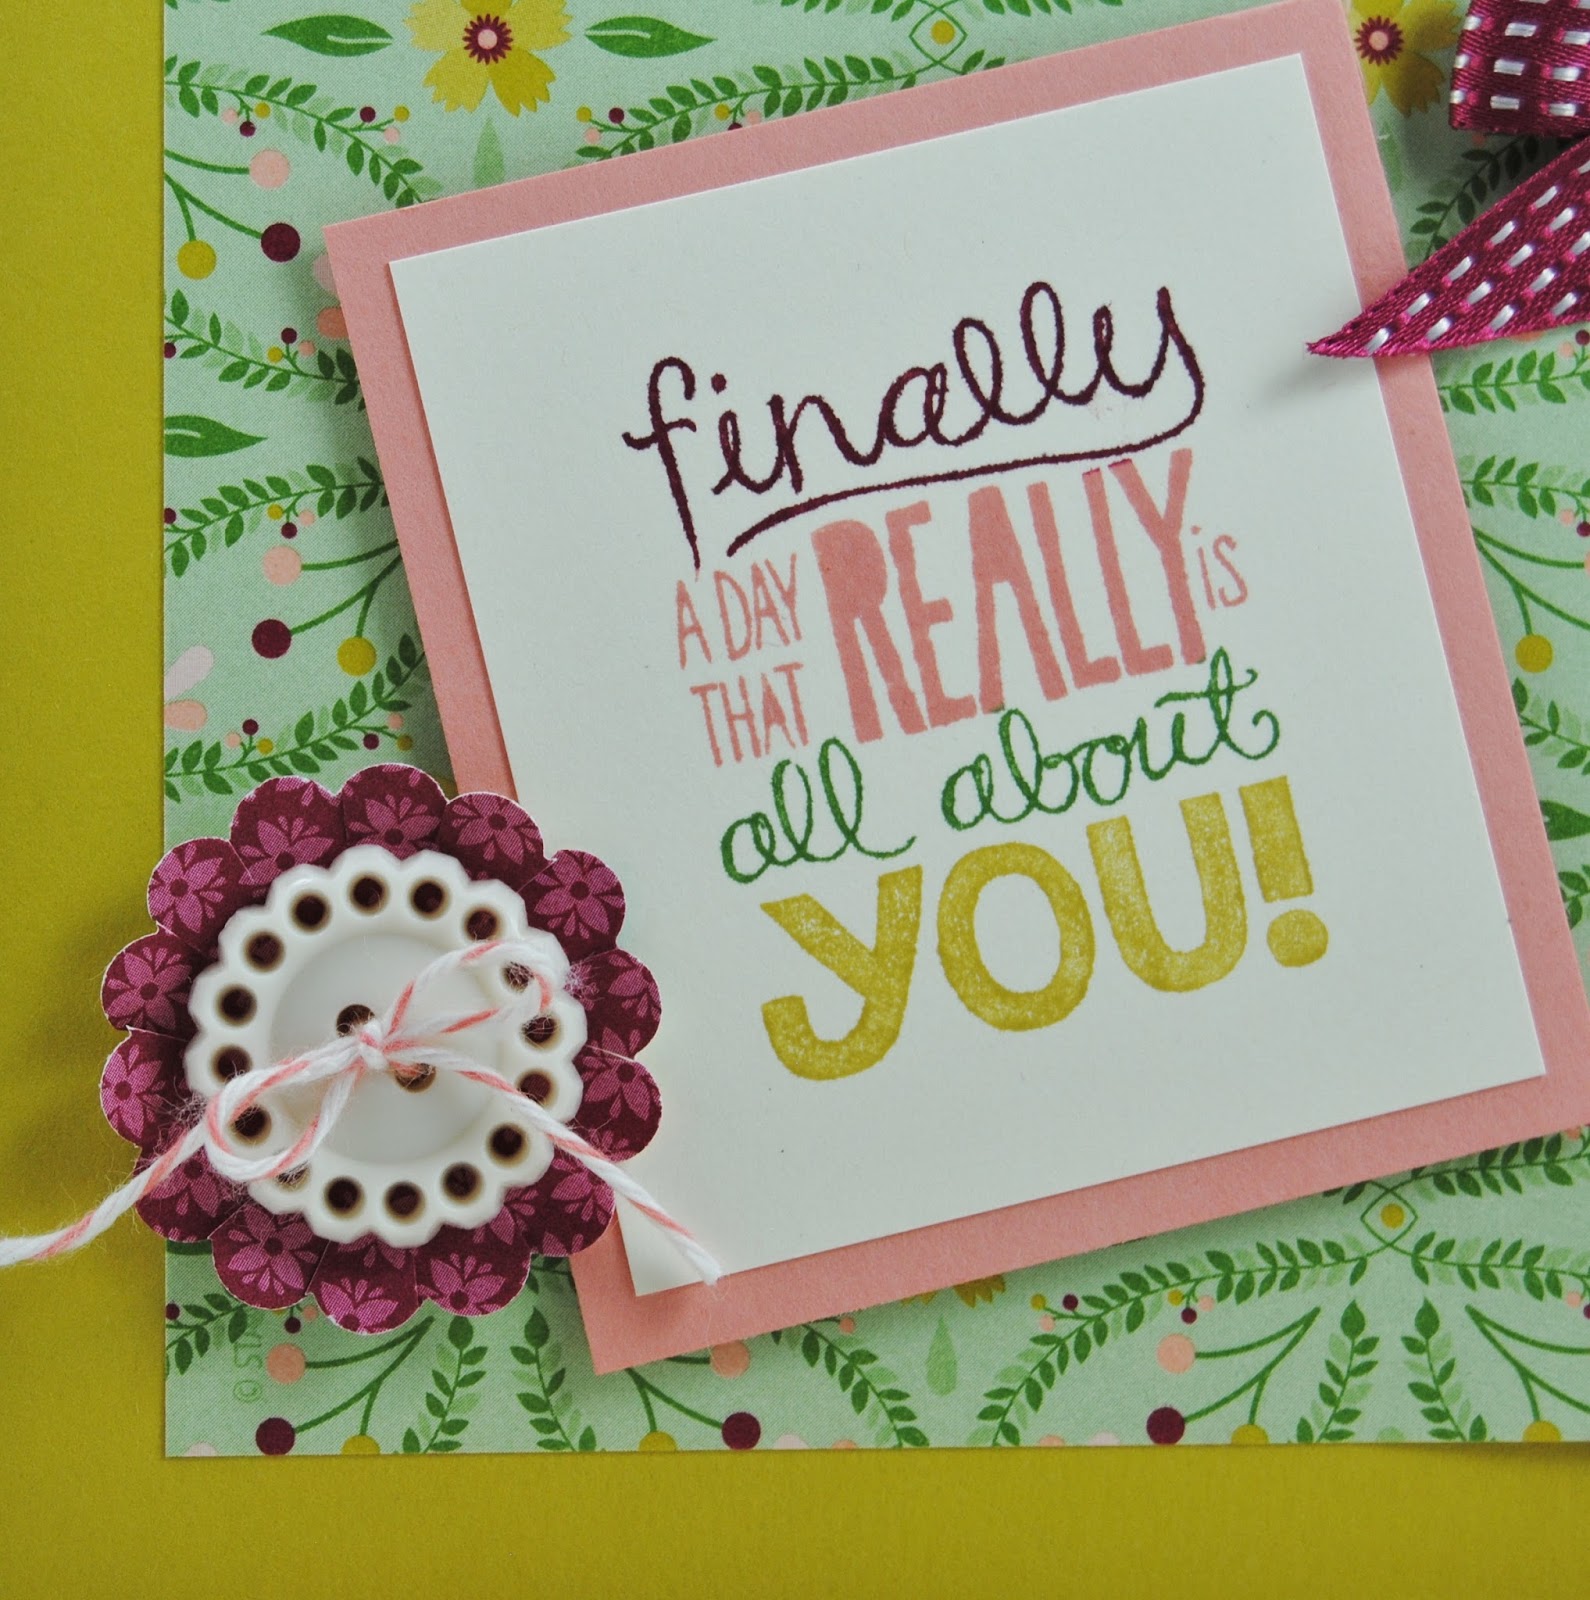
I broke out the Crisp Cantaloupe for the first time, and I like it. I don't have the new In-Color Markers yet, so I inked up the whole stamp in Crisp Cantaloupe and wiped off some of the ink with a baby wipe. I then colored in the sentiment with Raspberry Ripple, Gumball Green and Summer Starfruit Markers. These colors work beautifully together. I stamped the sentiment on Very Vanilla and layered it onto Crisp Cantaloupe Cardstock. I punched out the flower with the 1 1/4" Scallop Circle Punch and used my Paper Snips to notch petals all around. I added one of the new lovely Very Vintage Buttons with a Calypso Coral Baker's Twine bow. I popped the flower and the sentiment up with Dimensionals.

Before I adhered the DSP to the Summer Starfruit Cardstock, I added a piece of Raspberry Ripple Stitched Ribbon and attached the bow with a Glue Dot. I also added a strip of the new Crisp Cantaloupe Ruffle Trim-love this stuff! I tucked some banners underneath that were made with the Big Shot and Bitty Banners Framelits.

And, as I promised, onto the next project...

I got my monthly gift, and it came a day early-gotta love it! Of course I'm talking about My Paper Pumpkin! Many have said this is their favorite so far. I was in the minority and not crazy about it at first.  But after I started working with it and put my spin on it, I really do like it too.

It's kinda hard to see, but the card front has 5 hexagons that you punch out and stamp a heart on the inside, which peeks through the holes. I added some Dimensionals to the chevron images to give it a little extra depth. I also added a Pumpkin Pie Taffeta bow and one of the new Brights Buttons with Early Espresso Baker's Twine through the center.

This is how the card is designed in the kit. I thought it was a little too heavy at the bottom, so I feft some of the hexagons off. That's what is so great about these kits-you can add some embellishements if you want or just go with the design provided. And the best part is that you can whip up 4 of these in under a half hour! Everything is prepped for you and ready to go! If you're interested in finding out more, go to www.mypaperpumpkin.com and check out the video.

Well thanks so much for visiting. I'm getting started on another project for you. I've got Hurricane Q tomorrow, so hopefully I get it finished! Thanks so much for stopping by!

Tuesday, June 18, 2013

ANIMAL TALK CARD:

Hello there! So sorry again for the big gap in posting. I seem to be on for two weeks then off for two. I guess that's just how it has to be for now with this carzy, chaotic life of mine:)( I haven't recieved my big order of new stuff yet, but I do have a few new things to share with you today. I used the set Animal Talk, which I'm so happy will be around for another year! I started with a Crumb Cake base and used the new Birthday Basics DSP.

I stamped this little cutie in Basic Grey and colored him in with Crumb Cake ink and a Blender Pen. The sentiment is in Bermuda Bay, Summer Starfruit and Gumball Green. I'm not real crazy about each of these colors individually, but I love how they all work together. I stamped them onto Whisper White and used the new Circles Collection Framelits to cut it out with the help of the Big Shot. I cut out one of the birthday hats and attached it with a Dimensional. I had to trim it down quite a bit and I maybe should have even more-he kind of looks like a 'Grand Poobah' or like he's wearing a dunce cap. Oh well, he's so cute, he can get away with it! I added a strip of Basic Grey Cardstock and stamped the sentiment in the same ink. A brand new Brights Button and loop of Summer Starfruit Stitched Ribbon gave it a little somethin, somethin.

I finished it off with a piece of Epic Day Washi Tape and a sliver of Summer Starfruit. The Washi Tape is so fun to work with-a little dab will do ya, and it's so addictive. I just want to add more and more. Just like chocolate, I don't know when to stop. Although, I seem to show much greater restraint with the tape!

A super fun and easy card for the little guy in your life. I want to share what else I've been working on...

Our daughter Emily is getting married in September, so I've been busy designing and redesigning the invitations. I think I finally got it down. Now to make several hundred of each!

I stocked up on this paper several years ago, which in unfortunately retired now. I sure hope I have enough! But the sentiment and the punch are brand new. I used the Label Love Bundle, which can be found in the brand new catalog. You save 15% when you buy the stamp set and coordinating punch. It's such a bargain, now I can spend more money on the cake! I added some detail to the belly band using the Finishing Touches Edgelits, which I'm sure I'm really going to hate after I make a couple hundred of these! I tucked a couple of Vellun banners behind the tag using the Bitty Banners Framelits.

I finished it off with a pair of flowers punched with the Itty Bitty Shapes Punch Pack and a couple of Basic Pearls.

These will be the favors for each of the guests, which will be stuffed with chocolate of course. I used the Fancy Favor Die which is now retired-why, I don't know! That is just whack! I will keep this die foreva! I'll need to make 2 bags for each favor. The bottom one in black, and then another in vanilla. I cut the top of the bag off of the vanilla one, punched a hole through the top and tied with ribbon. The top just lifts off so it will be easy access the the sweets inside.


For the tag, I stamped the sentiment in Basic Black ink. I couldn't get the rest of the image as dark as I wanted, so I cut the middle strip out and attached it to a Basic Black label, which again, I'm going to hate myself for after I make several hundred! I finished it off with a pair of Vellum flowers.

So, as you can see I've been keeping plenty busy, but I'm anxious to dig into my new toys and share some projects with you using the new products. Check back tomorrow and hopefully I'll have something else ready to share. Thanks so much for stopping by!

Friday, May 31, 2013

MOVING FORWARD CARD:

Hello there! I've got one final retiring card for you from one of my favorite sets, the Ronald McDonald House set Moving Forward. I really hate to say farewell to this set, especially since SU! donates $3 to the charity for every stamp set that is sold-over $1,000,000 to date. It's not too late to get this set. You have til 12:50 am tonight to place an online order, and then it's gone for good! I used lots of my retiring favorites on this card-Summer Smooches DSP, Friendly Phrases and the Brights Brads. I started with a Whisper White base and added the DSP. I stamped the bike image in Tangerine Tango, wiped the seat off with a baby wipe, and colored the seat with a Tempting Turquoise Marker and stamped the image. I stamped it again in Daffodil Delight for the small wheel, and Real Red for the big wheel. I used the larger circle from the Owl Builder Punch to punch the small wheel and the 1" Circle Punch for the large wheel.

I used the Stamp-a-ma-jig to get the froggie right where I wanted him and added some Old Olive grass underneath. I used the Paper-piercing Mat & Tool to attach the brads. I mounted the image onto a piece of Tempting Turquoise Cardstock and then mounted that onto another piece of Whisper White with Dimensionals. I punched out the Tempting Turquoise label with the Decorative Label Punch, cut it in half and stuck it under the image with SNAIL. I added a couple of fluffy clouds using the Cupcake Builder Punch and ran them through the Big Shot with the Perfect Polka Dots Embossing Folder.

I added the sentiment in Tangerine Tango, flagged the end and added a Brights Brad. I finished it off with a border of faux stitching using an Old Olive Marker and a ruler. I used a sentiment from Petite Pairs for the inside of the card, which is 25% off through June, along with Sassy Salutations and Sweet Essentials. As in the past, I got by with a little help from my friends at SU! with the layout for this card from my Demonstrator Business Website. Check out the project ideas if you haven't already.

Today marks the official start of the new catalog! As usual, my wish list is a mile long. Thanks to all who came to my Retirement Party and helped me get some things marked off my list! I can't wait to get my new stuff and start sharing with you-hopefully in about a week!:)

And as always, at the end of the month I have my line-up for the 'Kits/Card To Go'. The number for each selection is listed ABOVE the card. See my home page on the right hand side for prices of each kit. Here they are~pick any 4:

                                                                           1)


                                                                                2)


3)


4)


5)


6)


7)


8)


9)
 
Okay, those are your choices. Please let me know your selections by June 5th and if you're wanting the 'Kits' or 'Cards' To Go. Email me at lmel09@q.com. Thanks so much for stopping by!


Thursday, May 30, 2013

HOOP LA LA CARD:

Hello there! I hope you're all in one piece today! Our shed is in the neighbor's back yard two houses down, and we have broken and uprooted trees all around us. Craziness! I had to wake up Quinten early from his nap in case we had to move to the basement, so that tells you how drastic things were getting around here! Well, we're getting down to the last few cards of the current catalog. This card features the set Hoop La La, which I dearly love. Sadly, this is the first card I've made with it. I did use it for one of my Artisan projects though, so it has seen some love:) I started with a Very Vanilla base and added a piece of Storytime DSP. I used the Big Shot to cut out the frames using the Window Frames Collection Framelits for the So Saffron frame, and the Apothecary Accents Framelits for the Pool Party frame. I used the Essentials and Festive Paper-piercing Packs along with the Mat and Tool for the detail on the frames.

I colored the tulip image with Riding Hood Red, Wild Wasabi and Basic Grey Markers. I put Dimensionals between all the layers except for the bottom frame, to give it some dimension. I triple-stacked the Dimensionals for the 'hello' sentiment for it to lay flush. I strung some Pool Party Baker's Twine through the label and added a trio of Brights Brads.

I love the combination of bright and subtle colors in this DSP and am really going to miss it. I'm going to try to knock out another couple of cards to post by tomorrow using Moving Forward and Easy Events. I've got a full day of Quinten tomorrow, so we'll see how far I get??? Thanks so much for stopping by!
Wednesday, May 29, 2013

WISHES YOUR WAY CARD:

Hello there! Today I have a fun card for you made with Wishes Your Way from the Spring Catalog. I opted to cut out the pinwheel by hand by following the pattern in the Tea For Two DSP, but you could easily use the Pinwheel Die instead-well maybe not easily; it's a little tricky at first. Once you've made a couple though, it's a snap. The die would have made the pinwheel a little smaller, and I wanted the stitching to show on the opposite side, so that's why I cut it out by hand.

For the background, I inked up the Clear Block D with So Saffron ink and stamped it onto a piece of Very Vanilla Cardstock. I added a border of Lucky Limeade Cardstock punched with the Dotted Scallop Ribbon Border Punch and adhered it under the Saffron square with Liquid Tombow. The sentiment is stamped in Island Indigo and I ran it through the Big Shot with the Bitty Banner Framelits to cut it out. I finished the pinwheel off with a Printed Designer Brad in Island Indigo as well. There's only a couple more days to get the brads, Pinwheel Die and DSP.

For a finishing touch, I used the Needlepoint Border Embossing Folder for a little bit of layered interest in the background. Thanks so much for stopping by. Make sure to come back tomorrow for another set that won't be around much longer. See you soon!

Tuesday, May 28, 2013

CROSS MY HEART CARD:

Hello there! I hope you enjoyed the holiday yesterday. We had a fun day of grilling and s'mores! Doesn't get much better than that. We're winding down to the end of the month and your last chance to get lots of great retiring sets. One of those is this set Cross My Heart from the Spring Catalog. I paired it up with Teeny Tiny Wishes for a retirement card. I started with a Basic Black base and added several different papers from the First Edition DSP, which is unfortunately gone. I added some faux folder tabs made with the Ticket Duo Builder Punch in So Saffron Cardstock.

I added a Hung Up Cute Clip, along with a couple of Neutral Buttons, which won't be around for much longer either. I used the retiring sets Hoop La La for the coffee ring and French Foliage for the splatters. I'm going to miss both sets:( I added some Basic Grey Stitched Ribbon and Early Espresso Baker's Twine as well. I made a mini faux newspaper by folding up some DSP and wrapping a rubber band around it.


I added a strip of DSP from the Neutrals DSP Stack, which I have several of in all the color families. You can get them nearly new for half price today at my Retirement Party, along with lots of other goodies! Just place an order from any or our catalogs-including the new one, and pick out the equivalent amount from my retired stash. It goes from 4-7 today. Hurry over before your favorites are gone! Thanks so much for stopping by!