Tuesday, April 30, 2013

HEARTS A FLUTTER FAVOR:

Hello there! Sorry for the little break-we went to Arkansas for a few days. It was a long haul with a 1 year old, but he and mommy got to see daddy, so it was worth it. Time to switch gears back to Amanda's shower which is coming up. I got the 22 invitations made and mailed out before we left and these are the favors I'm making.


I used the Big Shot and Petite Purse Die to make the little bag. I cut the flap off and glued the purse together using Liquid Tombow Glue. I used Crumb Cake Cardstock and Taffeta Ribbon as I did for the invitation. I also used the Flower Trim, White Tea Lace Doilies and Basic Pearls. As with the invitation, I had to use some contraband for the pennnant to get the right shade of blue. I stamped it with Marina Mist and cut it out with the Hearts A Flutter Framelits.

I added a pair of the largest pearls to the handles on the side and added a sentiment from Teeny Tiny Wishes. I stamped it onto Whisper White Cardstock using a Marina Mist Marker and punched it out with the Jewelry Tag Punch-which will be retiring soon, so you'd better act fast if you want to get it before it's gone!

I added a Small Cello Bag filled with chocolate and tied it with Linen Thread. I had to trim the top of the bag a bit so it would fit inside. Well that's about it for this little treat holder. I'm hoping to make a couple of banners too, but not sure how it'll work out timewise. If I get them made, I'll be sure to post them here. Thanks so much for stopping by. Tomorrow I'm hoping to have a Father's Day card for you made with Best Dad Ever and post this month's 'Kits/Cards To Go'. Make sure to swing by!

Thursday, April 25, 2013

SERIOUSLY PAPER PUMPKIN:

Hello there! I got my monthly gift and couldn't wait to share it with you-My Paper Pumpkin, that is! This month's kit has been quite controversial! Some hate it, some love it. I think it's fresh and fun and I think anybody young or young at heart would love to get this in the mail.


The Seriously Kit came with 3 sentiments, a Cherry Cobbler Spot, 4 Silver Buttons, Twine, stickers, envelopes and really cool cardstock thats printed on the front and back, but white on the inside. I added a piece of More Mustard (snif...) DSP from the Paper Stack and layered it underneath the bubble. I put the stickers on at an angle to add a little more interest.


I made this card just like the sample provided, and it's super cute as is. What I really love about MPP is that you can easily add an element or change it a bit and get several different designs from one kit. And I REALLY love that everyhting is all cut, prepped and ready to go!

And 'seriously' this is all that's left over. You can easily store several months kits in one of the boxes you receive. I'm also going to save the nice color instructions/sample to have as a guide to make more after I've sent out the cards in the kit. To find out more info, go to www.mypaperpumpkin.com. Or email me with any questions you have. Thanks so much for stopping by today!


Wednesday, April 24, 2013

BUG ME CARD:

Hello there! Today I have a fun card for you made with Bug Me. I started with a Crumb Cake base-I just noticed that I've been on a Crumb Cake kick lately! Must be the weather! On top of that, I added a So Saffron strip with a piece of Wild Wasabi Stitched Ribbon underneath. I stamped the bug bodies onto Very Vanilla Cardstock using Promrose Petals, Wild Wasabi, Pretty in Pink and Raspberry Ripple ink. I punched them out with the 1 1/4" Circle Punch. Next, I lined up the Stamp-A-Ma-Jig over each body and stamped the head. I stamped a head in each of the 4 colors again and punched them out using the Itty Bitty Shapes Punch Pack. I attached them with Glue Dots. Well, I have some close ups for you but for some reason I can't upload them...GRRRR! I stamped the sentiment in Early Espresso onto Wild Wasabi Cardstock and flagged the ends. I added a Silver Basics Button on top with some Linen Thread. At the top, I used several ribbons and stapled them to the card. I used Raspberry Ripple and Primrose Petals Stitched Satin Ribbon, Pretty in Pink and Wild Wasabi Stitched Ribbon, and So Saffron Taffeta Ribbon. That's about it for this card. Pretty quick and simple!

I have some exciting news! I got a sneek peek at the new upcoming catalog and it looks GREAT! SU! released the list of RETIRING STAMPS AND RETIRING ACCESSORIES today and you can see the lists here: www.lauramellinger.stampinup.net. Click on the image that says retiring products. The stamp sets will be available until May 31, but the accessories are only available as supplies last. Some items have already sold out, so if there's any retiring accessories you're wanting, you'll want to order them ASAP! I'll be featuring retiring sets until the end of May, and maybe I'll throw in some projects with the new stuff, so make sure to check back often for some sneak peeks! Thanks so much for stopping by today!


Tuesday, April 23, 2013

OH, HELLO INVITATION:

Hello there! Today I have an invitation that I made for my neice's upcoming bridal shower. Her wedding colors are champagne and a cornflower blue. Crumb Cake worked pretty well for the champagne, but I had to buy some contraband for the blue, as none of our current blues worked. I used a Crumb Cake base and added another layer on top which was run through the Big Shot with the Framed Tulips Embossing Folder. Next, I cut out an oval out of Whisper White Cardstock using the Ovals Collection Framelits. I stamped the sentiment in Crumb Cake and the background image was stamped off in Marina Mist ink. I used the Paper-piercing Mat and Tool and Occasions Pack for the piercing detail.

I added a sliver of DSP from Tea For Two and tucked a Paper Doily accent underneath. I used the Hearts A Flutter Bundle to stamp the pennants and coordinating Framelits to cut them out. I added a piece of Crumb Cake Taffets Ribbon on top which I cinched with a piece of Linen Thread and tied in a bow. I added a pair of Basic Pearls and a rose from the Flower Trim.

I gave the card a spritz of Champagne Shimmer Paint that I mixed with alcohol to give it a little sparkle. Well I gotta get scootin out the door to my grandbaby's concert tonight. I hope you like todays card, and more importantly, I hope Amanda likes it! Thanks so much for stopping by today! See you tomorrow!

Monday, April 22, 2013

PERFECTLY PRESERVED CARD:

Hello there! This is the last of my card & candle duos that we made for the auction that was held yesterday. The school surpassed their goal, so I'm glad we were able to help contribute a little bit. Like I mentioned in the last few posts, I've been getting lots of inspiration from the samples that SU! has postd to my DBWS. You can see them here: www.lauramellinger.stampinup.net. This is another design that I borrowed from them. I had to change up the DSP because they used Orchard Harvest, which is now retired. I used the Calypso Coral sheet from the Sent With Love DSP, but I like the gingham they used much better.


I thought this was a perfect card to 'pear' up with my hubby's Pear Glaze Candle. It smells exactly like Victoria's Secret version-if they still make it? Anyway, I used the Perfectly Preserved set and coordinating Cannery Framelits.

As with the others, I started with a Crumb Cake base and I ran it through the Big Shot using the Woodgrain Embossing Folder and added a piece of Whisper White Cardstock on top. I rounded the corners and used the Duo Ticket Punch for the top and stapled it to the cardstock. I stamped the pear image 3 times, once in Island Indigo, Lucky Limeade and Calypso Coral. I stamped 3 of the stem images in Lucky Limeade and cut them all out using the Framelits. I stamped the sentiment and ran it through the Big Shot also with the Framelits.  I adhered the pears with SNAIL and attached the stems with Liquid Tombow Glue. I cut a skinny strip from the DSP and adhered it with Tomlow Liquid as well. I tied a Linen Thread bow through one of the Naturals Buttons and attached it to the card with a Glue Dot and slid the sentiment underneath. This was a super quick and easy card to make and I think works just as well in the warm weather as in the fall. I hope you enjoyed these lovely couples over the past few days...and speaking of lovely couples...make sure to check back here tomorrow for a bridal shower invitation I've been working on for my neice who's getting married. See you tomorrow! Thanks so much for stopping by! 

Sunday, April 21, 2013

COLLAGE CURIOS CARD:

Hello there! Happy sunshiny Sunday to you! It's a little nipply out there, but I'll take it. Today I have a card made with Collage Curios and Fabulous Friends.  I borrowed the layout from my DBWS again. It's such a time saver to have a great design in place before you even get started. If you haven't already, check back to the previous post for a link to where you can see tons of great project ideas from SU! I started with a Crumb Cake base and added a piece of So Saffron Cardstock that I ran through the Big Shot using the Chevron Embossing Folder. I layered a piece of DSP from Summer Smooches on top of a piece of Cherry Cobbler Cardstock. On top of that, I added a strip of Tangerine Tango that I ran through the Stripes Embossing Folder. And on top of that, I added a piece of Lucky Limeade that I ran through the Big Shot using the Tasteful Trim Die. I added a little interest with the Paper-piercing Mat, Tool and Essentials Pack, and tied a piece of Linen Thread around it. I attached it with Dimensionals.


Next, I punched out a scallop from the Cherry Cobbler DSP Stack with the 1 3/4" Scallop Circle Punch. I punched a circle from Primrose Petals Cardstock and stamped the image with Primrose ink as well, using the 1" Circle Punch. I popped this up on 2 layers of Dimensionals and stuck it to the inside of a large Soda Pop Top.. I cut the butterfly out with the Beautiful Wings Embosslit Die and added a flower to the center with the Itty Bitty Shapes Punch Pack from Crumb Cake Cardstock. I added a Rhinestone Jewel to the center and attached it with a Glue Dot. I stamped the sentiment in Cherry Cobbler and tucked it under the Pop Top.

I paired this card up with an Apple Jack Candle, one of my hubby's top sellers. I changed the color scheme up a bit from the original card as I needed to coordinate some Cherry Cobbler into the card. Cherry Cobbler is a perfect match to his Apple Jack. I think they used Melon Mambo on the original card, which looked better, but it didn't match, so we couldn't have that now could we?

Thanks so much for coming by today! Make sure to stop back tomorrow. Enjoy this beautiful day!

Saturday, April 20, 2013

PENNANT PARADE CARD:

Hello there! Here's another card I made for the auction tomorrow. Again, I got my inspiration from the SU! ideas on my DBWS. I had to change things up a bit again on this card, as some items were retired. I used the sets Pennant Parade and A Word For You. I started with a Crumb Cake base and added a layer of DSP from Sunshine & Sprinkles. On top of that, I added a piece of Whisper White Cardstock and drew a frame around the edge with a Melon Mambo Marker. I then pierced a border all around using the Paper-piercing Mat and Tool and Essentials Pack. I used the edge of the template as a straight edge for the marker. Next, I added a banner and stamped the sentiment with the Stamp-A-Ma-Jig to get perfect placement. I attached it with Glue Dots. I punched out a strip of Melon Mambo DSP from the Paper Stack with the Scallop Edge Border Punch, and adhered it to the back of the Whisper White piece.

I stamped the hats in Tempting Turquoise and punched them out with the Petite Pennants Builder Punch. I used the Postage Stamp Punch for the trim on the bottom. I used Daffodil Delight and Melon Mambo Cardstock for that and for the tops of the hats, using the Itty Bitty Shapes Punch Pack. I added a Brights Brad to the center of each flower and added a star punched out with the Merry Minis Punch Pack. I finished it off with a Daffodil Delight Stitched Ribbon bow and attached it with a safety pin from Vintage Trinkets.


I paired this card with one of my hubby's Fresh Pineapple Candles-yummy! Thanks so much for stopping by! I'll see you back here tomorrow.

Friday, April 19, 2013

OH, HELLO CARD & CANDLE:

Hello there, or should I say, Oh, Hello there! Sorry, couldn't resist. Like I said in yesterday's post, SU! has some really great project ideas posted on my DBWS. I needed some cards quick to donate to an auction for one of our local schools, so I helped myself to some of their designs. This card was made with Oh, Hello, a set I drug my heels in getting, but I've really grown to love it.

My hubby makes the most scrumptious candles and he picked out some to donate, so I came up with a card to coordinate with each one. The candles are Primitive/Folk Art in design, so I wanted to use a Crumb Cake base for each card to coordinate with the labels.

I thought the Tea For Two DSP would work well for this card, but there wasn't any lavendar in it, so I made my own DSP! I layered some Wisteria Wonder DSP from the In Color Stack, under the chevron design, cut some out and glued them in place. And did you notice the amazing stitching on this card??? I'm so excited to have finally put my Christmas present to good use! My sweet hubby got me a really nice sewing machine, and to be honest, I've been kind of afraid of it. It's digital and well, if you know me, I'm technologically challenged, so I just kind of avoided it. But this was so much fun! Can't wait to do another one-which I better do quick, before I forget how!

I stamped the sentiment in Early Espresso onto Very Vanilla Cardstock and ran it through the Big Shot using the Labels Collection Framelits. I then used to Stamp-A-Ma-Jig to line up the chevron image in the background which was stamped in So Saffron. I cut a strip of the newsprint design in the same DSP and flagged the bottom. I attached the tag onto the flag with Dimensionals, and then added a pair of roses from the Flower Trim. I threaded-or is it thread?-a piece of Linen Thread through a Vintage Faceted Button, tied a bow and attached it with a Glue Dot. 

That's it for this card-pretty simple really! But I thought it turned out quite lovely. I had to change it up a bit from the card I CASED-go check out the original at www.lauramellinger.stampinup.net and click on Project Ideas. Check back here tomorrow for another idea that I stole, er borrowed. Thanks so much for stopping by!

Thursday, April 18, 2013

BRIGHT BLOSSOMS HOSTESS GIFT:

Hello there! Here's a sweet little gift I made for my hostess this month. I was browsing my DBWS and started looking through all the project ideas SU! has posted and came across this little gem. It's made with the Petite Purse Die and Big Shot. I ran a piece of Lucky Limeade Cardstock through and cut the flap of the purse off. I then stamped the leaf image from Bright Blossoms onto the front. I glued the purse together using Liquid Tombow Glue and attached the handle to the sides using the Paper-piercing Tool and Mat and a pair of Brights Brads.

For the fun little flower, I used Summer Smooches DSP and the Boho Blossoms Punch. I stamped the circle image in Daffodil Delight onto Whisper White Cardstock and punched it out with the Itty Bitty Shapes Punch Pack. I poked a hole in the center and added another Brights Brad to the center. I attached the flower with Glue Dots.


I tied a bow around one of the handles using Daffodil Delight Stitched Ribbon. I stamped the sentiment with Essentials stamp set and ran it through the Big Shot using the Bitty Banners Framelits. I stamped it in Real Red and tied it on with Whisper White Baker's Twine.

And it wouldn't be a hostess gift unless chocolate was involved, so I put some Nuggets in a Small Cello Bag, trimmed the top off a bit, and tied some more twine around it. And I just finished off the bag of  Nuggets, so I got a treat too! I won't think so when I hit the Y tomorrow, but it's all good right now:)

Make sure to stop back tomorrow. I have some fun projects to share with you over the next few days. Thanks so much for stopping by!

Wednesday, April 17, 2013

BLAST OFF CARD:

Hello there! I'm back again with a set that has seen very little love from me-Blast Off. I think this set is adorable and I'm hoping it carries over to the next catalog, but in case it doesn't, I wanted to make sure I got it inked up at least once! I started with an Island Indigo base and stamped the background image in it as well. The DSP is from World Spectacular.


For the space ship, I covered the rocket things with scotch tape and stamped the image in Cherry Cobbler ink. I then removed the tape, colored them with an Island Indigo Marker, and stamped the image onto a scrap of Whisper White Cardstock. I used the 1 1/4" Circle Punch to punch out the window and cut the spaceship out. Next, I stamped the bumper image-okay, space ships probably don't have bumpers, but you know what I mean-in Daffodil Delight, cut it out and adhered it over the Cherry Cobbler. I placed the spaceship where I wanted it and lightly traced the inside of the circle with a pencil. I used the Stamp-A-Ma-Jig to stamp the little astronaut inside the circle. Next, I stamped the flames in Calypso Coral ink and used a Cherry Cobbler Marker to color the dotted lines. Then, I punched a circle out of a Window Sheet using the 1 3/8" Circle Punch and glued it onto the back using Liquid Tombow Glue. I adhered the space ship onto the cardstock with Dimensionals.

I stamped the planet image in Daffodil Delight onto DD Cardstock and punched it out with the 1 3/8" Circle Punch. I stamped the image again, cut out the ring and attached it with Dimensionals. Then adhered the circle to the card using Dimensionals.

I stamped the sentiment in Early Espresso onto Cherry Cobbler Cardstock, flagged the ends and attached them with SNAIL. Finally, I added a few stars punched out with the Merry Minis Punch Pack and attached them with Glue Dots. The little alien dude was just too cute not to use, so I stamped him onto the envelope and on the inside. Thanks so much for stopping by today! Come back tomorrow for a cute little treat holder. Stay dry!

Tuesday, April 16, 2013

HAPPY HOUR CARD:

Hello there! So sorry for the extra long break! My daughter has had a migraine that's been hanging on, so I've had extra 'Grandma Duty' :)/:( We're wrapping up the current catalog, so I decided I'd better get some of these neglected stamp sets some love. Todays card is made with the set Happy Hour. I don't know why it's taken me so long to break it out, but better late than never, huh?

I started with a Pool Party base and added a piece of Crumb Cake that I ran through the Big Shot using the Stripes Embossing Folder. I stamped each image in Pool Party onto Whisper White Cardstock and punched them out with the 1 3/4" and 1 3/8" Circle Punches. Next, I stamped each image again in each of the following colors: Pretty in Pink, Pumpkin Pie, Real Red, Wild Wasabi and So Saffron. I then stamped the cute little garnishes for each drink in the same colors. I cut out each 'beverage' and SNAILED them onto the glasses.

For the sentiment, I colored the image with Markers in the same colors listed above, stamped the image and flagged the end. I attached it to the circle with a Brights and a Subtles Brad. I layered another flag behing the sentiment using Pool Party from the 2011-2013 In Color DSP Stack. I popped the circle up with Dimensionals.

This is a perfect set for the warm weather that is bound to get here SOMETIME! Check back tomorrow for a card made with another neglected set. Thanks so much for stopping by!

Thursday, April 4, 2013

DUDE, YOU'RE WELCOME CARD/ODE TO BAJA BREEZE:

Hello there! Let me start by saying it's a sad, sad day around here and I am grieving over the loss of a dear friend! As some of you may know, SU! is doing a small Color Refresh and some of our favorites are going away. I'm extrememly saddened to announce that Baja Breeze is one of them.  As I was going through the list, I was in agreement with most of them until I got to Baja Breeze, and I literally gasped. Follow mw to the end of this post and I'll give you the list of the retiring colors and the ones they're being replaced with.

This card is made with the Dude, You're Welcome Kit. It's designed to be user friendly for a guy to be able to make some simple, yet really nice cards.

It comes in a REALLY nice box~I was kind of surpised, pleasantly, in the quality. He, or you...who are we kidding, could definitely find a good use for the box when you're finished with the cards.

The kit comes with 12 envelopes-I'm thinking they might be the new Smoky Slate that we're going to be seeing in the next catalog???And 12 notecards in heavy duty, manly cardstock. 8 of them have designs exclusive to this kit. Very nice! And they all coordinate very well with Baja Breeze, might I add!

The kit also comes with 4 images-2 blocks which are double-sided. They say: Thank You, Special Occasion, I ----You, and # % & @ ! It also comes with a Basic Grey Stamp Pad, and instruction booklet-that they won't read. Actually it's pretty cute, so they might. And even an Official Man Card Sticker that says Real Men Build Cards.

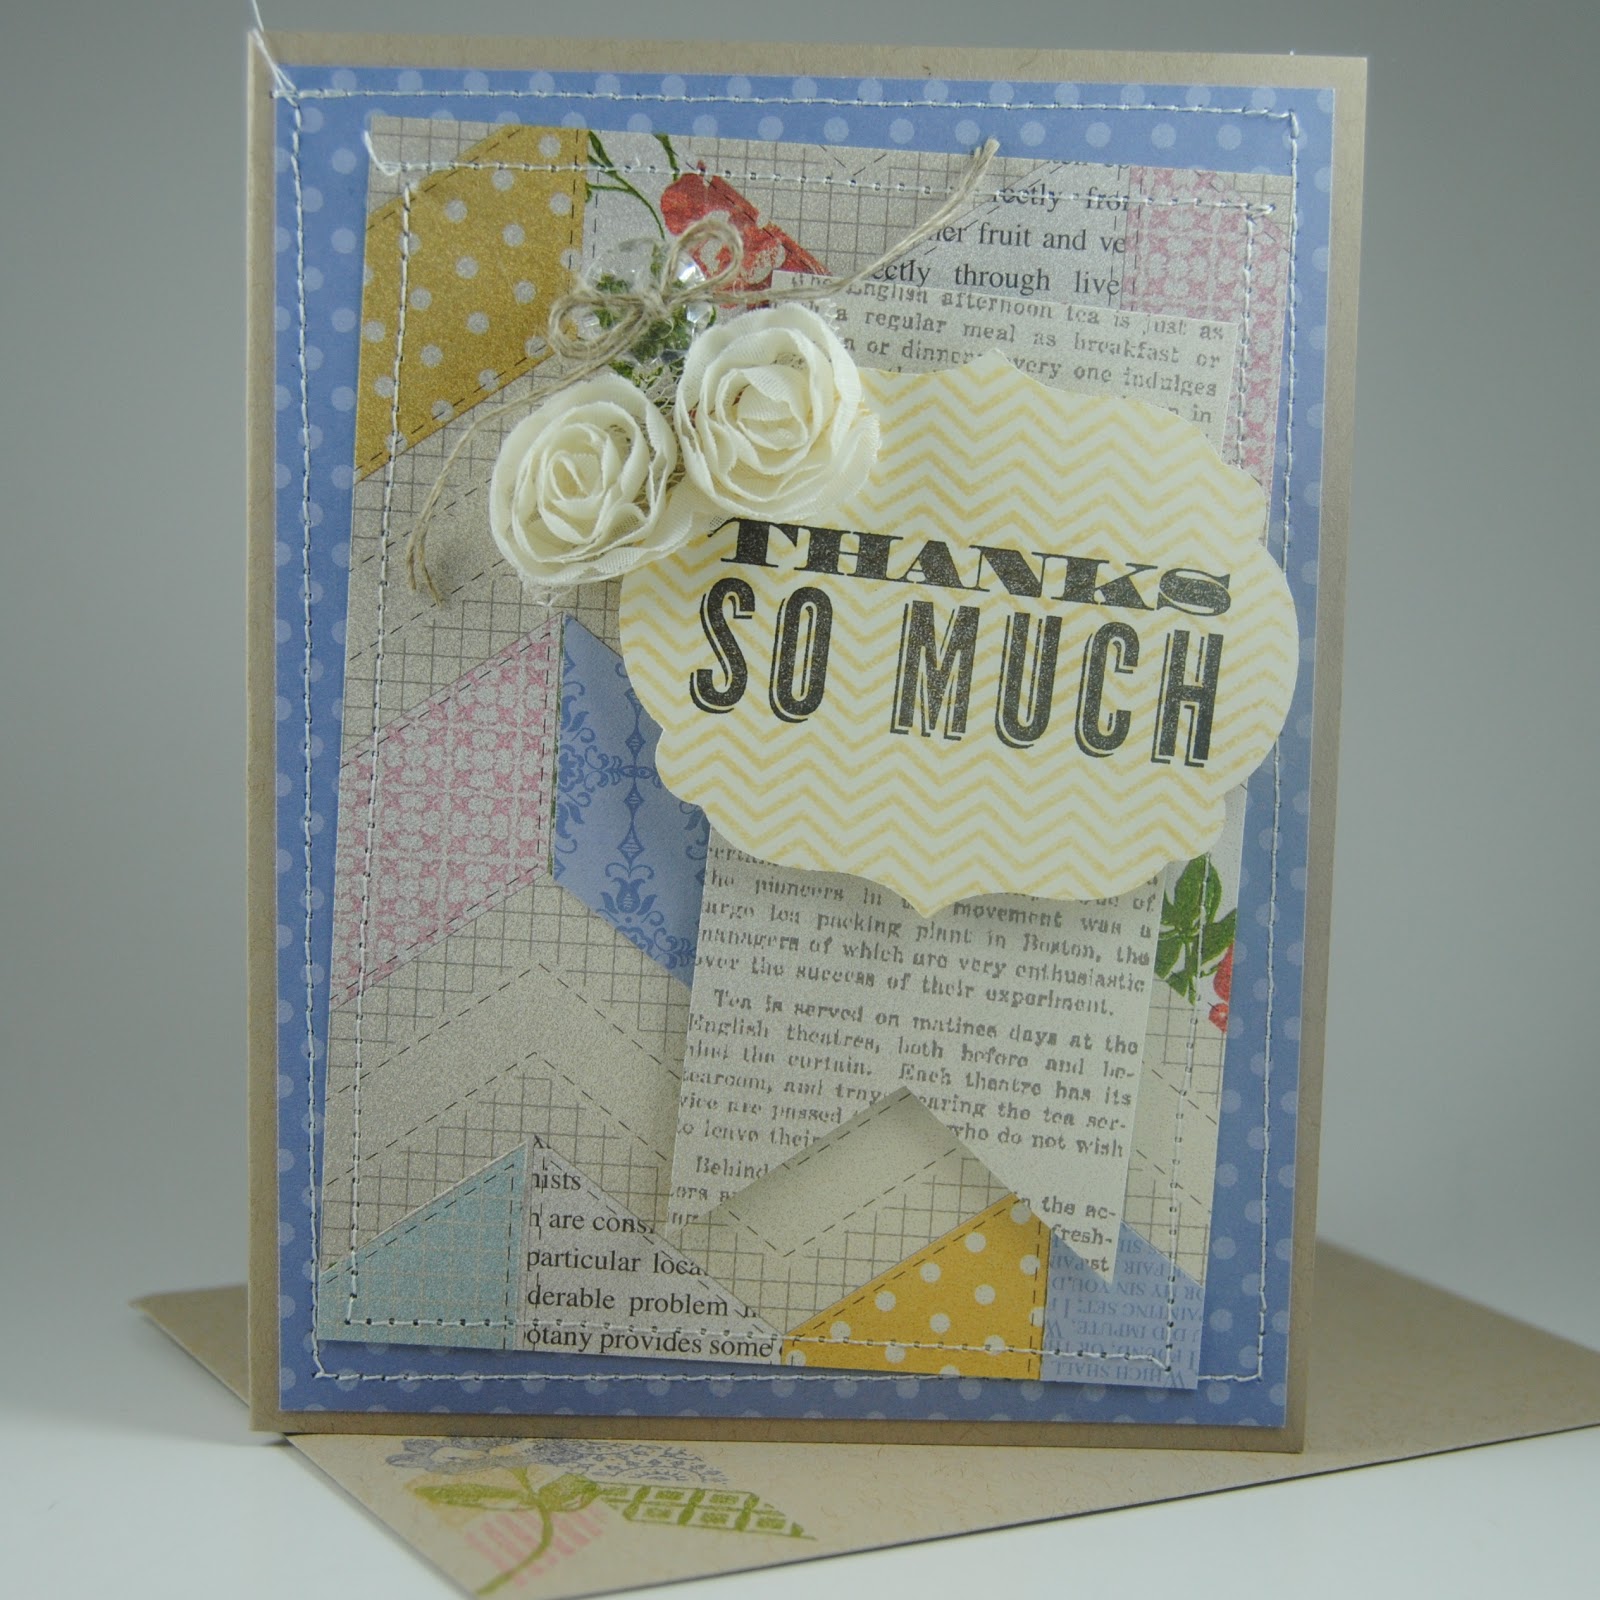
I added a Baja Breeze base abd added layered a piece of Basic Grey underneath one of the cardstock pieces. I also added some Basic Grey Stitched Ribbon and a Silver Basics Button with Pool Party Baker's Twine. As I said earlier, I'm in mourning over the loss of Baja Breeze. I'm hanging on to the hope that someone from the Home Office will see my post and I will receive a card like this in the mail soon:

Here's hoping that they realize the error of their ways and will make the correction soon! Until then, here's the list of the colors that will be retiring: Regal Rose, Pretty in Pink, Bashful Blue, Certainly Celery, BAJA BREEZE, Riding Hood Red, Bravo Burgundy, Not Quite Navy, More Mustard and River Rock.

The 10 colors that will be replacing them are: Bermuda Bay, Calpyso Coral, Wisteria Wonder, Pear Pizzazz, SOFT SKY, Pool Party, Blushing Bride, Crushed Curry, Island Indigo and the new Smoky Slate.

The new colors will be available when the new catalog goes live on May 31st, and
 there will be a New Color Kit containing all the new colors. The retiring colors are on a first come, first serve basis. So if you're wanting to stock up on any of them, you should probably order them soon. And right now is the perfect time as SU! is offering FREE SHIPPING on all orders from April 6-8.

One final reminder, if you're interested in trying My Paper Pumpkin out, you need to order by April 10 to get this month's kit-and please check me as your demonstrator!:) See all the details here: www.mypaperpumpkin.com. You can see more details about the Dude, You're Welcome Kit and all the other new arrivals at www.lauramellinger.stampinup.net. Thanks so much for stopping by and enjoy this beautiful day-if you're up to it...I'm not sure that I am yet. Feel free to send me condolences, flowers and chocolate...eh, just chocolate....

Wednesday, April 3, 2013

OH, HELLO CARD:

Hello there! Today I'm sharing a card made with the set Oh, Hello. I didn't think this was a set that I needed, but I finally caved after seeing so many great cards made with it. This was a card that was featured in our Stampin' Success magazine, but I changed the colors up a bit. I've been on a quest to use colors that I don't normally use, and Regal Rose is one of them. It really is a pretty pink, but it's kind of bright. But I thought it would work well for this card. I started with a Very Vanilla base and used the Stamp-A-Ma-Jig to align the chevron border up and stamped it in Baja Breeze. Next, I cut a piece of Regal Rose Cardstock and ran it through the Big Shot using the Ovals Collection Framelits. Then, I stamped the design in Regal Rose ink, using the SAMJ again to line everything up. I was afraid the pink was a little too bright, so I toned it down a bit by using a Sponge Dauber and sponging the edges in Crumb Cake ink. This gave it a soft vintage effect. Next, I used the Paper-piercing Mat and Tool and Essentials Paper-piercing Pack to add some faux stitching at the top. I connected the dots with an early Espresso Marker-one if these days I'm going to actually sew it with the new sewing machine I got for Christmas! I'm still not 100% sure how to use it-I guess I just gotta dive in and learn.

Next, I laid the Regal Rose Cardstock where I wanted it and traced the oval lightly with a pencil. I stamped the wavy chevron image in Crumb Cake and erased the pencil line when it was dry. I then stamped the flower image in Baja Breeze onto Baja Breeze Cardstock and used one of the Labels Collection Framelits to cut it out. I put Dimensionals onto the back of the Regal Rose piece an placed it on top of the Crumb Cake oval. Then, I added the Baja piece with Dimensionals also.

I cut a strip of Very Vanilla and stamped the sentiment in Early Espresso, and flagged the end. I used the splatter image from the Paper Pumpkin stamp set Hey There in Crumb Cake, stamped it off and stamped it over the sentiment and card. Oops, I need to back up. I added a piece of Victoria Crochet Trim to the bottom of the Regal Rose piece before I adhered it to the card base. Next, I inked up the flower image with a Baja Breeze and Garden Green Marker and stamped it onto Very Vanilla Cardstock. I did the same thing again with Regal Rose and cut out both flowers. I glued the Baja flower down with Liquid Tombow Glue and used Glue Dots for the Regal flower to give a little more dimension. I added a Linen Thread bow with Liquid Tombow.


Finally I added a short row of Basic Pearls under the sentiment. This is such a fun set to use-I really love it. I hope to make lots more cards with it in the near future. Please see below for the 9 cards that are options for April's 'Kits/Cards To Go'. The # will be ABOVE each option. See my home page on my blog on the right hand side for pricing information. Here they are...

                                                                                #1)


                                                                               #2)


                                                                             #3)


                                                                              #4)


                                                                            #5)


                                                                          #6)


                                                                            #7)


                                                                              #8)


                                                                         #9)

Okay, these are the 9 choices. You can go back over the last several posts to see more details of each card. Remember, you can pick any 4 of the designs, and you can choose from a 'Kit', where you do the stamping and assembling, or pick the 'Card' option, which are completed cards. If you choose #1, please specify the age you need. E-mail me with your selections at: lmel09@q.com by Friday, April 5th. Thanks so much for stopping by today!