Tuesday, January 30, 2018

CARD BUFFET REMINDER:

Hello there! Just wanted to post a few new cards to the line-up for Card Buffet on Thursday. I've added a couple new cards made with SAB sets that you can earn for FREE! I've also added 2 new designs using sets from the Occasions Catalog.

Card Buffet is from 4-8 at the Stampin' Pad-1513 Market Street. Please bring your own adhesive, or I'll have some on hand to purchase.

These will all still be available to make as well. Several new sets from the Occasions Catalog!

As well as these, with a couple of older designs for a total of 18 to choose from! Again, more SAB & Occasions sets, along with a couple for Valentine's Day. And you won't want to miss out on the adorable Valentine's favor I'll have for you featuring one of the cute pandas:)

I also have this adorable Stacked Snowman that I'm giving away to the first person who tells me they want to join my team as a Stampin' Up! demonstrator! It's full of SU! products and will be a fun bonus in addition to all the other amazing deals you'll get! Sale-A-Bration is the best time to join as you get to pick out 2 additional stamp sets-any price, from the Annual Catalog & the Occasions Catalog to add to your Starter Kit! Here's what $99 will get you:
   *$125 worth of products of your choice for only $99, along with catalogs & business supplies
   *Pick an additional 2 FREE stamp sets, any price to add to your Starter Kit, with FREE SHIPPING!
   *20%-25% Discount, even on top of promotions
   * Earn up to 38% income
   * Early access to catalogs & products
   *Access to Demonstrator Website & Stampin' Success Magazine full of ideas
   *Attend SU! Events & get FREE gifts & products
   *Earn the Incentive Trips to exotic locations all over the world
   *Earn Rewards, Prizes & Incentives
   *Become a part of my TEAM LOL! for monthly meetings, support, incentives & lots of FUN!

I welcome both Hobby Demonstrators who join for the discount to help support their hobby, and Business Builders who are interested in making some money & sharing this fun experience with others. I'd love to help you make this opportunity work for you!

Please let me know if you plan to attend on Thursday so I can have your fun little Valentine ready for you:) Thanks so much for stopping by!

Wednesday, January 24, 2018

WORKSHOP:

Hello there! A good friend of mine had a Workshop last night and we had a blast! We held it at the Stampin' Pad, so nobody had to clean their house-score! She had requested a card and mini pizza box for Valentine's Day and these are the 2 projects they made. I focused on the Sure Do Love You Bundle.

For the card, I started with a Rich Razzleberry base and stamped the hearts in the background with Rich Razzleberry as well. I added a layer of the Painted with Love Specialty DSP on top. On a piece of Whisper White Cardstock I stamped the heart outline with Rich Razzleberry ink.

I stamped the banner with Rich Razzleberry ink and the small heart with Powder Pink ink. I used the Lots to Love Box Framelits to cut them out, along with the large heart. I attached the banner with Dimensionlals and double-stacked Mini Dimensionals for the small heart. I adhered a Delicate White Doily to the back of the cardstock with SNAIL and added a Metallic Enamel Shape.

For the Mini Pizza Box, I added a piece of Rich Razzleberry on top and stamped the hearts in the background as I did on the card. I added a doily and repeated the same process as for the card.

I added some Ready Shreddie to the inside of the box and added a couple of Ghiradelli squares. The guests left with a nice Valentine's Day gift for someone special:)

I made this sweet little box for the Hostess using the same framelits and DSP. I cut out an oval from the Layering Ovals Framelits, scored it and attached it to the flap with SNAIL. I added a Gold Foil heart and smaller hearts from Melon Mambo, Powder Pink, Calypso Coral & Rich Razzleberry Cardstock.

I used one of the Scallop Circle Punches from the Occasions Catalog with Powder Pink CArdstock and cut the heart out of the center using the framelits. I have a confession to make...I'm not sure how many times I looked through the catalog before I even noticed the Scallop Circle Punches! I added a set of 4 notecards inside, along with some chocolate and tied it all up with the lovely Gold 1/8" Ribbon.

I made the notecards with the adorable Whisper White Narrow Note Cards & Envelopes.

I added a cute little envelope liner using the 2" Circle Punch with the Painted with Love DSP.

I made these sweet little favors for each guest using the Clear Tiny Treat Boxes and wrapped a piece of the DSP around them.

I filled each with a few small chocolates and more of the Ready Shreddie. It works great as a filler so you don't have to use as much chocolate if you have a bunch of favors to make:)

I cut a banner with the framelits from Gold Foil and slid it under the gorgeous Whisper White Organza Ribbon & adhered with Glue Dots. I added a Corrugated Element on top with Mini Dimensionals.


I added a Glue Dot to the center of the corrugated oval and added a piece of Gold Mini Sequin Trim. I stamped the sentiment onto Whisper White Cardstock using various coordinating inks, and punched it out using the Classic Label Punch.

They were actually pretty quick & easy to put together, but all of the gorgeous gold made them look pretty fancy!

We really did have a fun time getting together to make these fun projects and the Hostess earned an extra $25 in Hostess Rewards too! I'd love to help you do the same and get together with some of your friends for a fun night of stamping! Thanks so much for stopping by:)

Wednesday, January 17, 2018

LOTS OF LAVENDER CARD:

Hello there! Back today with another card to share made with the set Lots of Lavender, another Sale-A-Bration product that you can get for FREE with a $50 order. I started with a Sahara Sand base and added a piece of DSP from the Wood Textures DSP Stack. On top of that I added a strip of DSP from the Tutti-fruitti DSP Stack.

I stamped the flower image twice onto Whisper White Cardstock using Elegant Eggplant ink. I stamped the inside image with Wisteria Wonder and the leaves with Pear Pizzazz. I cut out one whole image with Paper Snips, and just the flowers of the second image. I adhered the partial image to the card base with Glue Dots. I wrapped some Silver Metallic Thread around my fingers and attached a messy swirl to the back of the whole cut out image with Glue Dots. I then adhered it over the partial image with Dimensionals.

I stamped the labels with Label Me Pretty-the bottom in Elegant Eggplant and the top in Wisteria Wonder. I punched them out with the Pretty Label Punch & 1 3/4" Circle Punch. I adhered the large label to the flowers with SNAIL. I folded a piece of Old Olive Mini Chevron Ribbon in half and angled the ends. I added  Glue Dots to the center and to the back of the ribbon and attached it to the label. I added the sentiment on top with Mini Dimensionals.

Finally I punched out 3 leaf images from Vellum Cardstock using the Leaf Punch, and tucked them behind the flowers using Glue Dots. I finished it off with a few Basic Rhinestone Jewels. This is one of my favorite SAB offerings this year, and I would love to help you get your own set for FREE! Well, back to bed I go to try to get rid of this sinus headache. Thanks so much for stopping by:)

Tuesday, January 16, 2018

AMAZING YOU CARD:

Hello there! So sorry I've been MIA for the past couple of days. I got hit with bronchitis hard and I've pretty much been a slug for the past 2 days:( I made a goal for myself to post every day in 2018, and to get in 30 minutes of activity every day. Unfortunately things didn't work out as I planned. At least I'm feeling better to share some lovely cards with you today:)

This card was made with the Sale-A-Bration set called Amazing You. To be honest, I was not a fan when I first saw it. Actually it was one of my last picks for my SAB rewards. I kept seeing some beautiful cards made with it though, so I decided to get it and CASE some-and it was FREE, so what did I have to lose?

After I paired it with the gorgeous Sweet Soiree DSP, I started to warm up to it. I also used the coordinating Celebrate You Thinlits, that are also a SAB option. SU! tried something new this year by adding 2 higher-tiered options. These dies are available for FREE with a $100 order. I wasn't sure how it would go over with my customers, but I've had several who have ordered these! Again, the dies didn't excite me too much on their own, but when paired with the coordinating stamp set, they come alive:)

As a SU! demonstrator, I get access to a quarterly magazine and a weekly email full of ideas. The following 3 cards were from the email last week. I couldn't wait to make them and share them with you! This one is a bit more involved, but the WOW! factor makes the extra effort worth it!

I stamped the flower image twice in the center of a piece of Basic Black Cardstock with VersaMark. I heat-embossed it with Clear Embossing Powder. I stamped the ray image with VersaMark onto Vellum Cardstock to form a circle. I heat-embossed it with Copper Embossing Powder and a circle punch to cut it out. I used DSP from the Tutti-fruitti DSP Stack and Pick A Pattern Washi Tape.


I stamped the flower on Daffodil Delight Cardstock with the same color ink. I stamped the sentiment with Tangerine Tango on Whisper White & Peekaboo Peach Cardstock. I used the Pretty Pines and Welcome Home Thinlits with Old Olive, Tranquil Tide & Lemon Lime Twist Cardstock. I finished it off with a Hearts & Stars Element, a Delicate White Doily piece, and some Metallics Sequins.
This one was my favorite and I'll probably be making more of these. The possibilities are endless when you combine these 2 products.


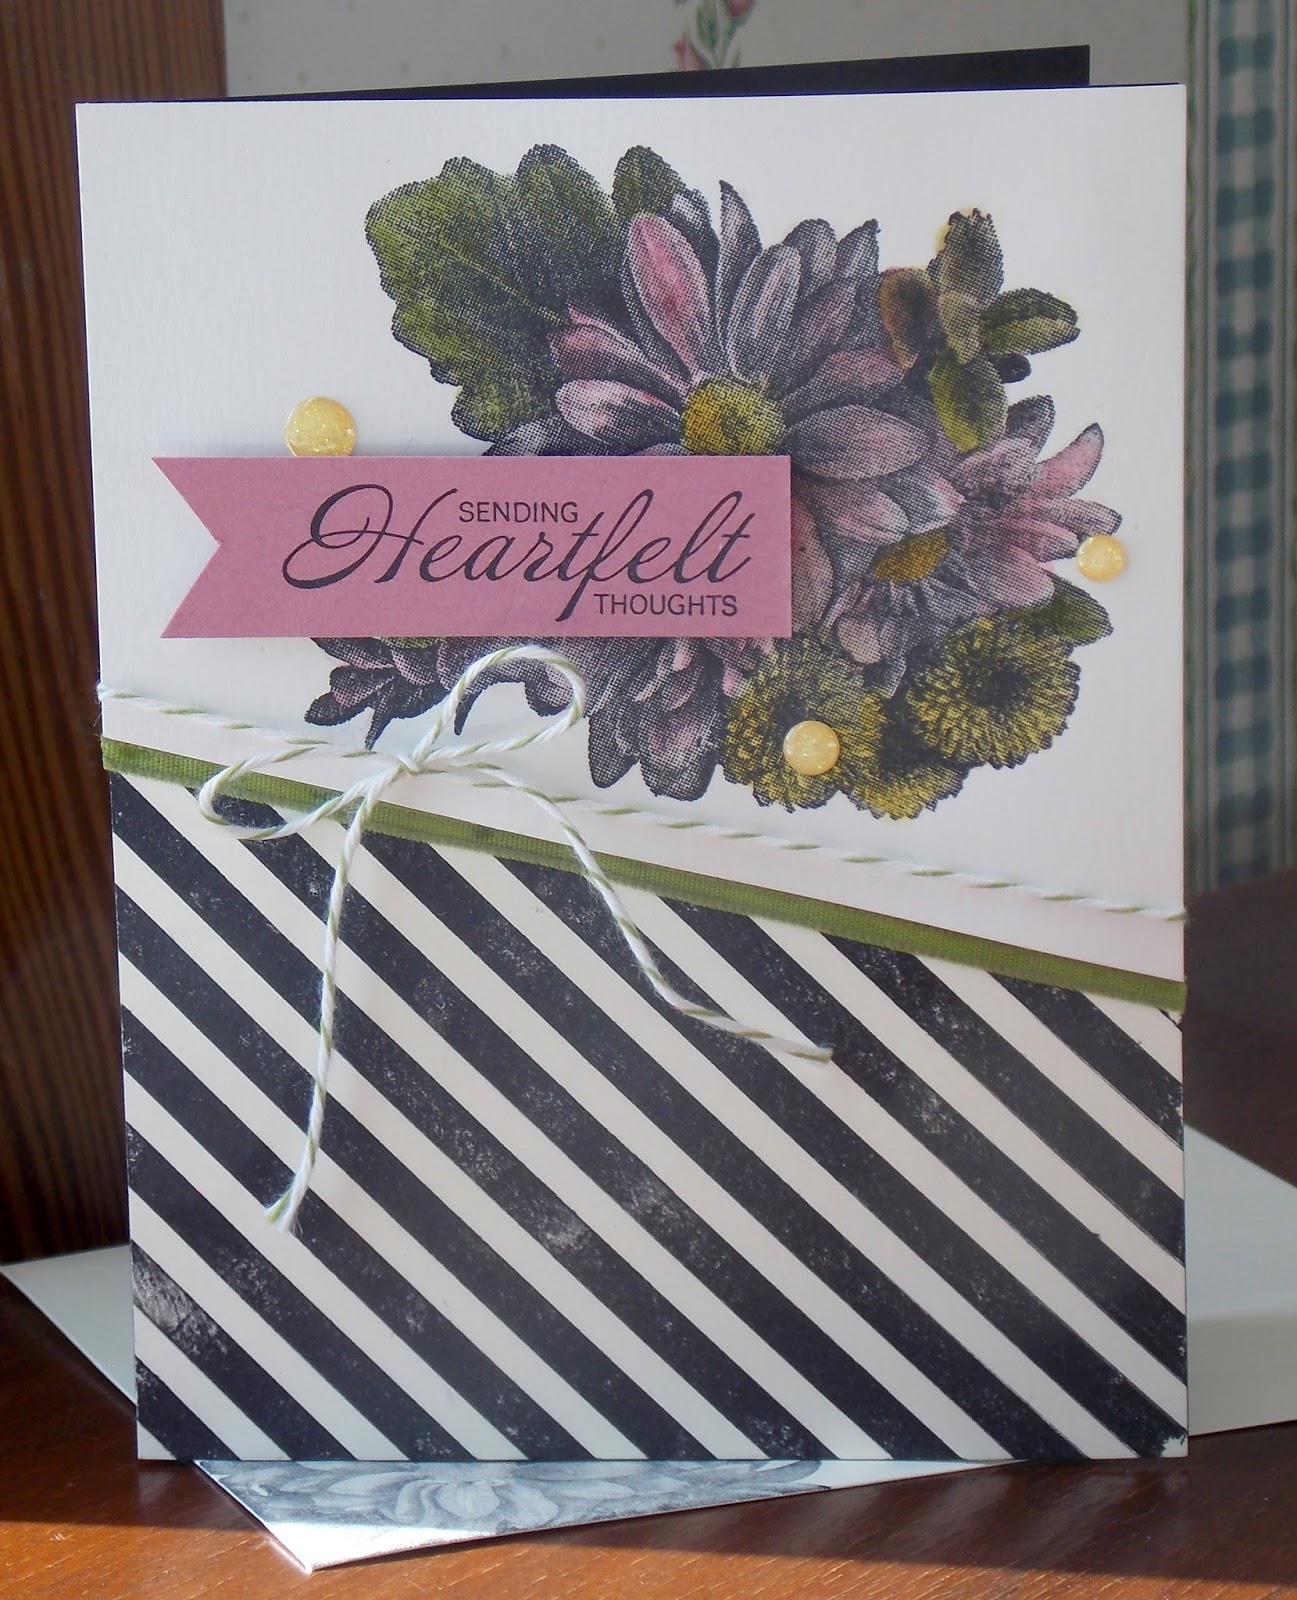
For this I started with a Soft Sky base and ran a piece of Pick A Pattern Washi Tape along the side. I colored the stamp using Melon Mambo, Old Olive & So Saffron Markers and stamped it onto a piece of Whisper White Cardstock. I used the dies to cut out the sentiment from the center of the flowers and attached the cardstock to the base with Dimensionals.

I stamped the sentiment with Black Archival ink onto So Saffron Cardstock and cut 'amazing' from Basic Black Cardstock. I added a few Basic Rhinestone Jewels.

This one took a little time to run the dies through the Big Shot several times, but after the cutting was done, it came together quickly.

I used a green for the base, Pear Pizzazz or Wild Wasabi...I can't remember & for some reason it photographed funky. I cut out 'celebrate' 8 or 9 times and glued it down in rows using Liquid Tombow-tiny drops! I used the Mini Treat Bag Thinlits to cut out the star strip using Daffodil Delight Cardstock.


I used the same thinlits for the Whisper White banner and used Silver Glimmer Paper to cut out 'amazing'.
I used the Tutti-fruitti DSP Stack to cut out YOU. I added the star with a Glue Dot.

I hope you got lots of inspiration today for how to put these products to use. I would love to have a Workshop/Party with you to help you earn one or both of these products for FREE! Sale-A-Bration is the perfect time to hold an event of your own as you get an extra $25 in Host Rewards! Well, I think that's all for me today...Off to bed with my Z-pack, sinus meds, cough drops & Biofreeze. Hopefully I'm back to normal soon. Thanks so much for stopping by:)

Saturday, January 13, 2018

FLORAL STATEMENTS CARD:

Hello there! I'm having fun playing with a new product from the Occasions Catalog-Brusho! These little jars contain watercolor ink crystals which help you watercolor like a pro:)

Make plans to attend TNT Tuesday! on Tuesday, January 16 at the Stampin' Pad. We'll be trying out this fun watercoloring technique several different ways.

We'll make the card above on Shimmery White Cardstock , and try it out on Watercolor Paper too.

Come learn how to make beautiful backgrounds, and master another coloring technique with your stamps.

For $30 you get a box which contains 5 pots. The crystals are highly concentrated so you only need a tiny amount to achieve beautiful results. This little box will probably outlive you!

You'll get Brilliant Red, Gamboge-orange, Yellow, Brilliant Blue & Mossy Green. You can mix the powders to get a whole rainbow of colors.

You won't want to miss this fun & informative class! TNT Tuesday runs from 6-8 at the Stampin' Pad this Tuesday, January 16th. The cost of the class is $15 or FREE with a $25 order! Please let me know if you plan to attend so I can have everything prepped for you. I hope to hear from you soon:) Thanks so much for stopping by:)

Friday, January 12, 2018

HEARTFELT BLOOMS CARD:

Hello there! Here's another card we made at Card Buffet last week featuring the Heartfelt Blooms set, which is a Sale-A-Bration product that you can earn for FREE with a $50 purchase. This has been a very popular set so far. This new 'DisINKtive' design gives the finished image such depth & detail. Look for more of this unique process from SU! in the future:) They actually have a patent for this new design!

I stamped the flower image & sentiment with Archival Black ink on Watercolor Paper, and used Aqua Painters with Powder Pink, Old Olive & Crushed Curry stamp pads to color in the image.

I also used the Diagonal Stripe Background Stamp on Very Vanilla Cardstock & the sentiment was stamped on Sweet Sugarplum Cardstock. I added some lovely Old Olive Sheer Ribbon & Old Olive Baker's Twine. I finished it off with a few Glitter Enamel Dots.

This is one of the samples I had at my Sale-A-Bration Kick-Off Event last week-end. I've been spending a lot of time in my stamp room coming up with additional ideas for all the fun & exciting new products in the SAB & Occasions Catalogs...I know, it's a dirty job:)

I got the idea for this beautiful card on Pinterest. I started with a Crumb Cake base and stamped the background in VersaMark. I stamped the flower image with Sweet Sugarplum-apparently I have a thing for Sweet Sugarplum with this set:) I stamped a second flower on Very Vanilla Cardstock & cut it out with Paper Snips. I colored in the center with a Daffodil Delight Marker. I stamped the sentiment with Wild Wasabi ink.

I mounted the Very Vanilla Cardstock to a piece of Crumb Cake & wrapped some Sweet Sugarplum Baker's Twine around the cardstock twice & tied a bow. I then attached the cut-out flower with Dimensionals. I adhered the whole piece to the Crumb Cake base with Dimensionals.

Make plans to attend Card Buffet next month and make both of these lovely cards. Or better yet, get your order in for $50 and earn your own set for FREE and make as many cards as you want! Thanks so much for stopping by:)