Friday, October 30, 2015

BLISSFUL BOUQUET OCTOBER PAPER PUMPKIN:

Hello there! Happy Halloween Eve:) I want to share October's Paper Pumpkin kit with you called Blissful Bouquet. This month was a challenge for me to come up with some alternate ideas. I think my brain was geared for Christmas and these floral cards caught me off guard. But as usual, once I started working with it, I got some ideas.


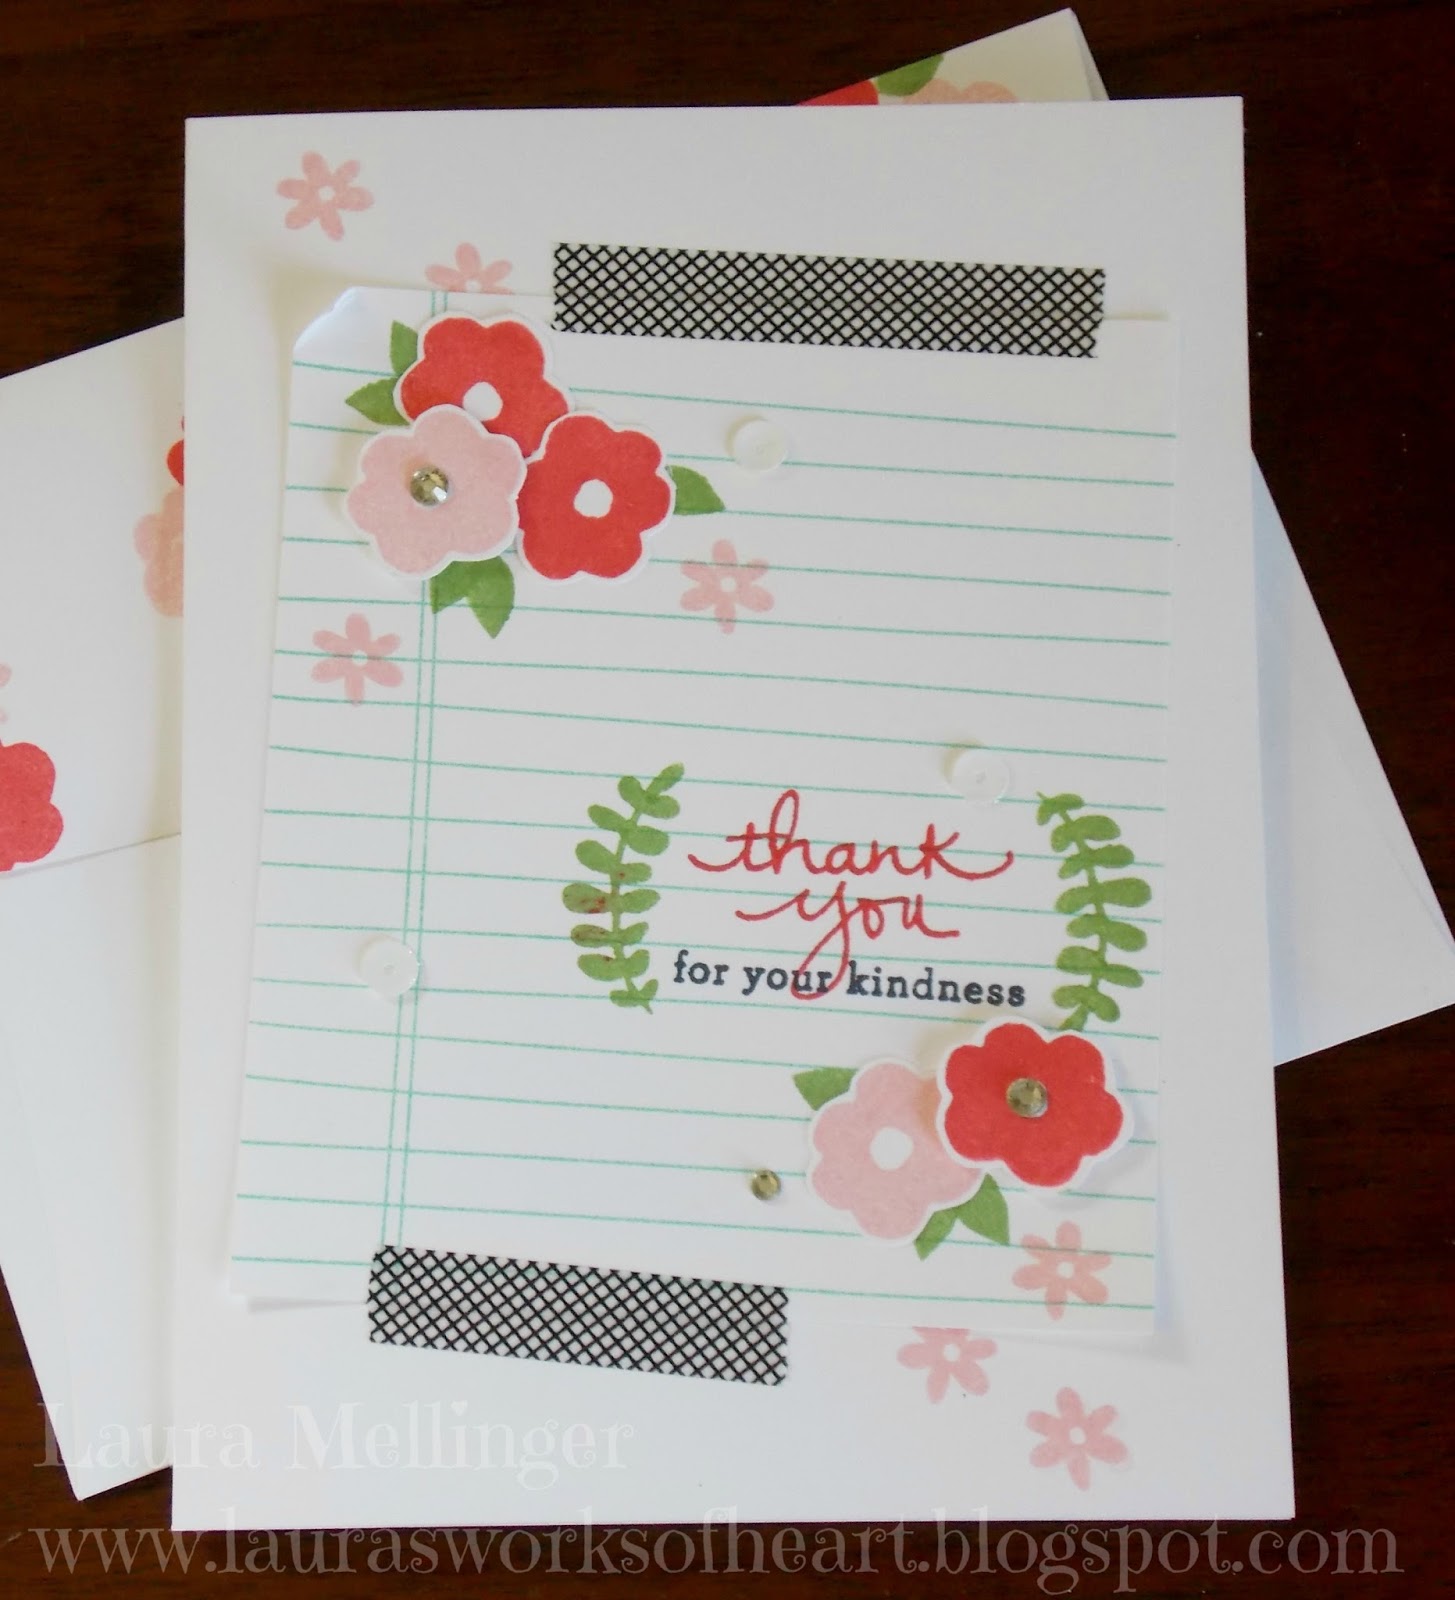
These were the cards made according to the kit instructions.

And this was the stamp set included in the kit along with a Basic Grey spot.

Here's an alternate card that I made. I used the Crushed Curry card base included in the kit and added a piece of Burlap Ribbon. I added a strip of Basic Grey DSP from the Neutrals Color Collection and a piece of Cherry On Top Washi Tape. I simply cut out a couple of the flowers from the printed paper in the kit and attached them to the label.

For this card I splattered the leaf patterned paper with an Aqua Painter filled with Old Olive ink and alcohol. I used a Sponge Dauber in Hello Honey ink and added some color to the background. I then stamped the small leaf image with Cajun Craze ink. I used the Bird Builder Punch with Gold Foil Sheets and added a Regals Button adorned with Crushed Curry Baker's Twine.

Since I was all ready for Christmas, I decided to make a Christmas card using a Shimmery White Cardstock base. I wanted the ink to be a bit more subtle so I used Smoky Slate. I used a Sponge Dauber in Whisper White Craft ink to soften up the edges of the tag and stamped the sentiment with Oh, What Fun. I added a piece of the gorgeous Very Vanilla Subtle Stripes Satin Ribbon~seriously, does SU! have contests to see who can come up with the longest name for a product? And I stamped the flower image 3 times. I cut them out with Paper Snips and stacked them using Dimensionals in between. I used Dazzling Details in the centers of the flowers and sprinkled them with Dazzling Diamonds Glitter.

For this one, I cut the watercolor designed paper to 3" x 3", wrapped the twine around a couple of times and tied a bow. I adhered it to the card base with Dimensionals and added the gold leaf stickers. I stamped the flowers in Perfect Plum ink onto the same cardstock and punched them out with the Owl Builder Punch. I added Regals Candy Dots to the centers and attached with Glue Dots.


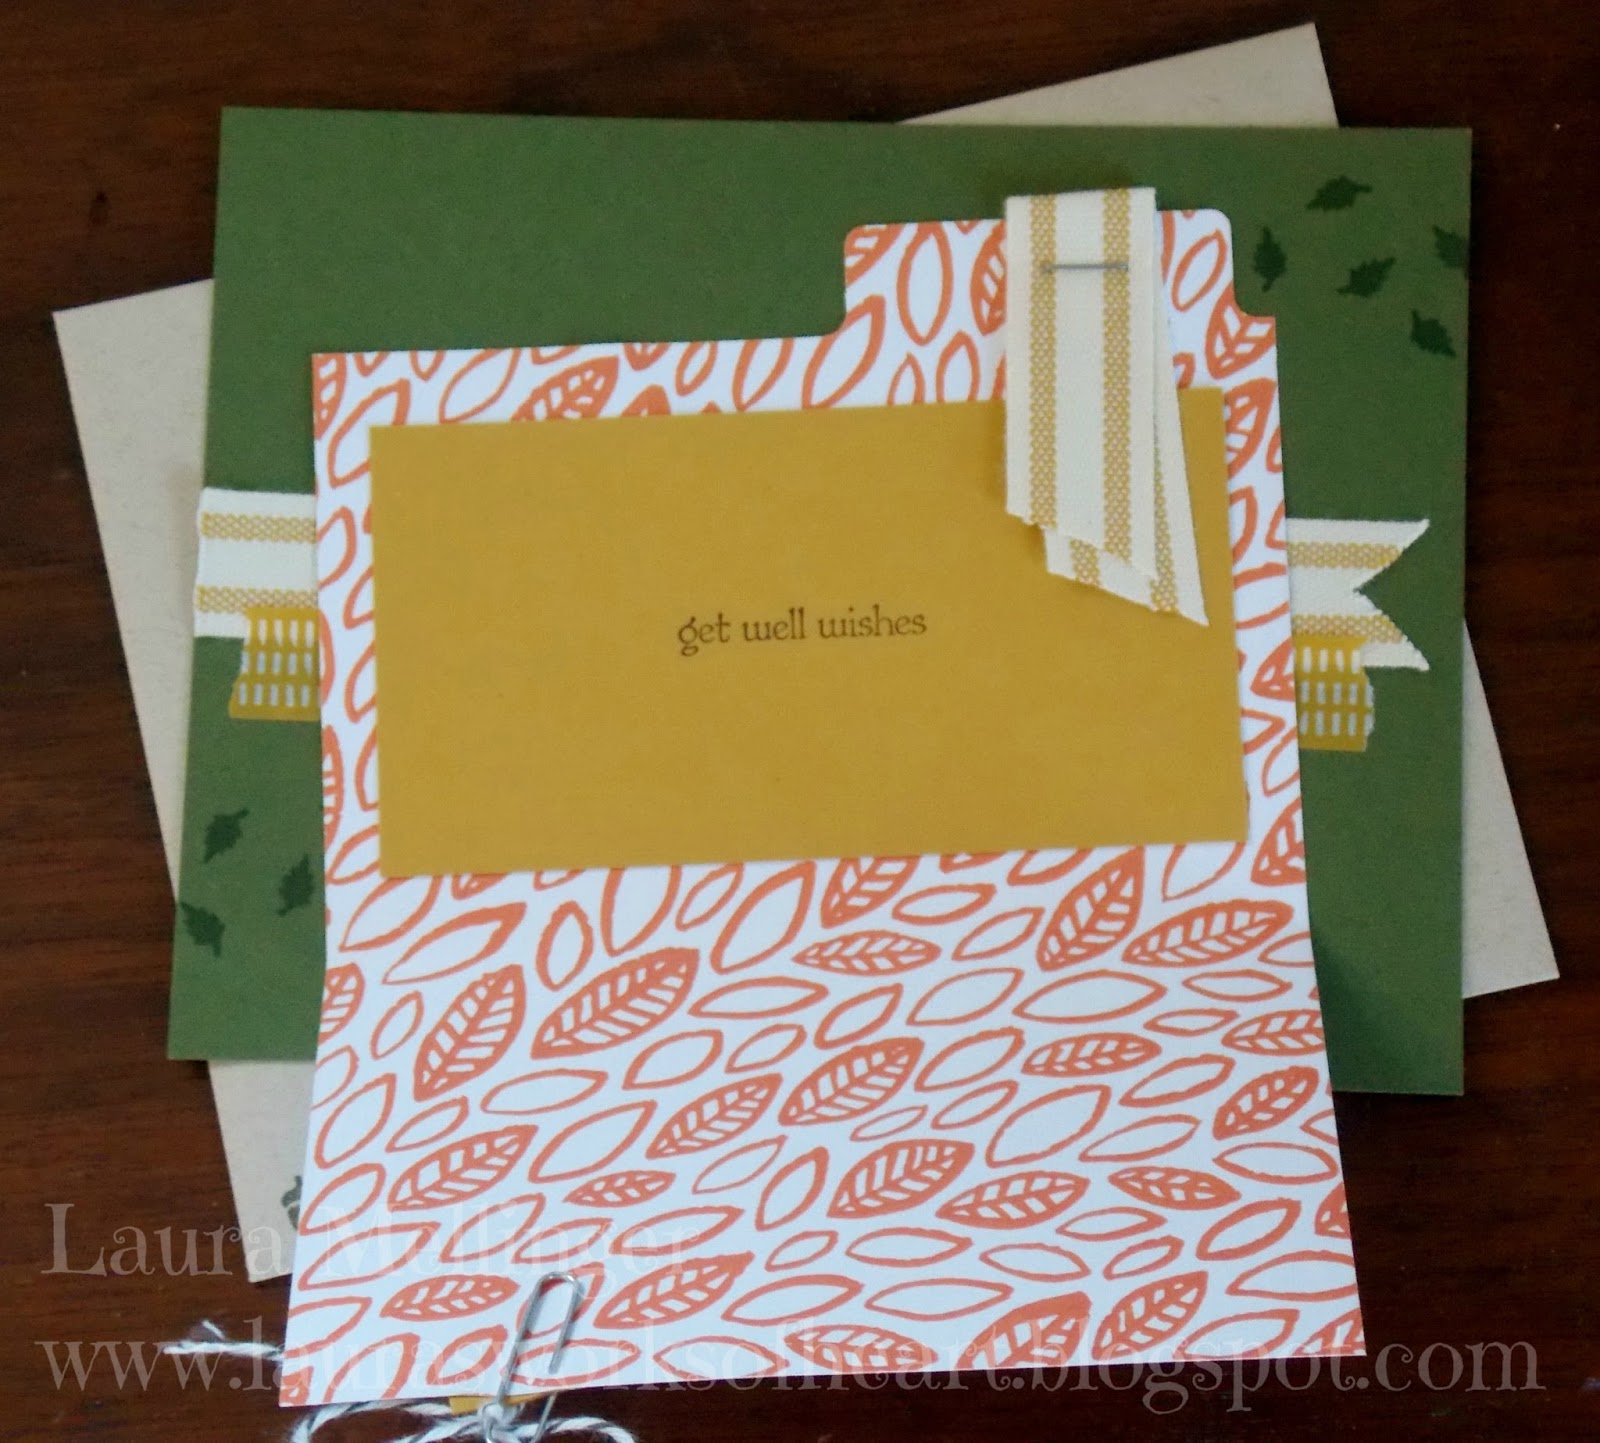
I made this sweet little treat bag with the help of the Gift Bag Punch Board. I followed this video to put it together using Crushed Curry Cardstock. Gift Bag Topper is the name of the video in case the link doesn't work.
https://www.youtube.com/watch?v=OyZBdswNXrk&feature=youtu.be

I stamped the front of the bag with Crushed Curry ink and added Calypso Coral Seam Binding. I used an exacto knife to make a small slit at the top of the bag for the ribbon to go through and tied it in a knot. I added one of the adorable Home For Christmas Buttons and added a Crushed Curry Baker's Twine bow. I used 2 sets of Velcro dots on both sides under the flap to keep it closed.

Here's another one using a Basic Grey base. I added a piece of Basic Grey DSP from the Neutrals Color Collection. I added a piece of Cherry On Top Washi Tape and a Brights Button. The watercolor paper is what was left over from the 3x3 Thinking of You card.

I made 'fun size' Christmas card using one of the bases provided in the kit and added a pointsettia made from Real Red Cardstock. I stamped the flower image twice, cut it out with my Paper Snips and added a Dimensional in between. I topped it with a Home For Christmas Button and added a bow through the center using the Gold Cording Trim.

As I mentioned earlier, I wasn't too crazy about this month's projects, but I think this card is my favorite. I simply added a Tea Lace Doily and some Gold Glitter Ribbon. I stapled the ribbon in half and adhered with a couple of Glue Dots under the banner and added a Brights Candy Dot.

I met with my Pumpkin Pals last night and we had a great time working on this month's kit and we welcomed a new member Shelly:) These are the favors I made for them using the Square Pillow Box Thinlits.

I used Happy Haunting and Sweet Li'l Things DSP and cut a window out of each using one of the dies included with the set. I added a Window Sheet to the inside and adhered with Liquid Tombow.

I made the stump with Corrugated Paper and attached it when I added Fast Fuse adhesive to seal the box. I added a strip of Burlap Ribbon and stapled a piece of Gold Sequin Trim to it. I adhered the Burlap with Tear & Tape.

I used the set A Little Something for the sentiment in Soft Suede ink. I wiped off the acorn tops with a wipe and colored them with a Crumb Cake Marker and then stamped the image onto Very Vanilla Cardstock. I used the 1 3/8" Circle Punch~I think:) to punch it out and used the 1 3/4" Scallop Circle to punch out a Soft Suede Circle. I then attached a scrap piece of paper with a tiny dab if SNAIL to the scallop circle, and placed it back into the Scallop Circle Punch and off-centered it to get a starburst scallop instead. The scallops are starting to look dated to me and I rarely use them, so I was happy to find a way to put them to use again:)

I cut a pair of Mossy Meadow leaves using one of the dies included, and made a knot using Mossy Meadow Striped Cotton Ribbon. I attached all with Glue Dots and added an Into the Woods Element for the finishing touch.

We had a great time as always at our Paper Pumpkin Night, and would love for you to join us! We'll be meeting next month on Thursday, December 3rd, as November's Pumpkin Night falls on Thanksgiving. I'm really hoping for Christmas cards! Thanks so much for stopping by:)

Friday, October 23, 2015

ACORN FAVORS:

Hello there! I wanted to share these sweet little treats I made for my class members who attended my Nutty Notecards Class last night. I got the idea from Brenda Quintana here:  http://qbeesquest.blogspot.com/2015/09/acorny-kiss-tents.html

We had a small group so I wanted to make a little extra something for each one:) I used Crumb Cake, Hello Honey, Pumpkin Pie & Cajun Craze Cardstock & ink. I started with a 4" x 3/4" strip of cardstock for each and scored at 1", 2" & 3". I put Liquid Tombow on the end and folded each into a tent. I stuck a Herhey's Hug in each one.

I used the set Acorny Thank You to stamp the acorns and used the Acorn Builder Punch to pop them out. I adhered an acorn to each side and glued the tops together. I stamped the sentiments and used the Word Window Punch to punch them out. I added Regals and Neutrals Buttons with Glue Dots and added a Linen Thread bow to the tops.

We had a great time and welcomed a new friend Barbara to the group, who drove 1 1/2 hours to join us! We were amazed that we didn't even need alcohol to have so much fun...I guess that's what stamping with friends will do:) Thanks so much for stopping by!

Tuesday, October 20, 2015

THANKFUL HOSTESS GIFT:

Hello there! I wanted to share the Hostess gift I made this month. It features the set Thankful Forest Friends and the Square Pillow Box Thinlits Dies, both found in the Holiday Catalog. I used the Schoolhouse DSP, which is fitting as my Hostess works at an elementary school:)


I colored the stamps with Tangelo Twist, Garden Green, Daffodil Delight & Pool Party Markers and stamped onto Whisper White Cardstock. I used the Deco Labels Framelits to cut it out with the help of the Big Shot. I wrapped a piece of Pool Party Cotton Ribbon around the box and secured it in place with Glue Dots. I adhered strips of coordinating Schoolhouse DSP designs to the back of the label with SNAIL, and attached the label to the box with Dimensionals.

I strung a piece of Crushed Curry Baker's Twine through a Brights Button and attached it and the bow with Glue Dots. Such a fun, quick and easy gift to put together!

I also wanted to share some pictures of the generosity of some amazing people. Operation Christmas Child is in full swing and we're getting ready to pack shoeboxes to send to needy kids all over the world. We've had generous donations of soap, shoeboxes, Beanie Babies, dresses & shorts made from men's shirts, and lots of monetary donations. We would be perfect candidates for an episode of Hoarders~Buried Alive right now!


And candy:)

Handmade stuffed animals:)

Neighborhood packing parties:)

Dresses made from men's dress shirts...

And shorts made from men's polos. I even made a pair! But I'll have to get a little more practice before they're blogworthy:) But...my Paper Pumpkin just got here, so time to take a break from OCC and get busy upstairs:) I'll be posting soon:) Thanks so much for stopping by!

Monday, October 19, 2015

ENDLESS THANKS CARD:


Hello there! Back with another CASE from the SU! site using the set Endless Thanks. This is also one I'll be making for our church Card Ministry. I just have to find time to make them...my Paper Pumpkin will be showing up any day, and it's going to be a challenge for me this month...flowers:( And I have my Nutty Notecards Class on Thursday~can't wait! I started with a Whisper White base and added another layer on top that I stamped with the Writing Notes Background Stamp in Pool Party.

I stamped the sentiment with Calypso Coral and Black Memento ink. The leaves were stamped with Wild Wasabi. I stamped several flowers in Calypso Coral And Blushing Bride ink and cut them out. I laid them where I wanted them and stamped the leaves with Wild Wasabi.

I stamped the small flower with Blushing Bride ink and glued the flowers down with Liquid Tombow. I popped a couple up with Dimensionals. I added Basic Rhinestones to the centers and added sequins from the Metallics Assortment with Glue Dots. I finished the card off with a couple of strips of Everyday Chic Washi Tape.

I also had fun decorating the flap on the envelope to coordinate with the card. I'm hoping to get started on all these cards for the church this week-end:)


This was a nice surprise from SU! They don't offer a discount on stamps very often, so don't miss out on this short event! I will be putting in an order on Friday, so let me know if there's anything you're wanting to order by 6pm. If you have any questions, please feel free to email me at: lmel09@q.com. Thanks so much for stopping by!


Sunday, October 18, 2015

SWEET STACK CARD:

Hello there! Here's a fun birthday card I'm making for our church Card Ministry using the set Sweet Stack. Our demonstrator magazine had this idea for us a few months ago and I loved it. It works for everybody! I started with a Crumb Cake base and used the coordinating Cutie Pie Thinlits to cut out the balloons and adhere them randomly.

I stamped the background image with Bermuda Bay ink onto Pool Party Cardstock, stamping off towards the bottom. I stamped the balloon tail with Whisper White Craft ink and heat-embossed it with White Embossing Powder. I then stamped the balloon with Crushed Curry ink onto Whisper White Cardstock and cut it out. I stamped the balloon image again with Watermelon Wonder ink again and cut out the 'celebrate' using my Paper Snips. This card ended up being more involved than it looked. I'm not looking forward to cutting out 12 of them 'celebrate's!

I then adhered them to the banner with Dimensionals.  I added a messy Silver Metallic Thread swirl behind the balloon and then attached it to the banner with Dimensionals. Instead of cutting out the Watermelon Wonder bows, I used the bows I had leftover from the Sweet Stack Project Kits I made awhile back. I adhered the bow with Glue Dots.

I finished the card off with a few sequins I took off of the Bermuda Bay Sequin Trim and adhered with Glue Dots. It's crazy how this looks like such a simple card, but it actually took a little work. Hopefully I can find some time soon to knock a dozen of these out! Check back tomorrow for more details about the 15% OFF STAMP SALE which starts tomorow! Thanks so much for stopping by:)

Saturday, October 17, 2015

A LITTLE SOMETHING CARD:

Hello there! Here's one of the cards I 'm making to give to our church Card Ministry. It features the set A little Something which can be found in the Holiday Catalog. I started with an Always Artichoke base and stamped the background leaves in the same color. I then made a mini file folder with Into the Woods DSP and the File Tabs Edgelits.

I added a Delightful Dijon banner made with the Banners Framelits and stamped the sentiment in Early Espresso. I made a border with a row of acorns and added a strip of In Color Washi Tape over the top. I then attached a paper clip with an Early Espresso Baker's Twine bow and added an Into the Woods Element with a Glue Dot.

I added a strip of Hello Honey Striped Ribbon to the base and stapled a piece to the tab using the Handheld Stapler. I added a piece of Bohemian Washi Tape and attached the file folder with Dimensionals.

I added a piece of Delightful Dijon Cardstock to the inside and stamped the sentiment with Early Espresso ink using the set Teeny Tiny Wishes.

I figured we're getting into the season where Get Well cards will be needed and I hope this one will help brighten someone's day.

And speaking of brightening someone's day....beginning Monday and going through Friday, October 23rd, SU! will be offering 15% off of all stamps! It doesn't include bundles or Hostess sets, but I'll have more details to share Monday. Thanks so much for stopping by:)

Friday, October 16, 2015

THANKFUL FOREST FRIENDS SQUARE CARD:

Hello there! I found another card on the SU! site that I wanted to CASE. It features the set Thankful Forest Friends again. I started with a Very Vanilla base and stamped the leaf image in Soft Suede and Old Olive ink, stamping off first. On top of that, I added a banner made with Farmer's Market DSP.

I used Soft Suede & Old Olive Markers to color the stamp and used the Deco Labels Framelits to cut out the label. I then cut out a few of the flowers from the Into the Woods DSP and adhered them with Liquid Tombow. I added a couple of Brights Candy Dots to the Rich Razzleberry flower centers.

Oops...better back up...before I attached the banner, I added a messy swirl made with the Silver Metallic Thread. I then finished it off with a few sequins from the Metallics Assortment and adhered with Glue Dots. I also used the Farmer's Market DSP to make a square envelope using the Envelope Punch Board.

Well I have some good news/bad news. Good news~My Paper Pumpkin has shipped this month and it's called Blissful Bouquet. Bad News~I saw a sneak peek and I kinda hate it. Definitely going to be a challenge this month! Stay tuned...Thanks so much for stopping by:)

Thursday, October 15, 2015

CELEBRATE BABY CARD:

Hello there! I'm back with another card made with the set Thankful Forest Friends that I swiped from the SU! website. And I am thankful for them~they're so darn cute:) I needed a baby card for a little boy and this worked perfectly. I started with a Soft Sky base and added a layer of Into the Woods DSP, which I brayered with Soft Sky ink before adhereing. I stamped the bear in Soft Suede and the fox & sentiment in Pumpkin Pie. The sentiment is from Crazy About You.

I attached the woodgrain design from Into the Woods DSP to a strip of Old Olive Cardstock. I then attached the Whisper White piece with the bear stamped on it to the top of the DSP with SNAIL. I wrapped a piece of Whisper White Baker's Twine around it and tied a bow.

I adhered the 3-layer piece to the card base with SNAIL and cut out the fox with Paper Snips. I attached the Expressions Natural Elements with Liquid Tombow and popped the fox next to the bear using Dimensionals.

I was so happy to come across this sweet little card for a sweet little baby:) Make sure to stop back tomorrow~I'm on a roll! Thanks so much for stopping by:)