Hello there! Happy St. Patty's Day to you. I hope you didn't overindulge on green beer last night! :/ Today I have a birthday card for you made with the SAB set Feeling Sentimental. I held out on getting this set for a long time. I liked it, but I didn't know what I'd do with it. I finally broke down, and this is what I came up with. My dad will be 80 this May, and I had initially made a card for him using the Sent With Love set-with the airplane. But I got to thinking, this is a milestone birthday, so I'm going to go with this one and save the other for Father's Day. It's quite astonishing that I'm thinking this far ahead~there may be hope for me yet! Along with Feeling Sentimental, I used the sets Memorable Moments and French Foliage-my go to set to add some age to a project. I used a Crumb Cake base and layered it with Early Espresso and Bravo Burgundy-a color I never use. I've been challenging myself to use colors that I normally don't, and I really liked this color combo.
I used the Big Shot and the Labels Collection Framelits to punch out the tag. I used Early Espresso ink and the Stamp-A-Ma-Jig to center everything. I initially used the 1" Square Punch for the numbers, but had to cut them down a little more to fit on the tag. I used the paper-Piercing Tool and mat to poke the holes and added a couple of Mini Brads. I popped the numbers up with Dimensionals.
I added a strip of First Edition DSP to the top that I distressed a bit, and wrapped some Early Espresso Baker's Twine around it to add some whimsy. I then stamped the sentiment twice onto Bravo Burgundy Cardstock and punched the words out with the Ticket Duo Punch. The whole word didn't fit onto the ticket, so I lined Celebrate up and layered it to spell out the whole word.
This isn't a typical style for me and I dinked around with this card forever, but I like the final outcome. I hope you do too! Can't wait to get back to my stamp room this week and come up with some more inspiration to share with you. Enjoy the sunshine today! Thanks so much for stopping by!
Sunday, March 17, 2013
Wednesday, March 6, 2013
HAPPY HELLO BAG:
Hello there! Today I have a happy little treat holder to share with you. I made this for my hostess this month using the Happy Hello Simply Sent Kit and Vine Street Embossing Folder-both SAB products that you can get for FREE with a $50 purchase, but only available for a couple more weeks! I started with a half of a sheet of So Saffron 12 x 12 Cardstock and ran it through the Big Shot using the Fancy Favor Die. I then ran it through again using the embossing folder. I then flipped the embossing folder around to emboss the other end of the cardstock. I assembled the bag with Sticky Strip and then cut the purse flap from one of the cards in the Happy Hello Kit. I scored it and attached it to the back of the bag with Sticky Strip. I used a Velcro Dot to close the flap.
I made one of the fun flowers from the Pop Up Posies Designer Kits and attached it to the purse flap with Glue Dots. The sentiment is from Made For You and is stamped in Crumb Cake ink onto Crumb Cake Cardstock and punched out with the Modern Label Punch. I tucked it under the flower with Glue Dots.
Next, I used my Crop-O-Dile to punch a hole on each side and ran a piece of Natural Trim Ribbon through the holes for a handle. I tied a knot on the inside of each hole. Then I filled it up with Cadbury Eggs-it holds a bunch! The brad in the center of the flower is Summer Starfruit, but I didn't have any 12 x 12 cardstock, so I used So Saffron, and you would never know they weren't the same color-they blend together perfectly! This would also make a nice Mother's Day favor. You may not see me back here for a few days while I knock out my 'Kits/Cards To Go', but I'll be back soon. Thanks so much for stopping by!
Tuesday, March 5, 2013
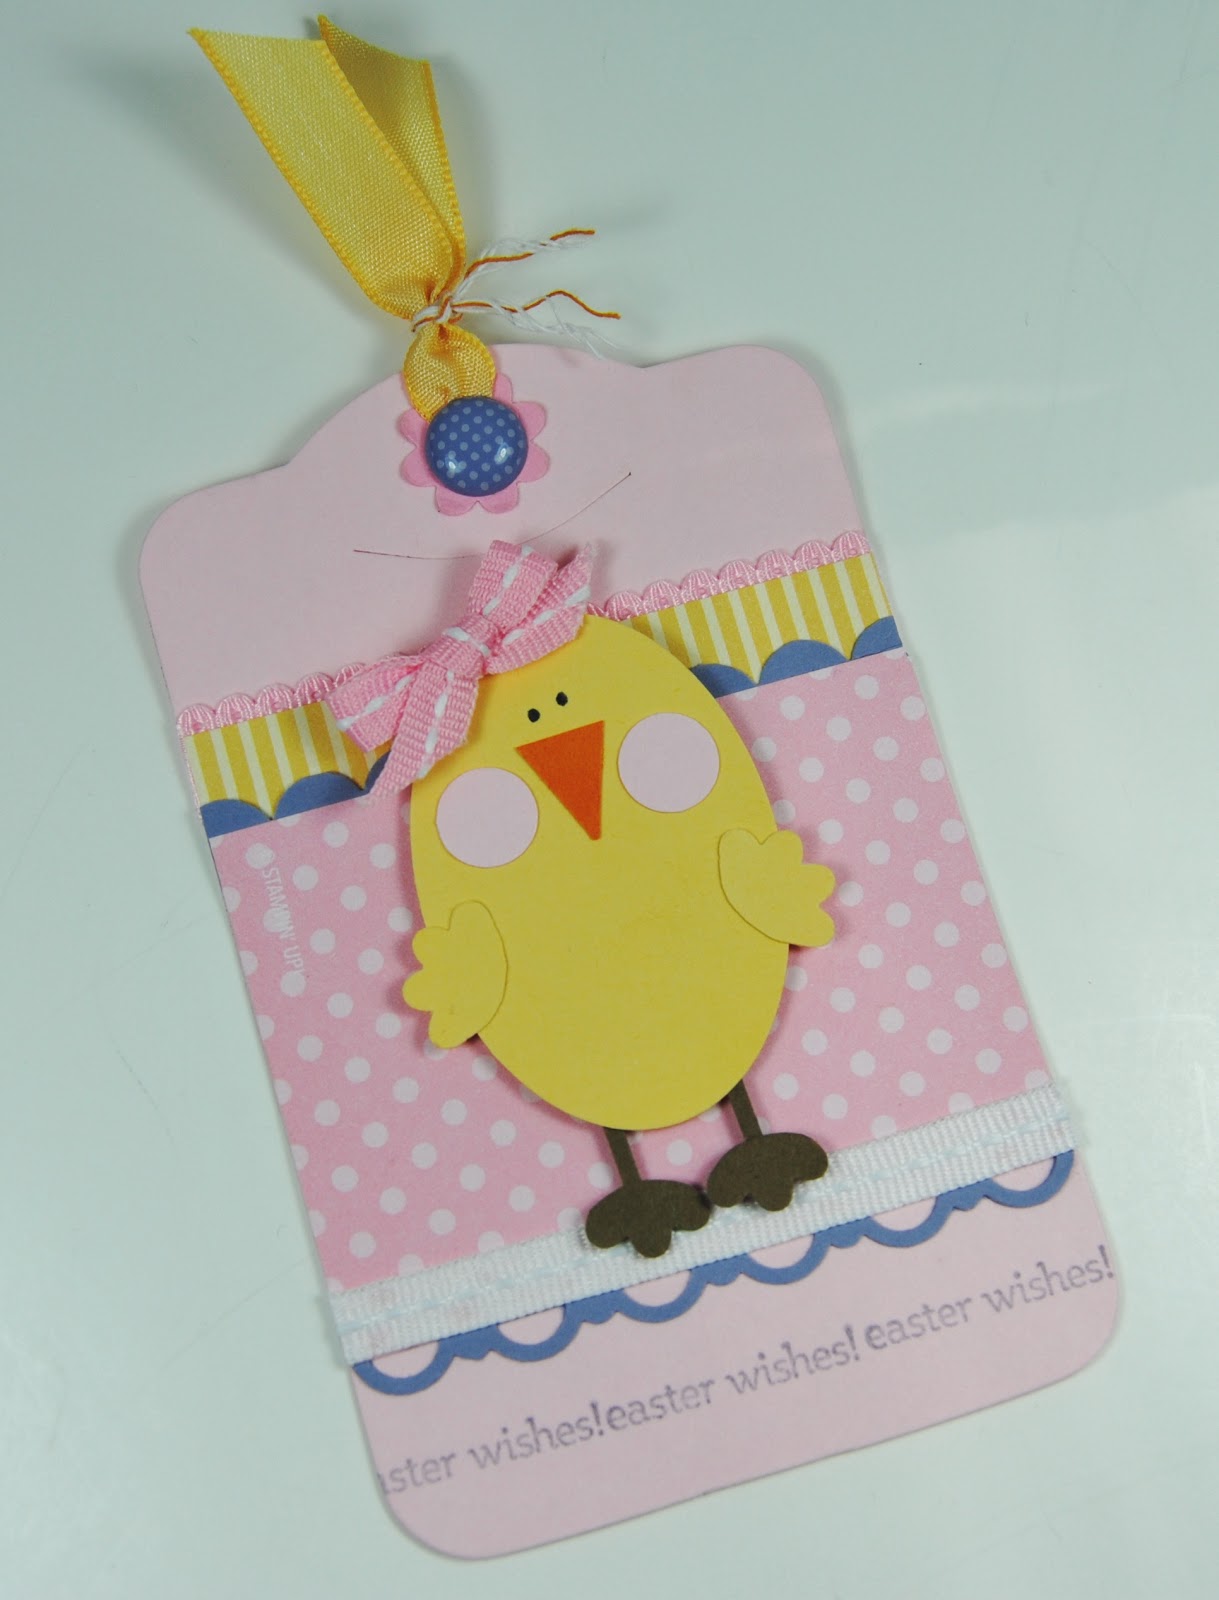
EASTER TAGS:
Hello there! Today I have some sweet little Easter tags to share with you. I was trying to come up with some Easter ideas, but I don't think a whole lot of people send out cards for Easter, so I thought these little guys might be a little more useful. In January I started cleaning out my stamp room, which included the much-overgrown closet. I had mounds of old magazines, and being the OCD freak that I am, I had to go through all of them to salvage any ideas that I thought I might need from them before I pitched them. What is wrong with me? Anyway, I got the idea for these tags from one of them, so I guess it wasn't a total waste! And I did get lots of ideas for my daughter's upcoming wedding-so I'm feeling a little better about the days that I spent going through all of them. So, onto the tags...
I made all 3 tags with the Two Tags Die and cut them out with the Big Shot. I also used the Extra-Large Ovel Punch for their bodies. For the bunny, I used Baja Breeze Cardstock and the Subtles DSP Stack. I used Whisper White and Pretty in Pink Stitched Ribbon, Pretty in Pink Scallop Dots Ribbon and Lucky Limeade Ruffled Ribbon. I tied some Lucky Limeade Baker's Twine through the Subtles Button and attached it to the tag with a few stacked Glue Dots. I also used the Scallop Trim Border Punch for the cute little border popping out in Whisper White Cardstock. I stamped the sentiment in Basic Grey with the Everybunny set.
For the bunny's ears, I used the Flower Folds Die, and his feet were made with the Modern Label Punch. For his fluffy tail I used the Boho Blossoms Punch and his nose was made with the Petite Pennants Builder Punch. I used the Basic Grey Marker to draw on his face and toes, and added a Baja Breeze Taffeta Ribbon bow. I glued everything together with Liquid Tombow Glue and popped him up with Dimensionals onto the tag.
I used Pink Pirouette Cardstock for this tag and again, used the Subtles DSP Stack. I used Pretty in Pink Scallop Dots Ribbon and Whisper White Stitched Ribbon. The scallop borders were punched out of Wisteria Wonder with the Scallop Edge Border Punch and Scallop Trim Border Punch. Let's face it...what punch DIDN'T I use? I used the Boho Blossom Punch for the flower detail at the top along with a Printed Designer Brad that I added after the So Saffron Taffeta Ribbon. I used some of my leftover Halloween Pumpkin Pie Baker's Twine to add a little detail to the ribbon. The sentiment is from A Little Bit of Spring and is stamped with Wisteria Wonder ink.
I made the chick out of So Saffron Cardstock, along with her wings and punched them out with the Boho Blossoms Punch. Her beak is Pumpkin Pie and punched again with the Petite Pennants Builder Punch. Her cheeks are Pink Pirouette and punched with the Itty Bitty Shapes Punch Pack. I used a Basic Grey Marker for her eyes and Soft Suede Cardstock for her legs, along with the Boho Blossom Punch for her feet. I gave her a sweet little Pretty in Pink Stitched Ribbon bow and attached it with a Glue Dot. Again, I popped her up with Dimensionals onto the tag.
And finally for this ducky little dude, I used Lucky Limeade Cardstock and the Subtles DSP Stack again. I used Pumpkin Pie Taffeta Ribbon along with Lucky Limeade Baker's Twine. I also used the Tasteful Trim Dit to make the Whisper White ric rac trim. I used the Owl Builder Punch for the circle at the top in So Saffron Cardstock. The sentiment is from Everybunny and stamped in Lucky Limeade ink.
I used So Saffron Cardstock for his body and Pumpkin Pie for his bill and feet. I used the Word Window Punch for his bill and the Modern Label Punch for his wings and feet. I used a Basic Grey Marker for his eyes and used the Tea For Two DSP for his little tie. I used the Jewelry Tag Punch and cut it to look like a tie. His little tuft of hair was made with the Owl Builder Punch.
My thought for the backgrounds was to mimic decorated Easter Eggs. I got a little carried away, as I often tend to do, but you could just use strips of different colored cardstock or DSP instead of all the ribbons and borders. I just couldn't stop once I got started! I hope you enjoy these little cuties and they inspire you to make some for your little Easter bunnies! Thanks so much for stopping by! Make sure to hop by tomorrow for a fun little treat holder. Stay warm!
Monday, March 4, 2013
WISHES YOUR WAY CARD:
Hello there! Happy sunny day! Let's hope it melts all the snow away for good! Sorry, I didn't get back here sooner. I keep forgetting how nutty-house my week-ends are! Today's card is the last of 9 choices for this month's 'Kits/Cards To Go'. Make sure to see the end of this post, where I'll have all the cards posted. Let me know your choices and if you'd like a 'Kit' or the completed cards. See my home page for the price options which are listed on the right hand side.
Okay, onto today's card. I used the set Wishes Your Way for the birthday sentiment and for the inside, which says ..blowing wishes your way. I also broke out my Pinwheel Die. It's a little tricky, but I'll share some tips with you that helped me assemble them. I started with a Rich Razzleberry base, another color that I don't tend to use, but loved how it worked with this card. The SAB Vine Street Embossing Folder gets the credit for the rich texture in the background. I used the Pumpkin Pie paper from the Polka Dot Parade DSP for the background, and the Marina Mist and Old Olive DSP for the pinwheels. I added a Daffodil Delight backdrop to one of the pinwheels made with the Extra Large Oval Punch, and added some matching ribbon for fun. A Brights Brad was added to each center. I borrowed the layout for this card from our Stampin' Success magazine.
I used the Big Shot to cut out the pinwheels, and like I said, it's a little challenging to put them together. The pinwheel has a tiny hole in the center and on each corner. I used the Paper-piercing Tool to poke out the DSP. Next, I used my Bone Folder to curl the side with the hole to make it a little more pliable. Then, I poked the Brad up through the bottom and lined the holes up on top of it. Once they're stacked up on top of each other, I held them in place, took the brad out from the bottom and stuck it through the top. After you practice a couple times, you shouldn't have any trouble. Or better yet, maybe you could have your grandchild help you out-I think smaller fingers is the key!
I stamped the sentiment in Old Olive onto Whisper White Cardstock using the Stamp-A-Ma-Jig to line it up perfectly. I ran a strip of the Silver Glimmer Paper through the Big Shot using the Tasteful Trim Die, glued it to the cardstock with Tombow Liquid Glue and attached the piece to the base. SU! is giving away a FREE pack of Silver Glimmer Paper for our 25th Anniversary, with every order that totals $150 through Sale-A-Bration. That's only until the 22nd of March, so if you're interested in getting some free Glimmer Paper along with lots of other freebies, let me know! Finally, I added a Brights Button that I threaded with Lucky Limeade Baker's Twine and attached it with Glue Dots. I initially had intended for this to be a male birthday card, but then I had to rethink that when I was looking at the sentiments for the inside. I wanted to stick with Wishes Your Way because the sentiments work so well with the pinwheels. But the twirly/whirly one wasn't going to cut it for a guy, and the blowing one, well, I decided I'm not going there, so a kid's card it is! Actually it would work for anybody who ISN'T a guy!
Okay, here's this month's choices. The number for each card is listed ABOVE the card. I need to know your choices and 'Kit/ Card' option by the end of the day tomorrow, March 5th:
1)
2)
3)
4)
5)
6)
7)
8)
9)
Okay these are the 9 choices. Let me know your selections by tomorrow night, and I'll get started on them. Make sure to stop back tomorrow-I have some sweet Easter tags to share with you. Thanks so much for stopping by! Enjoy the sunshine!:)
Wednesday, February 27, 2013
ANOTHER OH WHALE CARD:
Hey there! Back again with another Oh Whale card to share. I couldn't leave the girls out! I started with a Whisper White base and added 2 designs from the Sunshine & Sprinkles DSP-super fun paper! I used the Happy Whale Clearlit Die and Big Shot to cut out the whale and hearts. For the background, I used a piece of Basic Grey polka dots from the Neutrals Paper Stack. I also used a strip of Basic Grey Cardstock, wrapped a piece of Basic Grey Stitched Ribbon around it and added a bow attached with a Glue Dot.
I added one of our fun flower buttons from the Brights Collection and added a strip of Melon Mambo Cardstock through the holes. I held it down with a tiny piece of Sticky Strip on the back and then attached it to the whale with a Glue Dot.
I used the Paper-Piercing Tool and Mat to attach the Neutrals Brads and stuck them in the corner with Glue Dots. That wraps it up for this card. I think I'll go shovel one more time-hopefully and then I'm planning on stamping the rest of the day. I just may have something else to share with you today. Check back! Thanks so much for coming by!
OH WHALE CARD:
Hello there! Sorry I'm a little late with this post. I got a little lazy last night-maybe from all the shoveling:(. Better late than never though. This card was made with the adorable Oh Whale set. Continuing in my quest to use colors I haven't used in awhile, this card features Marina Mist and Pacific Point. I was thrilled to find out the coordinating DSP Sprinkles & Sunshine has both of those colors in it-score! I started with a Dafodil Delight base, cut a square of Marina Mist and layered it with 3 of the papers in the DSP. I used the 3" Circle Die with the Big Shot to cut out the circle. I stamped the whale in Pacific Point and added a Bitty Button with a strip of Pacific Point Cardstock run through the holes, and layered a Daffodil Delight circle underneath that was punched with the Itty Bitty Shapes Punch Pack. I attached it with Glue Dots.
I added a sweet little border in Daffodil Delight that was punched with the Scalloped Dots Ribbon Border Punch and attached it to the Marina base. Next I wrapped a piece of Pacific Point Stitched Ribbon around it and added the ribbon detail. I used the Happy Whale Clearlit Die to cut out the tiny anchor, whale and water drops. The whale image is clear so you can center it on top of the stamped whale and cut it out-using a Post It Note helps keep the die where you want it as you run it through the Big Shot. Or you can cut the whale out and use your Stamp-A-Ma-Jig to stamp the whale onto your die cut. I used the Paper-piercing Tool to poke a hole through the top of the anchor and ran some Island Indigo Baker's Twine through it and tied it to the ribbon. Finally, I added a row of stars along the bottom, punched them out with the 1/2" Circle Punch and attached them with Glue Dots.
I hope this added a little sunshine to you day. I'll be back later with another Whalecome card for a baby girl. Thanks so much for stopping by!
Monday, February 25, 2013
BLOOMIN' MARVELOUS CARD:
Hello there! As promised, I have another card for you made with a SAB set. The set is called Bloomin' Marvelous and I also used the Single Stamp Basic Label. This is also another set that didn't really appeal to me, But I'm really happy with how the card turned out. I've been trying to work a little smarter lately, and have been putting my Stampin' Success magazines to good use. I had remembered this butterfly from one of last spring's issues and thought it would work perfectly with this set. I started with a Very Vanilla base and layered it with a River Rock piece that I ran through the Big Shot using the beautiful Delicate Designs Embossing Folder. I added a piece of DSP from the Neutrals Paper Stack and stamped the butterfly image onto it in River Rock ink. I cut a very Vanilla strip and punched it with the Dotted Scallop Ribbon Border Punch, and then wrapped some Wisteria Wonder Ruffled Ribbon around it.
After I stamped the Basic Frame image in River Rock, I cut it out with one of the Apothecary Art Framelits. I stamped off the leaf images and stamped the sentiment in Wisteria Wonder ink. The butterfly was made with the Beautiful Wings Embosslit. I added the Linen Thread antenae with Tombow Liquid Glue on top of the Wisteria butterfly and attached the River Rock butterfly on top with Glue Dots. I used the Itty Bitty Shapes Punch Pack to make the dainty little flowers and attached a Basic Pearl in the center of each. I used the Tombow to glue the sides together and attached it with Glue Dots. I finished it off with a larger pearl on the label and a Wisteria Wonder Ruffled bow attached with a Glue Dot.
For the envelope, I used the Trust God set. One of the sentiments reads: Trust in the Lord with all your heart and lean not on your own understanding. I thought it worked perfectly with the sentiment on the card. Oh, I also added some Champagne Shimmer Paint into a spray bottle with alcohol and spritzed the card to give it some shimmer. This is a different style for me, but I really liked how it turned out-I hope you do too! Make sure to stop back tomorrow for a sweet little vvvvvvvvv (Quinten is trying to help me type :) whopper of a card. Thank you so much for stopping by!
Subscribe to:
Posts (Atom)