Hello there! Today I have some sweet little Easter tags to share with you. I was trying to come up with some Easter ideas, but I don't think a whole lot of people send out cards for Easter, so I thought these little guys might be a little more useful. In January I started cleaning out my stamp room, which included the much-overgrown closet. I had mounds of old magazines, and being the OCD freak that I am, I had to go through all of them to salvage any ideas that I thought I might need from them before I pitched them. What is wrong with me? Anyway, I got the idea for these tags from one of them, so I guess it wasn't a total waste! And I did get lots of ideas for my daughter's upcoming wedding-so I'm feeling a little better about the days that I spent going through all of them. So, onto the tags...

I made all 3 tags with the Two Tags Die and cut them out with the Big Shot. I also used the Extra-Large Ovel Punch for their bodies. For the bunny, I used Baja Breeze Cardstock and the Subtles DSP Stack. I used Whisper White and Pretty in Pink Stitched Ribbon, Pretty in Pink Scallop Dots Ribbon and Lucky Limeade Ruffled Ribbon. I tied some Lucky Limeade Baker's Twine through the Subtles Button and attached it to the tag with a few stacked Glue Dots. I also used the Scallop Trim Border Punch for the cute little border popping out in Whisper White Cardstock. I stamped the sentiment in Basic Grey with the Everybunny set.

For the bunny's ears, I used the Flower Folds Die, and his feet were made with the Modern Label Punch. For his fluffy tail I used the Boho Blossoms Punch and his nose was made with the Petite Pennants Builder Punch. I used the Basic Grey Marker to draw on his face and toes, and added a Baja Breeze Taffeta Ribbon bow. I glued everything together with Liquid Tombow Glue and popped him up with Dimensionals onto the tag.

I used Pink Pirouette Cardstock for this tag and again, used the Subtles DSP Stack. I used Pretty in Pink Scallop Dots Ribbon and Whisper White Stitched Ribbon. The scallop borders were punched out of Wisteria Wonder with the Scallop Edge Border Punch and Scallop Trim Border Punch. Let's face it...what punch DIDN'T I use? I used the Boho Blossom Punch for the flower detail at the top along with a Printed Designer Brad that I added after the So Saffron Taffeta Ribbon. I used some of my leftover Halloween Pumpkin Pie Baker's Twine to add a little detail to the ribbon. The sentiment is from A Little Bit of Spring and is stamped with Wisteria Wonder ink.

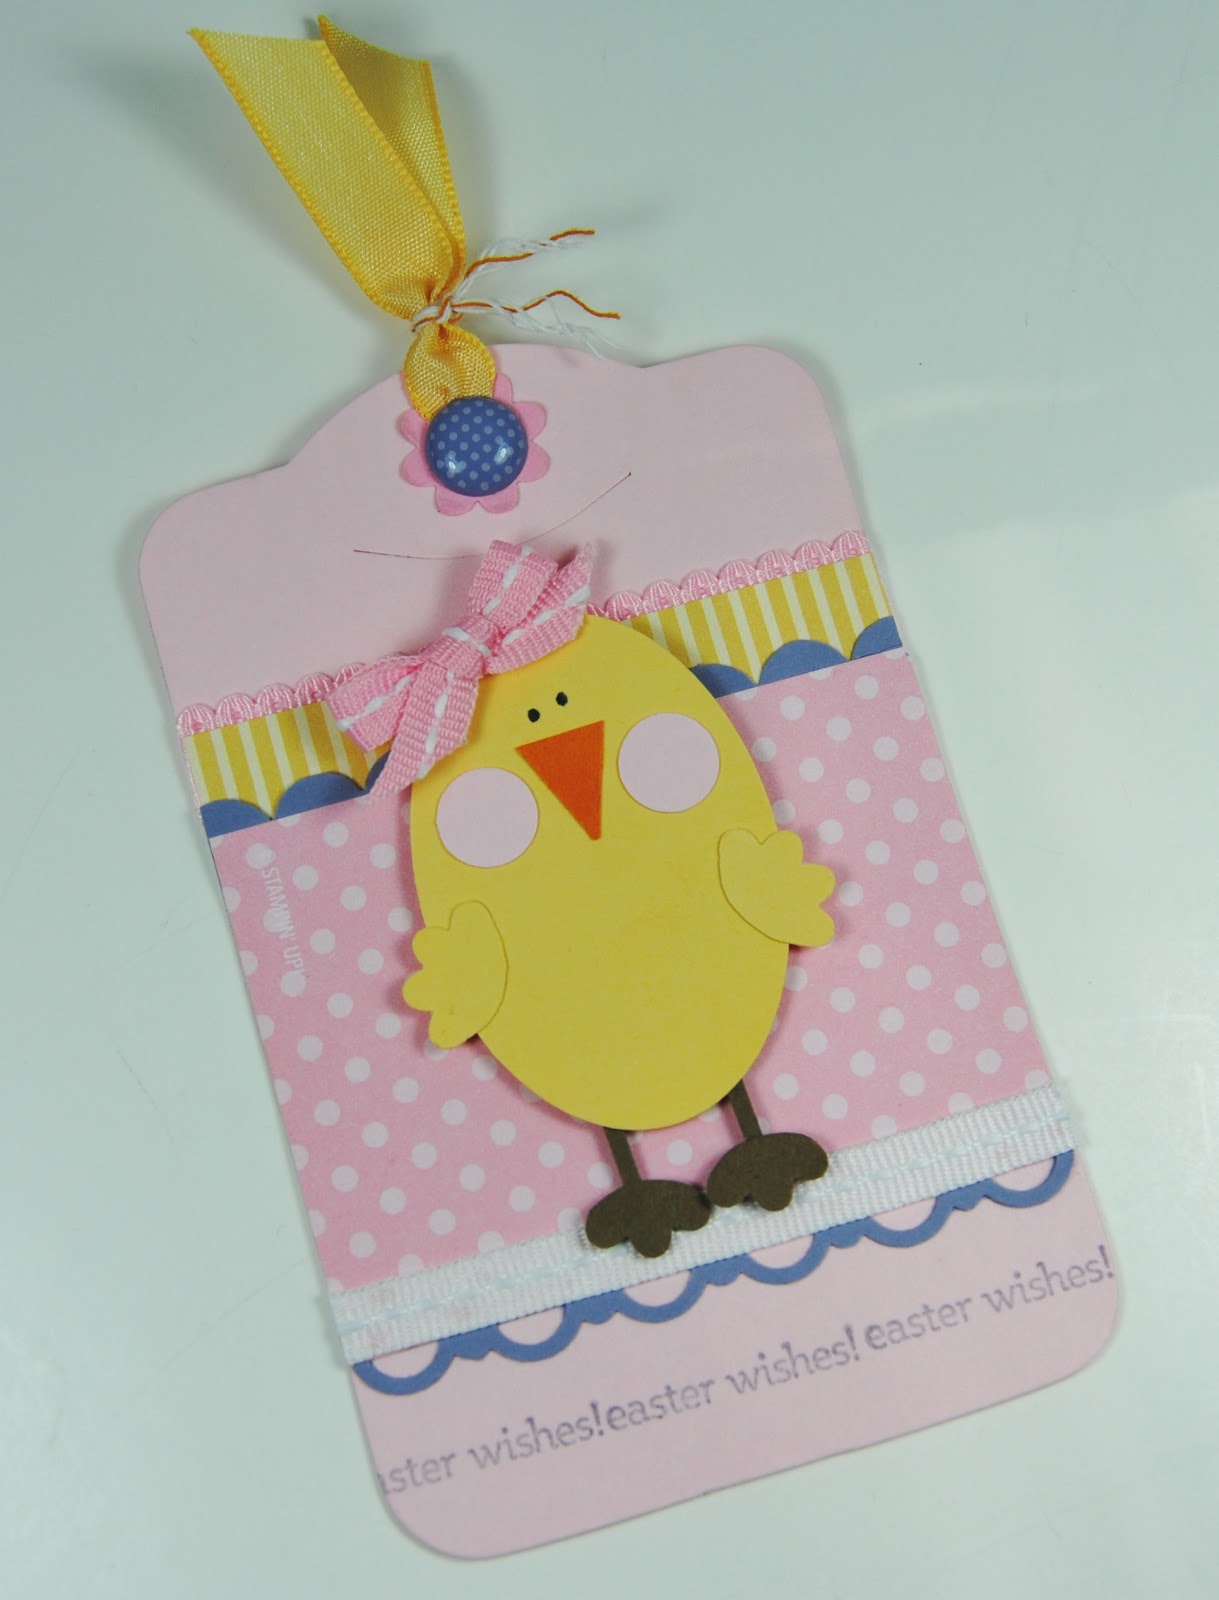
I made the chick out of So Saffron Cardstock, along with her wings and punched them out with the Boho Blossoms Punch. Her beak is Pumpkin Pie and punched again with the Petite Pennants Builder Punch. Her cheeks are Pink Pirouette and punched with the Itty Bitty Shapes Punch Pack. I used a Basic Grey Marker for her eyes and Soft Suede Cardstock for her legs, along with the Boho Blossom Punch for her feet. I gave her a sweet little Pretty in Pink Stitched Ribbon bow and attached it with a Glue Dot. Again, I popped her up with Dimensionals onto the tag.
And finally for this ducky little dude, I used Lucky Limeade Cardstock and the Subtles DSP Stack again. I used Pumpkin Pie Taffeta Ribbon along with Lucky Limeade Baker's Twine. I also used the Tasteful Trim Dit to make the Whisper White ric rac trim. I used the Owl Builder Punch for the circle at the top in So Saffron Cardstock. The sentiment is from Everybunny and stamped in Lucky Limeade ink.
I used So Saffron Cardstock for his body and Pumpkin Pie for his bill and feet. I used the Word Window Punch for his bill and the Modern Label Punch for his wings and feet. I used a Basic Grey Marker for his eyes and used the Tea For Two DSP for his little tie. I used the Jewelry Tag Punch and cut it to look like a tie. His little tuft of hair was made with the Owl Builder Punch.
My thought for the backgrounds was to mimic decorated Easter Eggs. I got a little carried away, as I often tend to do, but you could just use strips of different colored cardstock or DSP instead of all the ribbons and borders. I just couldn't stop once I got started! I hope you enjoy these little cuties and they inspire you to make some for your little Easter bunnies! Thanks so much for stopping by! Make sure to hop by tomorrow for a fun little treat holder. Stay warm!


So bright and cheery! Thank you for sharing!
ReplyDeleteJust like you! Thank you James!:)
ReplyDelete