Wednesday, December 21, 2016

NIFTY-GIFTIES:)

Hello there! Finally getting these gifts posted. It took me longer than I thought to get everyone's gifts to them and didn't want to post this until they had them:) I'm not going to go into a lot of detail as I have oodles of cookies to bake and decorate, but there will be lots of pictures:)

For some I used the Candy Cane Lane Suite.

I made gifts for my Club Members, Downline, Paper Pumpkin subscribers and those who gave me business throughout the year.

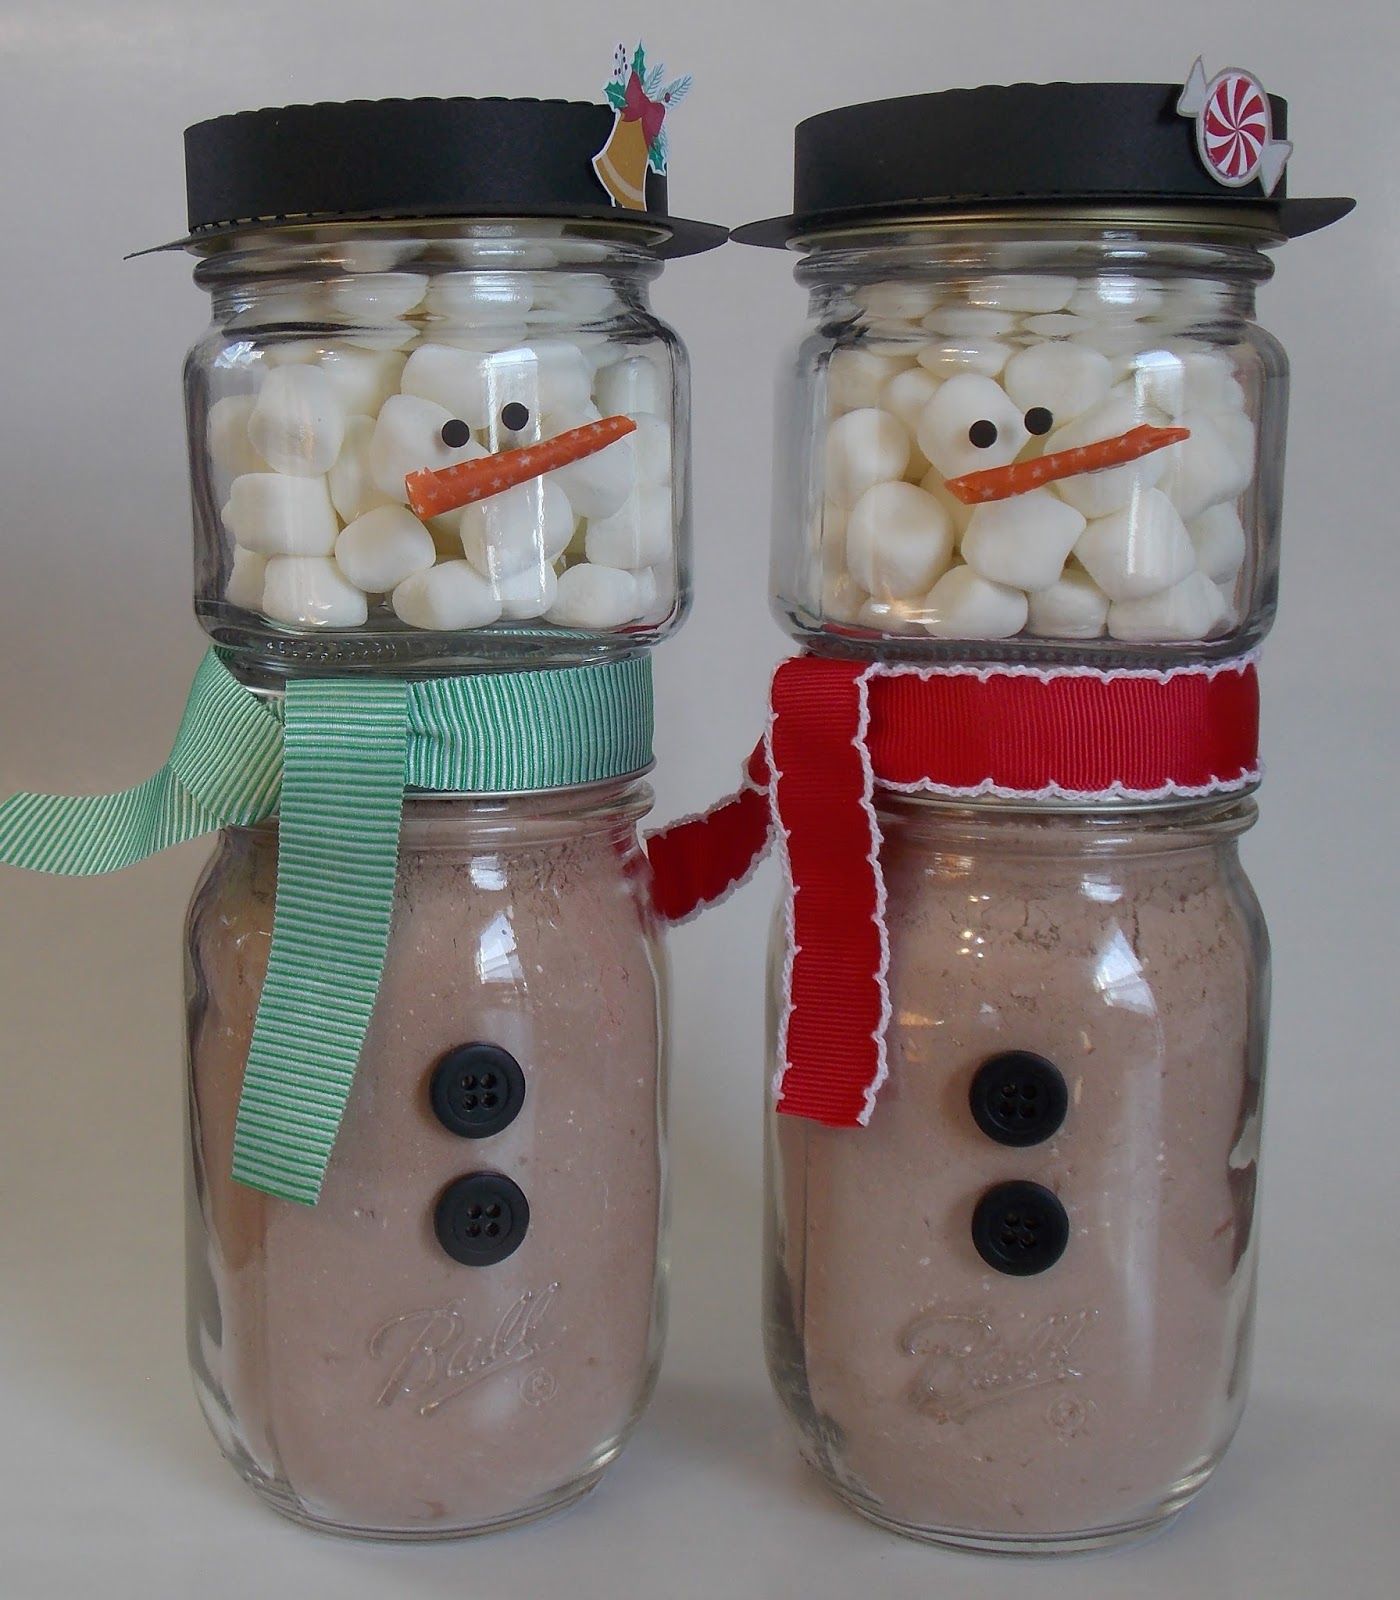
They each got a stamp set, as there were way too many good deals to pass up. Some got hot chocolate jars and some got boxes with macarons.


We went to St. Louis a few weeks ago and had to go into a candy store called Lolli & Pops. They had macarons and I've never had one so I decided to see what all the fuss was about. I decided I needed to share the love and that is what is inside the White Gift Boxes.

The gift boxes are great! You can decorate the acetate sleeves and slide them off to get to the goodies without destroying the box:)


Hopefully there's a few last minute ones out there who can use some ideas for 'wrapping up' your Christmas gifting-see what I did there?


The Holiday Catalog goes away January 3rd, so make sure you get everything you need before everything is gone for good.


I have one who likes to scrapbook so the Hello December Project Life worked perfectly for her:).

For some I used the Presents & Pinecones Suite.


Maybe you could use these last minute ideas to make something special for coworkers or someone special for Christmas:)


Again, sorry this is so last minute, but I hope it inspires you to share some crafty love:)

Last time I went to my stamp room, I had some help. I wonder how they do with cookies? Thanks so much for stopping by and I wish each one of you a very Merry Christmas! See you in 2017:)

Saturday, December 17, 2016

FLOURISHING PHRASES CARD:

Hello there! Back with my last card from my Card Buffet. This is another CASE from SU!, using the Flourishing Phrases Bundle. I started with a Watermelon Wonder base and stamped the background with the same ink. On top of that I added a piece of retired stripe DSP.

I cut out the flourish using the Flourish Thinlits from a Gold Foil Sheet and adhered with tiny drops of Liquid Tombow.. I then cut out the leaf using Pear Pizzazz Cardstock and attached with a Glue Dot. I stamped the sentiment with Watermelon Wonder ink onto Peekaboo Peach Cardstock and attached with Dimensionals.

I finished it off with a Whisper White Baker's Twine bow wrapped around the stem.

This is the last card of this month's Card Buffet choices. The all-occasion cards will still be available to make again next month, along with 6 new designs...maybe more:) We'll meet at First Christian Church on January 5th between 4-8pm. Let me know if you'd like to join us! Check back in the next day or two for lots of fun & festive projects. Thanks so much for stopping by:)

Friday, December 16, 2016

FLORAL PHRASES CARD:

Hello there! I'm winding down with the cards we made at my Card Buffet. This pretty wedding card was made with the Floral Phrases Bundle. I started with a Tip Top Taupe base and added a Very Vanilla layer which I ran through the Big Shot using the Detailed Floral Thinlits. Underneath the Very Vanilla layer I added a piece of Vellum Cardstock. I colored the floral stamp with a Clear Wink of Stella Glitter Brush and stamped randomly, covering the vellum. I adhered the vellum to the Very Vanilla Cardstock using tiny drops of Liquid Tombow.

I colored in some of the shapes with Wink of Stella where needed. I wrapped a piece of Tip Top Taupe Mini Striped Ribbon around the cardstock and tied a bow over the top using some retired gold cording. I stamped the floral image with Tip Top Taupe onto Very Vanilla Cardstock and used the Layering Ovals Framelits to cut out both ovals.

I added a piece of a Metallic Foil Doily to the bottom of the ovals and attached with Dimensionals, clearing the ribbon. I stamped the sentiment with Tip Top Taupe onto the same cardstock and attached to the ovals with SNAIL. I finished it off with a few sequins from the Gold Sequin Trim using the Fine-Tip Glue Pen.

I have 1 more card to share tomorrow and after that I'll have a bunch of Nifty-Gifty Christmas stuff to share, so plan to stop by. Thanks so much for visiting!

Thursday, December 15, 2016

STYLIZED BIRTHDAY CARD:

Hello there! Popping in with a quickie from my Card Buffet. This was by far the quickest & easiest card of the night. It's a complete CASE from SU! because I struggle with quick & easy...I'm just not wired that way. I used the single stamp Stylized Birthday and stamped it with Bermuda Bay ink onto Whisper White Cardstock.

Underneath that I added a piece of DSP from the Brights DSP Stack, and a strip of Tangerine Tango Cardstock that I adhered with tiny drops of Liquid Tombow.

I attached all that to a Bermuda Bay base and added a few Metallic Enamel Shape stars. That's all there is to that one:) Off to work on Christmas cards...I'm giddy:) Stop back tomorrow, I'll have something else to share. Thanks so much for stopping by!

Wednesday, December 14, 2016

FOXY FRIENDS CARD:

Hello there! Here's another CASE from SU! that I borrowed for my Card Buffet. It features the Foxy Friends Bundle. I started with a Crumb Cake base, and a strip of the same that I ran through the Big Shot using the Woodgrain Embossing Folder. I tied a bow around it with Basic Black Baker's Twine and attached to the base with Glue Dots.

I stamped the tree with Old Olive ink onto Whisper White Cardstock and cut it out using the Perfect Pines Framelits. I attached it to a piece of Soft Sky Cardstock with SNAIL. I stamped the fox with Pumpkin Pie ink onto Whisper White Cardstock as well. I used the Fox Builder Punch which coordinates with Foxy Friends set. The way the punch is laid out, I had to punch him out in sections. First his head, then his body and then his tail. I used Basic Black Archival ink for his face and legs. Photopolymer stamps make it a snap to get perfect placement:)

I attached his tail to his body with SNAIL, and attached them to the cardstock with Glue Dots. I added his head with a Dimensional. Before I adhered the fox & tree, I inked the heart word bubble up with Soft Sky ink. I used a baby wipe to remove the line and small heart before stamping onto the Soft Sky square.

I used Basic Black Archival ink for the sentiment, and attached the Soft Sky square with Dimensionals, clearing the baker's twine. Aside from the multiple stamping and punching, this card came together quickly & easily. I'm in the process of delivering some gifts to my Club Members, Downline & Paper Pumpkin subscribers. When I've got them all delivered, I'll share them with you, so stay tuned. Come back tomorrow for another card or some nifty-gifties") Thanks so much for stopping by!

Tuesday, December 13, 2016

BABY BEAR CARD:

Hello there! Back with another Card Buffet card. I used the sweet set Baby Bear. I started with a Sahara Sand base and added 2 designs of the By The Shore DSP. I folded a piece of Mint Macaron Sheer Linen Ribbon in a zig zag, and attached over the DSP using Tear & Tape on both ends.

I then cut out the circle using the Stitched Shapes Thinlits. I stamped the bear using the Two-Step Method-actually 3 step. I stamped him with the outline image in Chocolate Chip ink. I stamped over him again with the middle bear image, this time stamping off the Chocolate Chip ink. I stamped him a third time using the solid image with Sahara Sand ink. I stamped the sentiment with Chocolate Chip ink.

For the bow, I stamped off the solid image using Calypso Coral ink, and then stamped over it again full strength using the outline image. I stamped it onto Very Vanilla Cardstock and cut it out with Paper Snips. I attached the bow with Glue Dots and attached the circle to the card base using Dimensionals, clearing the ribbon.

I love this sweet little bear, which can be used for so many occasions. I also love how the DSP works for a boy or girl. Another great thing about this photopolymer set is that they numbered the bears so you can keep track of which image you used with which ink you used. Make sure to come back tomorrow, I still have lots to share. Thanks so much for stopping by:)