Tuesday, June 30, 2015

HAPPY THOUGHTS JUNE PAPER PUMPKIN:

Hello there! I've been so excited to share this month's Paper Pumpkin and had planned on posting all these fun projects sooner, but something burned up in our computer and we've been without one for almost a week! Talk about withdrawls:( But I think we're up and running again finally! The name of June's kit is Happy Thoughts, and 'happy' describes how I felt when I opened the box! Actually, I came up with so many ideas, you might want to go grab a bag of chips or make a pot of coffee...you're gonna be here awhile:)

This month's kit came with all the components to make 8 cards. This is one design, complete with envelope liners. Super cute!

And here's the other card...a more masculine version...which I love, as I struggle with these. It's really challenging to come up with alternate projects when the original ones are so cute, but I thought these could work for a baby as well.

And since our daughter Olivia is due to have her baby in a couple of months, that was the perfect inspiration I needed to come up with this card. She wants to be surprised on the gender, so I needed to come up with something that would work for a boy or a girl...and I think I delivered thanks to this month's kit:)


I cut 2" off of the bottom of the Calypso Coral envelope liner and used the retired pennant punch to cut out a pair of girlie pennants. I then wrapped some Bermuda Bay Bakers Twine around the pennant piece and then added a piece of the retired Calypso Coral Pompom Trim. I used the stamp set Something To Say for the sentiment and layered it all onto a piece of Soft Sky DSP from the Subtles Color Collection.

Our demonstrator magazine had a cute mini scrapbook idea using an Altoid's tin, so I stole the idea:)

I trimmed off some the Wild Wasabi envelope liner as well to have some extra coordinating DSP for this project. The sentiment is from Celebrate Today and stamped with Tip Tip Taupe ink, which is included in the kit. I used another Soft Sky DSP pattern from the Subtles Color Collection. I added a pair of retired mini clothespins.

I added a leftover piece of DSP to the lid. I used the Project Life Corner Rounder Punch for the mini scrapbook and the lid, but had to do a little more trimming on the lid piece. I used the 1/2" Circle Punch to cut a couple of notches out of the DSP for the bottom so the lid would shut properly. I put some of my wallpapering skills to use for the back around the hinges. Simply make a small diagonal cut in the DSP going towards the hinges, and then you can cut around them a little easier. I used an Xacto knife to cut around the hinges.

Our widest washi tape works great for decorating the inside of the tin. I used some retired Project Life tape.

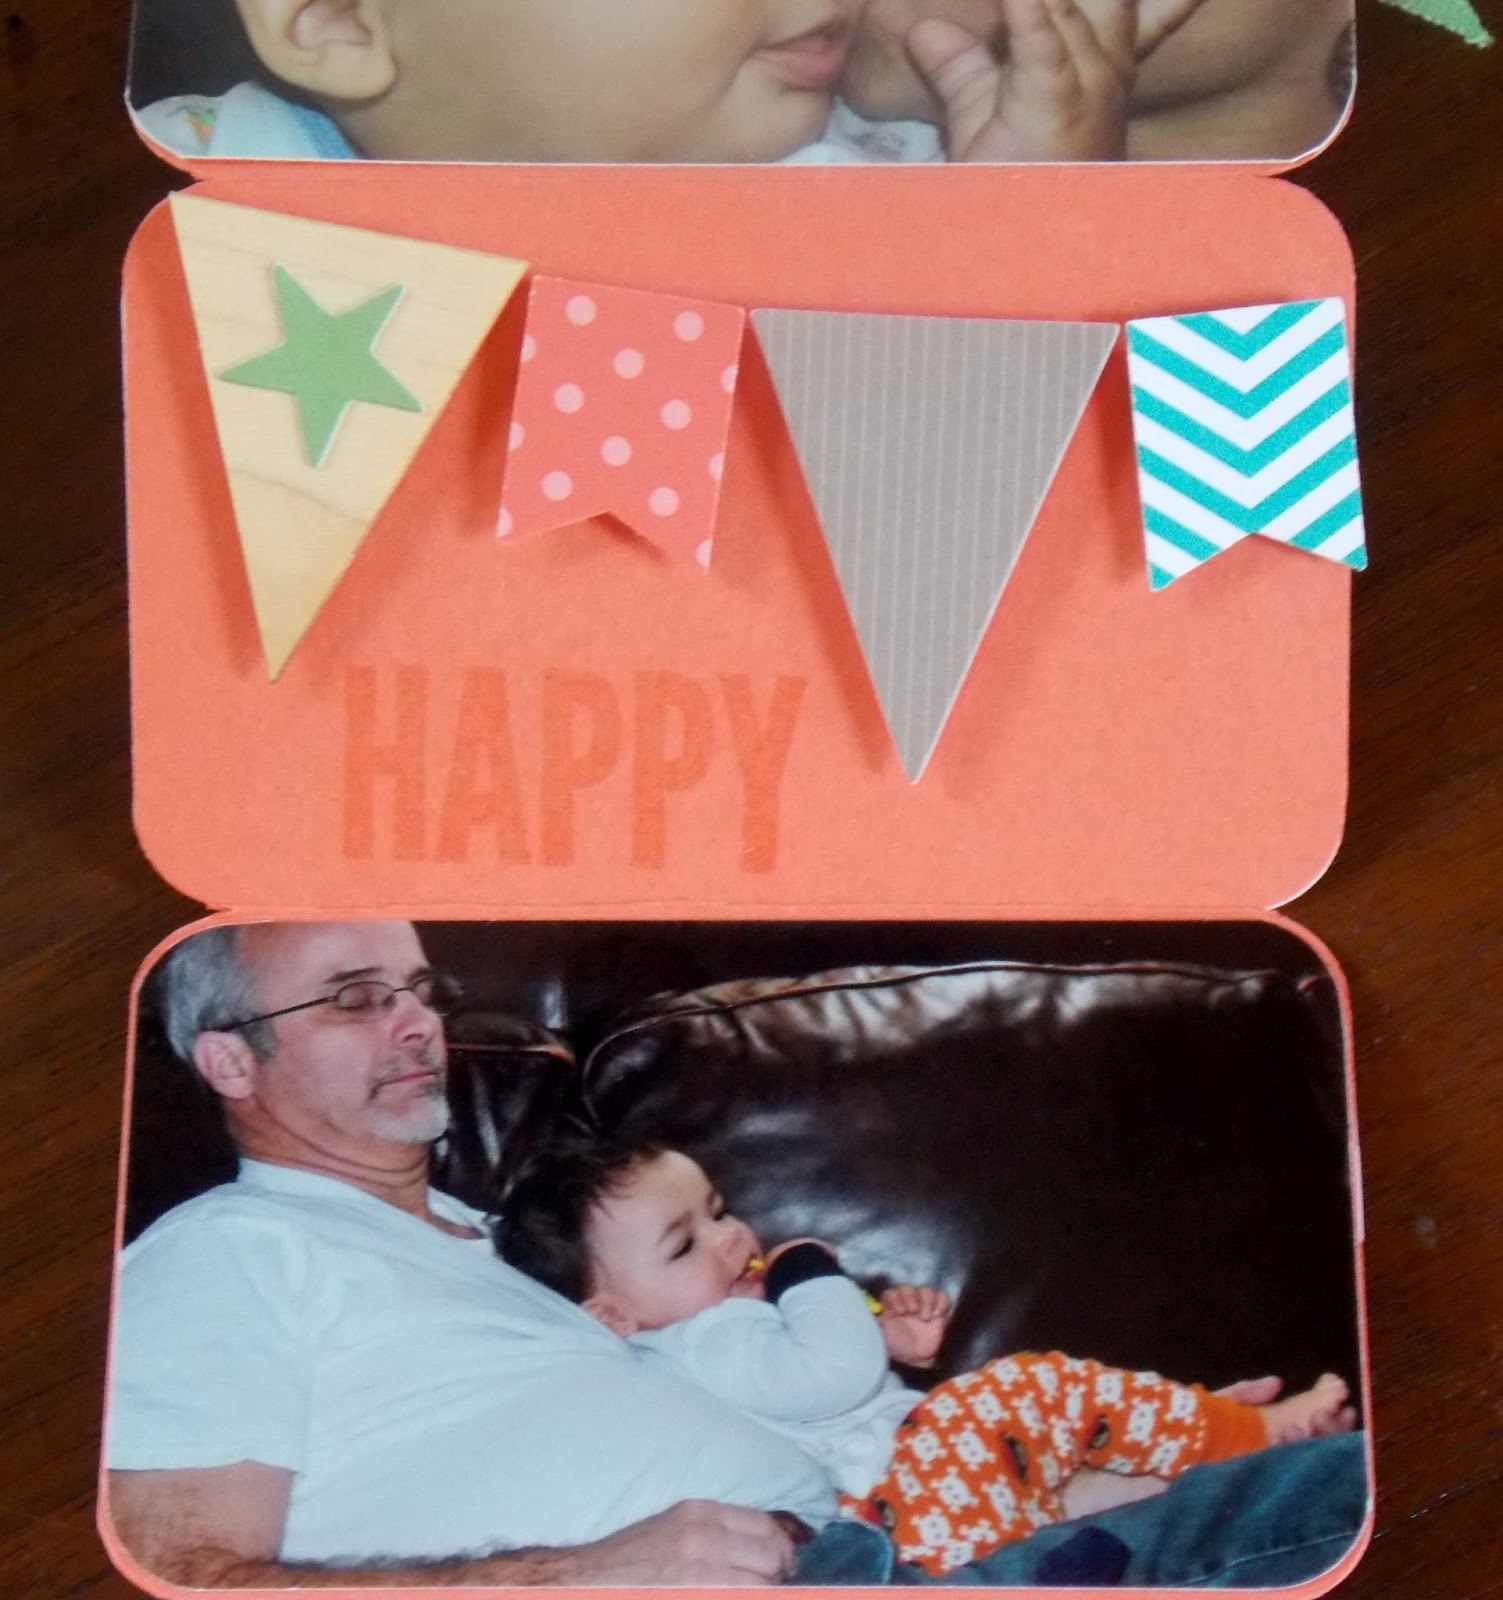
Here's the little accordian scrapbook that goes in the tin. I used a piece of Calypso Coral Cardstock, cut at 12" x 3 1/2". I scored each panel to measure 2 1/8". The end panel will be a little short of the 2 1/8", so I covered it with DSP to make it the same size.

I 'm planning on giving this to Olivia at her shower. I obviously don't have any pictures of the new baby, so I used some of Quinten, and will trade out when we have some of the new baby or I'll make another one. I used various DSP, washi tape and ribbons to coordinate with the Calypso Coral, Tip Tip Taupe, Bermuda Bay, Soft Sky and Wild Wasabi  color scheme. I used the Alphabet Rotary Stamp to add personalized sentiments.


I used the Scalloped Tag Topper Punch for the pocket. The stripe paper is from the In Color Envelope Paper and the Calypso Coral paper is from the Subltes Color Collection Stack.

The kit came with the fun little wood die cuts and they gave us a whole extra sheet~enough to do the scrapbook, a banner and a card:)

I had way too many cute pictures of Q, so I did the other side as well.

For the top, I stapled a piece of Wild Wasabi Seam Binding under the pennants and tied it around the scrapbook in a knot on the bottom.


The background pennants are from Celebrate Today stamped with VersaMark.


I also added some other pennants using the Banner Punch.

If that wasn't enough cuteness for you, there's more...

I made a banner for Olivia's shower by tracing the pennant shaped card onto Subtles DSP and using the extra wood cut pennants for a mini banner.

I added some Tea Lace Doilies and Tip Top Taupe lettering made with the Big Shot and an alphabet die. I used Clothespins to attach the pompom trim.

Here's some alternate cards...


I hope you're still with me, because the next part is really exciting! These are some of the surprises I've been working on for my Paper Pumpkin subscribers who will be attending my Pumpkin Party on July 30th! Inside are some essentials and I'm just saying  that there might or there might not be some chocolate:)

It's not too late to get in on the fun. I'm feeling generous today and want to give you one of these gifts as well. The first 4 subscribers  to sign up for Paper Pumpkin by July 10th, will each get one of these boxes of goodies! If you missed out on the June Happy Thoughts kit, not to worry...the refill is available for $8 to current Paper Pumpkin subscribers. So sign up and I'll have the stamp set and ink along with the above samples for you to make on July 30th when we meet. If you'd like to get in on this fun event or have questions, email me at lmel09@q.com or go to www.paperpumpkin.com to sign up. Thanks so much for stopping by!


Saturday, June 20, 2015

BASEBALL CARD:

Hello there! I just wanted to pop in here quick and share a Father's Day card I made for my son-in-law.  My daughter bought him Twins tickets and asked if I'd make him a card. This is what I came up with:)

I started with a Night of Navy base and ran it through the Big Shot using the Lucky Stars Embossing Folder. I then ran a piece of Whisper White through using the Banners Framelits. I used the Dots & Stripes Decorative Masks to draw the pinstripes with a Rose Red Marker. I printed off a couple of Twins logos and my printer didn't print a true red, so I had to go with Rose Red...but that's okay. It's a color I rarely use so I got to show it a little love.

As I said, I printed 2 of the logos and used the Circles Framelits to cut them out, but on one, I used a smaller circle and ran it through the Big Shot only til I felt a little resistance. I turned it and did the same on the other side and then used my Paper Snips to cut around the T and the s. I then layered the smaller circle on top using Dimensionals. I tied a piece of Whisper White Baker's Twine around the pinstriped piece and then tied a piece of Cherry Cobbler Baker's Twine over the top. I strung some more through a pair of Neutrals Buttons and adhered with Glue Dots.

The sentiment on the envelope is from a past Paper Pumpkin kit and worked great for this project. I was so happy with how it turned out and I hope Russ likes it too:) And speaking of Paper Pumpkin...I got an order from Mr. Brown yesterday with some goodies to make a surprise for each of my subscribers who are attending my Pumpkin Party on July 30th. I wasn't expecting it til Monday, but it came 3 days early! Love when that happens:) Thanks so much for stopping by!

Wednesday, June 10, 2015

BAKER'S BOX HOSTESS GIFT:

Hello there! I've been looking forward to today for the past 8 days. My SU! order came with lots of brand new goodies from the brand new catalog! I usually have to wait til 6 or so in the evening, but Mr. Brown came early today:( ) I got busy right away and made this sweet little box for my Hostess this month.

I used the new Baker's Box Thinlits Die for this cute little box and one of the brand new In Colors, Mint Macaron Cardstock. You need to run the die through twice to get 2 pieces for the box, but you'll only use 1 piece of 8 1/2 x 11" cardstock. I tried out the new Tear & Tape Adhesive and I LOVE it! So much quicker and easier than Sticky Strip:) I stamped the adorable polka dots in Mint Macaron ink using the coordinating stamp set Homemade For You, and saved 15% when I bundled them together:) SU! was really generous with Bundles in the new catalog~36, if I counted correctly:)

I cut a piece of Mint Macaron Dotted Lace Trim and folded it in half. I then layered a strip of Gold Sequin Trim over the top and stapled it to the top of the box. I stamped the sentiment onto Whisper White Cardstock and used one of the thinlits that came with the box to cut it out, with the help of the Big Shot. I cut a strip from one of the sheets of the In Color Envelope Paper and adhered it on the tag. I folded a piece of a Tea Lace Doily in half and adhered it on top. I added a generous amount of Liquid Tombow to the back of the tag and looped a piece of Gold Metallic Baker's Twine over it. You have a little bit of time to fiddle with it before the glue dries and get it how you want it. I added a couple of Dimensionals to the back and attached to the box.

I inked up the stripe image with Mint Macaron ink and carefully laid a Clothespin on the stamp to get the fun diagonal stripes. Finally , I added an In Color Blossom Accent to the Clothespin using a couple of Glue Dots. The box actually holds quite a bit. I put in 8 Dove chocolates, but I think it could have held double that...but I didn't have 'double that' left to put in it:)

I can't wait to go play with the rest of my new stuff! Speaking of playing with new stuff...today is the last day to sign up for Paper Pumpkin to get your kit in time for our Pumpkin Party on July 30th! Remember, you'll save 50% off your first 2 months if you're a brand new subscriber. Go to:  www.paperpumpkin.com to sign up and select me as your demonstrator. I've got lots of yummy treats in the works and some fun surprises too. Don't miss out on all the Pumpkin Palooza fun!!! See all the details on the June 4th post. Thanks so much for stopping by:)

Monday, June 8, 2015

APRIL PAPER PUMPKIN LOVE YOU A LOT:

Hello there! Sorry I didn't make it back yesterday. I ran out of light...and ideas. I thought this kit was so cute as is, I struggled to come up with alternative ideas, but I have a few for you.

Here's the stamp set that came with the kit and 2 Spots! Score:)

Here's the project made according to the kit's instructions. Like I said, cute, huh?

Kinda straightforward and simple...perfect for a guy:)

I plan to use these for my guys for Father's Day, so I didn't want to girlie-up too many. But I came up with one sweet alternative.

I really didn't want to cut out all those tiny flowers by hand, and then it hit me that the brand new Tree Builder Punch would do the work for me:)

For this one, I folded the flap down and made a little gift card holder.

I used 25" of twine instead of the 10" the instructions call for. I doubled it up and thread it through the hole.

I wrapped the twine around the gift card holder and brought it down through the hole.

I then pulled it between the 2 pieces of twine and tied a bow.

 Don't want to shell out money for a gift card? The old stand-by will always do:( )

This one could work for either a guy or a gal, leaving dude off obviously.

This one will be for Russ, he's definitely not a bow tie kind of guy...

And poor Dominique will probably get the unisex version.

This will be for my sweetie...

...and I'll put a gift card inside from all of us. I'll also give him one just from me that won't be fit for anyone else's eyes:0


I don't know who came up with this idea originally, but it's all over Pinterest and it's a brilliant way to recycle your Paper Pumpkin boxes:) I used 2 of the DSP bases that came with the kit.

Finally, here's a fun little 'outside of the box' box that you can make using 2 of the pocket cards. One of the SU! artists came up with this but I couldn't find instructions for it anywhere, so I did my best. I think their version was a little smaller, so they must have scored along the bottom somewhere and folded the box down a bit in height. I'm horrible at trying to explain these kind of things, so hopefully the photos help?

Take 2 of the pocket pieces and cut them at 2" from the bottom score line. Score the short piece down the middle at 1 1/2" and cut up to the bottom score line.

Cut a piece of Crumb Cake Cardstock to 3" x 2 1/2", or Kraft would be better if you have it. Along the shorter sides, score at 1/2" as shown.

Remove adhesive backing and glue as shown.


It should look like this...minus the pencil marks:)

My score line was off a hair and didn't make a flush base for the bottom, so I scored another line to make it a bit smaller and it solved the problem.

Again, remove all adhesive backing and glue as shown.

Attach to other half of gift box as shown.

Yours will look better than mine, but the inside of the box won't be real pretty. But it's for a guy, so...

You can cover the bottom to finish it a little better if you want. I used a piece of Crumb Cake Cardstock measuring 3 x 1 1/2".

Finally, score both flaps at 1" and glue together.

Decorate as desired. Tip: put the treats inside before you glue the top shut:)

That's all I've got for you today. In a couple days I'll get notification that my June Paper Pumpkin is on it's way. I'll know the name of the kit, but that's it...and so the speculation will begin. So much fun! If you want to get in on the fun and join us at our Pumpkin Party, make sure you sign up by Wednesday! Thanks so much for stopping by:)