Saturday, March 30, 2013

RAIN OR SHINE CARD:

Hello there! Today I have a card for you made with the set Rain or Shine. I needed a couple of cards today for a shower for twin girls, so make sure to check out the end of this post to see how I changed it up to work for twins. I started with a Certainly Celery base and added some DSP from the Subtles Paper Stack to the top and bottom. I added a strip of Pool Party Cardstock that I punched with the Scallop Dots Border Punch.

On a scrap of Whisper White Cardstock, I stamped the umbrella in Pretty in Pink ink and cut it out. I got it positioned where I wanted it on a piece of Whisper White and stamped the handle in Certainly Celery. I colored the band with a Rich Razzleberry Marker. I moved the umbrella out of the way and stamped the handle. Using the Stamp-A-Ma-Jig, I centered the umbrella over the handle and stamped it again in Rich Razzleberry to get the hearts along the bottom-which I did not want to cut out! I attached the pink umbrella over the Razzleberry one with Dimensionals, and then added a Brights Brad using the Paper-piercing Tool and Mat. I used the Stamp-A-Ma-Jig again to line up the sentiment. Oops, I should back up...before I added the brad and pink umbrella, I stamped the heart image off in Pool Party ink, and stamped the shower of hearts. Before I adhered the Whisper White Cardstock, I wrapped a strip of Pool Party Ruffled Ribbon around it, and then attached it with SNAIL.

Finally, I added a bow with a Glue Dot and added a couple of Subtles Buttons with Pool Party Baker's Twine through the centers. I attached the buttons with Glue Dots.


The Rain or Shine set has the sentiment for a bridal shower also, so it's very versatile.


For the shower today, I made the card horizontal and added another umbrella. I stamped the adorable potted baby image from the Hostess set Happy You on the envelope, and it looks really cute to add the drops of water or hearts over the baby.

I also made each of the girls a name frame to coordinate with their bedding. I wasn't too sure about pairing Rich Razzleberry with the pastels, but those were the colors in the crib set. And actually, it grew on me-I liked how it all coordinated when everything was done. Sorry the frames didn't photograph too well. I should have taken the glass out before I took pictures, but I had already cleaned it and wasn't going to again!

These banners may look familiar to you. I took the idea from Shelli's Easter baskets that she made for her grandkids. You can see her adorable creations at www. soshelli.com.

I used the Spring Sampler and the fun new photopolymer set Designer Typeset-totally clear, and totally sticky!. I used Whisper White, Pretty In Pink, Certainly Celery and Pool Party Cardstock. I used the Subtles and 2011-2013 In Color DSP Stacks, along with Tea For Two and Summer Smooches DSP.

I used Rich Razzleberry, Pretty in Pink and Pool Party ink. I used the Paper-piercing Mat and Tool to poke holes in the banners and strung Whisper White Baker's Twine through them. I used the Petite Pennant Punch and Itty Bitty Shapes Punch Pack for the little flowers. I also used the Big Shot along with the Petal Cone Die and Hearts A Flutter Framelits. I used the Perfect Polka Dots Embossing Folder to add a little texture. Finally, I added a little bling with a Vintage Faceted Button and a couple of Basic Rhinestone Jewels.


In addition to Jessica's 4 month old twin girls, she has 2 young boys also and I didn't want to leave them out. I made Andrew a name frame using Polka Dot Parade and Storytime DSP. I used Whisper White, So Saffron, Wild Wasabi, Pool Party and Riding Hood Red Cardstock, and Pumpkin Pie and Wild Wasabi ink.


I used a Brights Brad and Linen Thread to string the banner together.


I used the Chevron, Stripes and Argyle Embossing Folders. I added a Naturals Button and threaded it with Cherry Cobbler Baker's Twine. I used a stapler on some of the pennants.

For Landon's frame, I used Sunshine & Sprinkles DSP and Lucky Limeade, Pacific Point, Daffodil Delight and Basic Grey Cardstock. I used Pacific Point ink and Island Indigo Baker's Twine along with a Silver Basics Button.

Well I still got some baking to do and cleaning, ugh! It's so pointless with a 15 month old on the loose, but I guess I'd better get to it. I'm singing at church in the morning and have caught Quinten's cold-I pray that I don't sound like Kermit the Frog in the morning! Thanks so much for stopping by and have a wonderful Easter!


Friday, March 29, 2013

MY PAPER PUMPKIN CARDS:

Hello there! Happy Spring finally! I hope you got to get out and enjoy this beautiful day! I was busy in my stamp room most of the day, but I did manage to get out for a bit and I had my window open all day.

I got a visit from My Paper Pumpkin this month. I wasn't sure if I really needed to sign up for it, but the thought of being left out got the better of me! If you're not familiar with My Paper Pumpkin, it's a subscription for a fun little box of creativity that comes right to your door every month. This is one monthly gift you'll WANT to get! All the stamps, ink, paper and accessories are included to create cards, journals, decor and more! And what's most exciting is that it's a surprise every month! This is what came this month-enough supplies to make 4 of these cards, including envelopes. The card bases are really cool-Basic Grey on the front, but white on the inside. Like I said, the kit comes with the stamps and a Clear Block D. It also came with the stickers shown, buttons and a Basic Grey Stampin' Spot.


I juggled things around a little and stepped it up a bit with a strip of Tempting Turquoise Cardstock, a couple extra circles punched in Basic Grey and So Saffron, and some Lucky Limeade Baker's Twine. I love the splatter image and the fun sentiment. Another reason I wanted to sign up is that the stamps and accessories are exclusive and limited to that month's kit only-meaning the only way to get them is by joining the Paper Pumpkin craze!

Another benefit of these kits is that they can be completed in 30 minutes or less-seriously!

And you use up almost all of the supplies! This is all that you have left over. So, if you don't have a lot of time to devote to papercrafting, or you don't want to stockpile a bunch of supplies, My Paper Pumpkin may be the perfect fit for you! You could easily store several months of leftovers into one of the boxes you receive.  Membership for MPP is $19.95 and shipping is included! They ship around the 15th of the month. You need to sign up by the 10th of the month to get that month's kit. So you would need to sign up for MPP by April 10th to get April's kit. And like I said, it's a total surprise that will come right to your front door! If you decide it's not for you, you can cancel at any time.

Or...if you're afraid of commitments, you can order the Try It Kit for $16.95. It's a one time deal that you can try out and see what you think. The Try It kit comes with 2 of the mini journals shown above. They can literally fit into your shirt pocket-that's how cute and adorable they are! The pages have a fun grid design and you get a sheet of butterfly stickers, with plenty left over for another project! The Try It Kit also comes with a Clear D Block and the 2 stamps shown above. It also comes with exclusive Summer Starfruit Baker's Twine and an Island Indigo Stampin' Spot.

I hope you'll think about signing up for the monthly subscription, or giving the Try It Kit a shot-they're lots of fun, and who wouldn't want to get a surprise in the mail every month? If you're interested, email me at: lmel09@q.com, or go to www.lauramellinger.stampinup.net and check out all the details about My Paper Pumpkin. Remember, you need to sign up by April 10th to get the next kit, whatever it might be??? Thanks so much for stopping by!

Thursday, March 28, 2013

SWEET THREADS DUO:

Hello there! I have another two-fer for you today! I think the Sweet Threads Simply Sent kit in the Spring Mini is adorable. The cards in the kit were cute enough, but I thought I'd add a little extra cute to them. I didn't really realize you need schooling on cross-stitching, but apparently I do because the back of mine didn't look like the illustration in the instructions. But I was pretty happy with how they turned out. They were a little more time consuming than I thought they'd be, but then again, maybe I didn't know what I was doing!

First, I stamped the sentiment as the directions advise you to. The stamp set Sweet Essentials comes with the Bundle and saves you 15%! I stamped the sentiment in Lucky Limeade, which is the color of the printed card. After I finished the cross-stitching, I added 4 Dimensionals to the back. Next I cut a strip of Primrose Petals DSP from the 2012-2014 In Color Paper Stack. I added an inch of the polka dot pattern to the end of the strip with SNAIL before I folded it over and attached it to the card front. Next, I added the Whisper White piece. I wrapped some of the Lucky Limeade embroidery floss (included in the kit) around the DSP and tied it in a knot. I added a Silver Basics Button that I
 threaded with Primrose Petals floss and attached it with Glue Dots. Finally, I tied a tiny bow out of the floss and glued it to the flower.

For the birthday card, I cut a strip of DSP from Patio Party and adhered it to the Primrose Petals cardfront. I added a piece of Lucky Limeade Ruffled Ribbon and attached it with Sticky Strip. I then layered the Whisper White piece on top with Dimensionals and added a bow with a Glue Dot. I added a little detail to the cupcake with the Itty Bitty Shapes Punch Pack and Summer Starfruit Cardstock. I punched out 2 flowers, pierced then with the Paper-piercing Tool nd mat and attached a Neutrals Brad to the center. I attached the flower with a couple of Glue Dots.

As you can see, my cross-stitching can use a little work, but I think it still turned out cute. Both of these cards will be options for the 'Kits/Cards To Go' this month, and I'll leave the stitching for you! I used all of the strands in the floss, but I think it may look a little better if you use fewer strands. The directions said all the strands were used on the samples, but theirs look a whole lot better than mine...again, it could be the one behind the needle!

If you're thinking about getting this Bundle, you may want to consider adding the set Hoop La La that I used on the envelopes. It goes perfectly with the kit. I hope you like these sweet threads and will consider trying out some cross-stitching. Thanks SEW much for stopping by!

Wednesday, March 27, 2013

WONDERFEUL MOTHER/FOR THE BIRDS CARD:

Hello there! Looks like we might be getting a little closer to spring...let's hope! Today, I have a Mother's day card for you using Wonderful Mother and For the Birds. I started with a Whisper White base and added 2 prints from Twitterpated DSP. I added a strip of Rose Red that I ran through the Scallop Edge Border Punch. I tied a piece of the lovely Two Tone Ribbon in Pink Pirouette around it and tucked a sliver of a Tea Lace Doily underneath. I added a couple of the roses from the Flower Trim and went over them lightly with a Pink Pirouette Marker.

I love the look and feel of this ribbon, but I was having a hard time finding what to put with it. I noticed one of the ends was frayed and the threads were Rose Red, so that's what I went with.

I stamped the image in Basic Grey onto Whisper White Cardstock and punched it out with the 2 1/2" Circle Punch. I used Pink Pirouette and Rose Red Markers, and a Blender Pen with Baja Breeze, Lucky Limeade and Basic Grey Pads. I used a pencil eraser in Baja Breeze for the polka dots and added some Dazzling Details sprinkled with Dazzling Diamonds for some extra sparkle.

I stamped the sentiment in Basic Grey onto Pink Pirouette Cardstock and punched it out with a 1 3/8" Circle Punch. I finished it off with an Antique Brad that I took the prongs off of, and attached it with a couple of Glue Dots.

I was happy with the soft, delicate feel of this card. I made this card after I made a card to coordinate with the Floral District bag and gift card easel for the St. Louis Regional. I liked the layout and decided to duplicate it for this card. Here's the initial card I came up with:

Like I said, everything was pretty much the same except I used Floral District DSP and Tangerine Tango and Daffodil Delight Cardstock. I used the Scallop Dots Ribbon in Tangerine Tango and attached the bow with a Glue Dot.


For the background, I used a Sponge Dauber in Baja Breeze. I also added a couple of Baja clouds punched with the Cupcake Builder Punch.


I finished it off with a couple of Brights Buttons and Whisper White Baker's Twine.


For the envelope, I duplicated the same detail that I used on the bag. Here's the bag and gift card easel that this card coordinates with:


I hope you like these bright and cheery cards that I have for you today. Stop back tomorrow for a couple more fun projects. Thanks so much for stopping by!


Tuesday, March 26, 2013

HENRY SAYS/PURE GUMPTION CARD:

Hello there! As promised, I have a much shorter post today! This graduation card was made with Henry Says and Pure Gumption. I thought they worked really well together. I started with a Riding Hood Red base and stamped the sentiment and flags in Midnight Muse. I stamped Henry in Midnight Muse on Whisper White Cardstock and added a Summer Starfruit border. I used the Stamp-A-Ma-Jig to align the birds on his trunk and used Riding Hood Red, Midnight Muse and Baja Breeze Markers to color the birds. I stamped the pennant in Summer Starfriut, cut it out and adhered it with SNAIL.


Again, I used the Stamp-A-Ma-Jig to stamp his cap exactly where I wanted it. Next, I stamped Henry in Midnight Muse DSP from the 2012-2014 In Color Paper Stack, cut him out and adhered him with SNAIL. I stamped the cap in Riding Hood Red Cardstock twice and cut them both out, one only the top of the cap. I adhered the cap with SNAIL, and for the top of the cap, I added a Regals Brad and attached it to the cap with a Dimensional.


Next, I stamped the pennant image 3 times on Whisper White-once in Summer Starfruit, once in Baja Breeze, and once in Midnight Muse. I cut each of the pennants out and adhered them onto the stamped pennants with Glue Dots. Finally, I threaded a Naturals Button with Linen Thread and attached it with Glue Dots.

This was a fun card to make and hope it will inspire you to make some for any upcoming grads you may have. Thanks so much for stopping by! I'll see you back here tomorrow with a Mother's Day card...or two!

Monday, March 25, 2013

ST. LOUIS REGIONAL PROJECTS-YOU DIDN'T SEE!:

Hello there! So sorry for the gap in posting, but I had a crazy week-end, well week, actually. My friend Jamie Hurley and I made plans to attend the SU! Regional in St. Louis this past week-end. I had some projects lined up to share with you, when I got a call on Monday from Andrea at the Home office asking if I would be interested in being a Workshop Wow presenter! #%*@ NO! is what I was thinking, but 'Sure, I'd love to' is what came out. I was excited and horrified at the same time! For about 2 days, I felt like I had just gotten off of the Tilt-A-Whirl, but when I had my projects figured out, I was really excited to share them. I was more than a little freaked out though every time I thought about being on stage in front of 500 demonstrators with a camera over my shoulder! So I went out and got my nails done, bought a new outfit (which was an agonizing process!), new jewelry and boots, new bra, socks and underwear-no time to do laundry, and paid a rush alteration fee to have my pants shortened. When I got home from my exhausting shopping trip, I had planned on making one more project. But I came home to my poor hubby on the couch with the flu with our precious little 15 month old grandbaby terrorizing him. So I decided to tag off and let him go to bed, and figured 3 projects was going to have to do.

The next morning I woke up to the sound of our daughter hurling her little guts out, on her birthday of all days! I gotta say, I was glad to be getting out of there! I picked up Jamie and we were on our way. About an hour into the drive, I started feeling like I was back on the Tilt-A-Whirl again, but figured it was just nerves and that I hadn't eaten anything. Every time I laughed, I felt like I was going to puke, and Jamie is one funny gal, so I was feeling really crappy! We arrived in St. Louis with no problems, thanks to her wonderful navigating skills and got settled into our room. We were really looking forward to a nice peaceful dinner, maybe meeting up with some fellow stampers and breaking open a bottle of Harvest Apple wine that Jamie brought along. Welp, we got to the restaurant and when I smelled the wings from the next table over, I knew I was in trouble. But I thought, maybe if I eat something, it will help. It didn't. After 3 attempts to eat, I thought I'd better find out where the bathroom was. I got there just in time!

So Jamie, being the trooper she is, walked several blocks to the drug store to get me some Pepto, crackers and 7-Up. I was hoping I could get back to the room without having to hurl in the bushes or over a trashcan along the streets of downtown St. Loius. Even though I had to walk through a fog of sewer stench, as a crew of guys were working in the street, I made it back to the room without incident. Again, I was able to get to the bathroom in time! The Pepto was not up to the task and I was back in the bathroom-can you say Mt. St. Helen's? I went ahead and got a wake-up call for 5am, which is enough to make anyone sick, and thought maybe I'd be feeling better in the morning. Nope!

Again, Jamie came to the rescue and took my projects over to the Convention Center for me. She was even considering going on stage for me to show my projects! She got to meet Andrea Withers, Carrie Cudney and Bonnie Thurber! How exciting!!! Jamie filled me in on everything I missed, including a Comic Book Convention going on at the same time. Apparently I missed out on alot! I was happy that I got to meet Minders as we were leaving, but I was not looking my best-still in my jammies...and my boots...that's how I drove home! I was relieved that the Zombie Apocolypse slayers didn't see me on the street, because I looked like the Night of the Living Dead! Even though I spent the majority of my time on bathroom floors and in my hotel bed, I felt extremely blessed and honored to be asked to be a presenter. I hope that I will be offered the opportunity again sometime, I think???  Okay, on to the projects...
I came up with some fun little party bags made out of lunch sacks. Super cheap and you can make them for any occasion you need! This sweet owl bag would be a perfect favor bag to hold all kinds of treats for a little girl's birthday party. You start with a flat lunch sack. Pick the side that has a nice square bottom-for me, it was the side with the seam. It's going to be covered up with paper so it doesn't matter if there's a seam. Next, I folded the top down 3" and scored it with my bone folder. From the fold line, I measured up 1 1/2" and marked it. Then I measured 1 1/2" from the side of the bag and marked it. Draw a diagonal line, and cut the top layer only-this will give you one of the ears. Repeat on the other side for the other ear. Next, I cut a piece of Comfort Cafe DSP at 4 1/2" x 5 1/4". I rounded the bottom corners with the 3/4" Circle Punch-put the paper into the TOP of the punch to achieve this. Center the DSP on the flap of the lunch bag, turn it over and trace around the ears. I had to trim the DSP a little more, but you get pretty close. Attach the DSP with SNAIL. Next, I cut a piece of Baja Breeze Cardstock at 5 1/4" x 4" and ran it through the Big Shot with the Perfect Polka Dots Embossing Folder, and adhered it to the sack with SNAIL. Then I cut a piece of Patio Party DSP at 5 1/4" x 3", rounded the bottom corners, and ahdered it with SNAIL. I then used the Ovals Framelits to add 3 rows of feathers to her front, and added a strip of Daffodil Delight Stitched Ribbon over the top. I used the heart from the Hearts Collection Framelits to make the wings. I cut them out of Patio Party also and popped them up with Dimensionals onto the Baja Breeze.

I cut out the eyes using the Ovals Framelits. I used the smallest oval in Whisper White and the next size up in Pink Pirouette. I then layed the oval template from the Occasions Paper-Piercing Pack over the Pirouette oval and pierced the paper using the 2 smallest ovals. Next, I used the Primrose Petals Embroidery Floss and Needle from the Sweet Threads Simply Sent Kit, and also used it to tread the Neutrals Buttons for her eyes. I think that kit is so adorable-I can't wait to make some of the fun cross-stitched cards. Each eye took about 10 minutes to stitch, but I found it really relaxing for some reason. There's fewer holes in the inside oval, so you'll have to double dip on some of the inside holes making a V. They don't have to be perfect-it gives it a sense of whimsy! I used Dimensionals on both layers for the eyes. I used the Petite Pennant Punch in Pumpkin Pie for the beak, and used a Pumpkin Pie Marker to trace around the smaller triangle for faux stitching.

I made a sweet little pocket using the Oval Framelits again in Daffodil Delight and Baja Breeze. I SNAILED them together and used the Occasions template again for the stitching. I adhered some Sticky Strip to the back of the Chocolate Chip Scallop Dots Ribbon and folded it over the pocket. I added some Wild Wasabi Stitched Ribbon stems and Brights and Subtles Buttons. I attached them with Glue Dots.


I realize not everyone might want to get out their sewing kit, so here's a way you could simplify things a bit:

The eyes look just as cute just using just the Paper-Piercing Template...

And instead of the elaborate pocket, you could opt for a cute little button instead using the Soda Pop Tops. I ran a big one through the Big Shot using the platform with 1 Tab. I used the Pennant Parade set for the sentiment.

I wanted to make something to coordinate with the bag for on stage, so I recycled one of our button containers. I dressed it up with cardstock, buttons, stitching and ribbon and filled it with M & M's in the same colors. But you could just fill the lunch sacks with various treats and trinkets if you made them for an event.

This project was the most elaborate. I made a couple other designs that weren't quite as involved:

This is the ensemble that I was going to demonstrate on stage-much simpler! Fold the top down 3" and score. The top DSP is 5 1/4" x 3" and the bottom is 5 1/4" x 7". The DSP is from Floral District. I rounded the corners and attached to the sack with SNAIL. I wrapped some Tangerine Tango and Daffodil Delight Ribbon just around the top flap and adhered it-saved on ribbon!

I punched some Lucky Limeade leaves out with the Bird Builder Punch and attached them with Glue Dots. I made a Daffodil Delight flower to sit on top of it-punched out 3 scallops using the 1 1/4" Scallop Punch, stacked them with SNAIL and scrunched them up. I added a Tangerine Tango bow with a Brights Button to the center attached with Glue Dots. Next, I added a trio of tags and wrapped them around the bow using Whisper White Baker's Twine. For the tags, I used the Lots of Tags SIzzlet Die in Whisper White, Daffodil Delight and Crumb Cake. For the top tag, I stamped the sentiment in Tangerine Tango ink and used the Family Reunion set. I added a sweet little flower using the Itty Bitty Shapes Punch Pack and a Brights Brad. For the Daffodil tag, I added a leaf with Glue Dots and for the Crumb Cake tag, I punched out a trio of flowers. To get them spaced evenly, I punched out 3 flowers from a sticky note and centered them on the tag. Then just line the punch up over the sticky note flowers, and they'll be perfect!

I made a matching gift card easel making a tent out of Crumb Cake Cardstock measuring 8 1/2" x 4 1/2". Score at 3 1/2" and at 5". Sticky Strip the top together and decorate as shown.
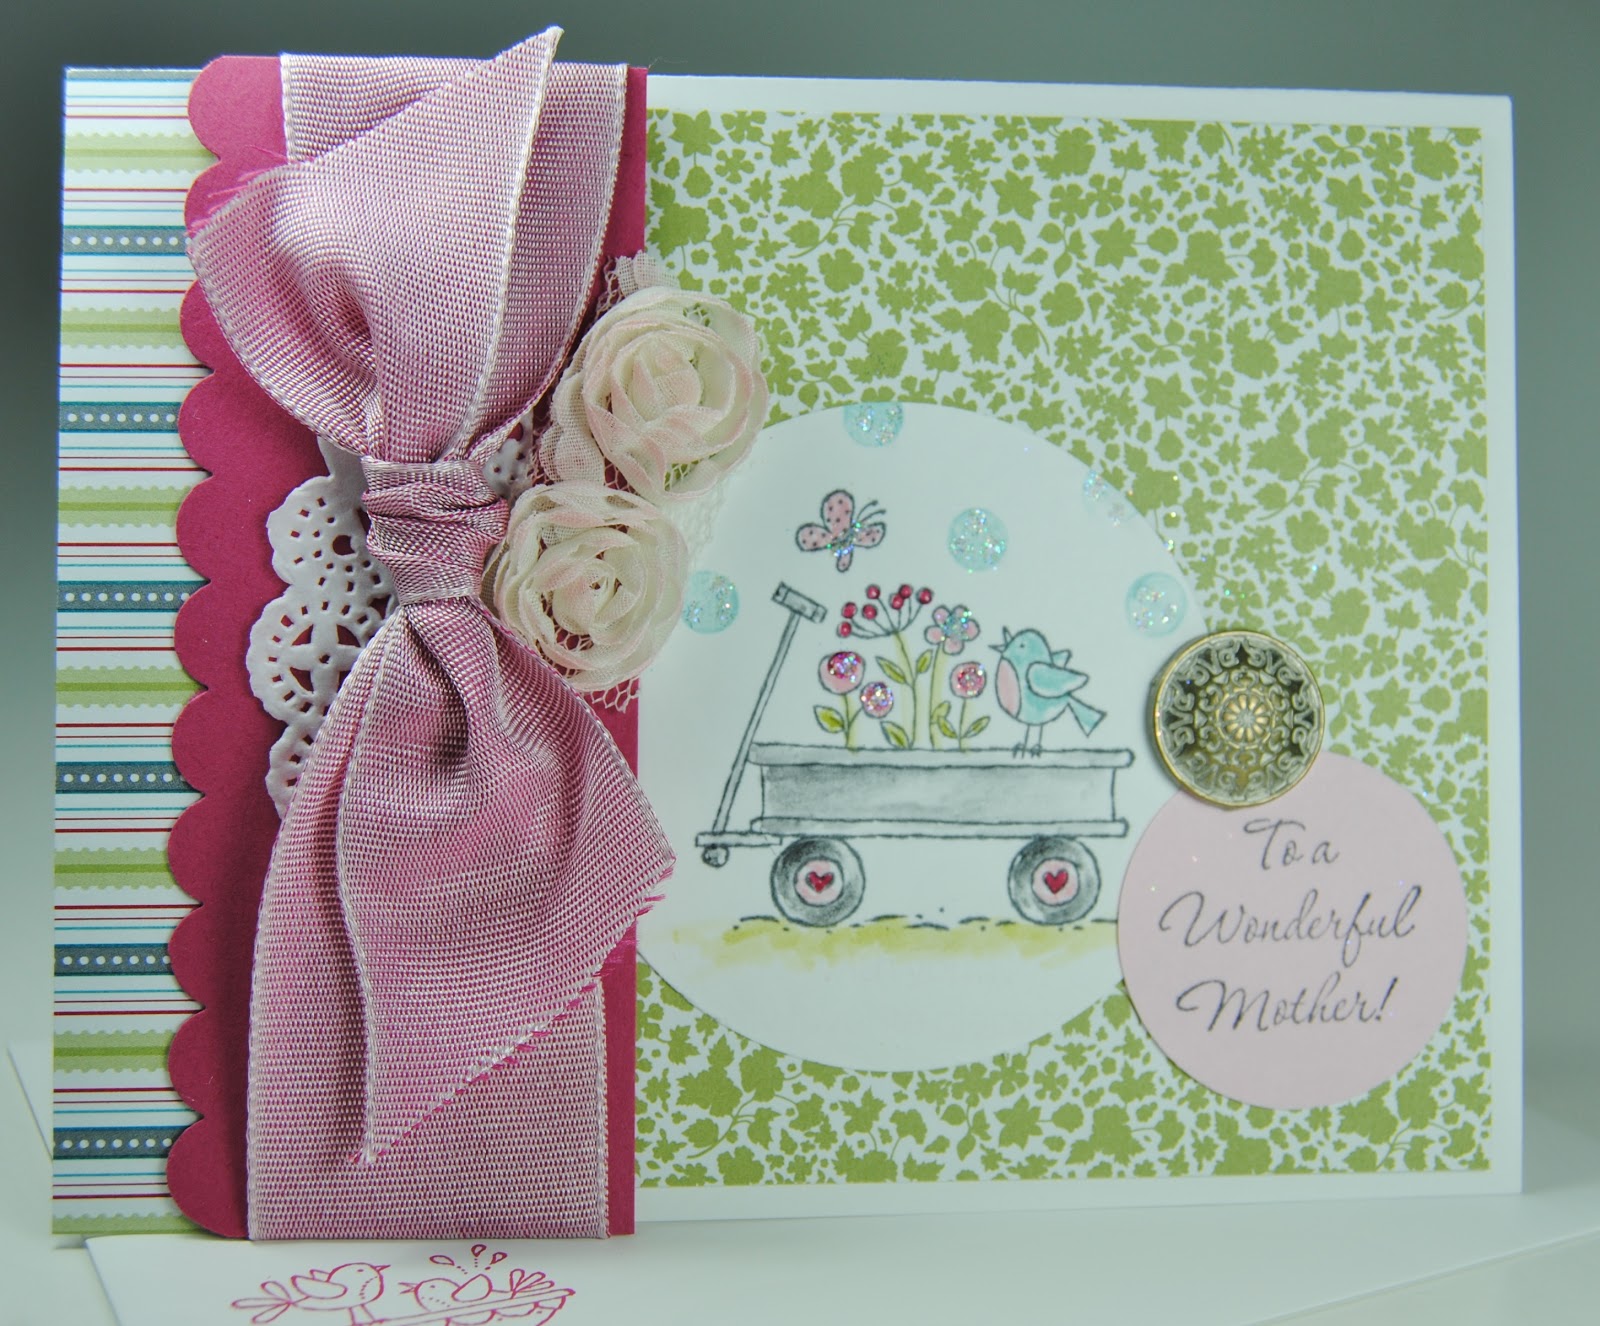
This would make a great gift for Mother's day! And onto my final project.....

Unfortunately, I don't have a picture of the bag for you. Andrea took it to the home office-I'm hoping she'll post it on the SU! Facebook Page-be sure to check there! I used the Limited Offer Sent With Love DSP for this project, and the fun new Designer Typeset Photopolymer set. I thought this would be the perfect thing to send to a college student. You could make several bags filled with goodies for him to share with his roommates-he'll be the hit of the dorm!

He'll need plenty of quarters for laundry...

And of course, plenty of munchies! It might not be a bad idea to have his name on his stuff-I remember those days! Again, sorry I don't have a picture of the bag. If I can find it, I'll post a link.
I hope you enjoyed my projects. I wish I could have gone into a little more detail with this last group, but I'm really tired-and you probably are too, if you're still with me! Oh, I wanted to share a couple more things with you before I go...

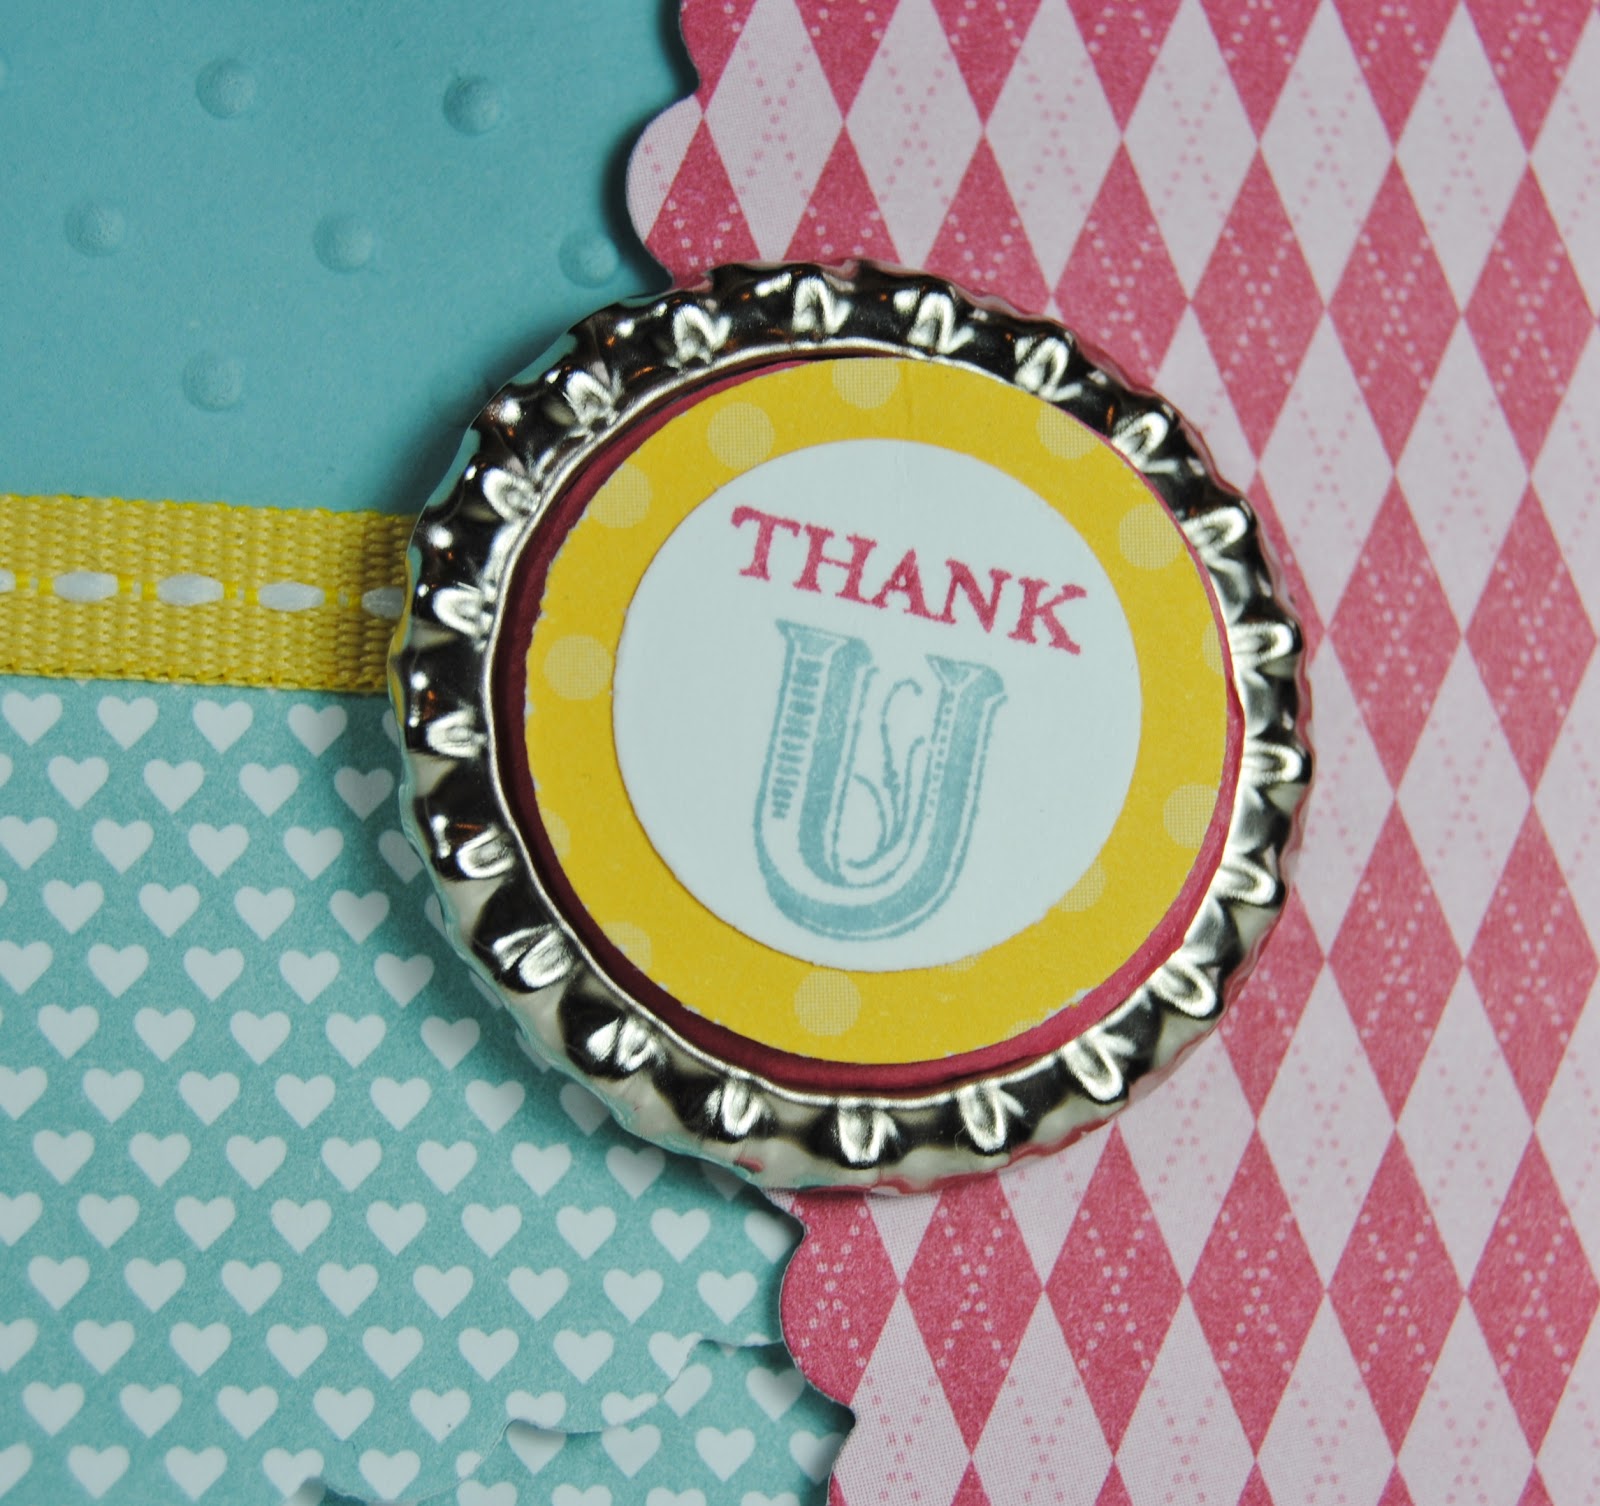
This is the sweet thank you card I got from SU! made with MDS. They gave me a gift certificate even though I wasn't able to fullfill my end of the deal. I truly work for a great company!


And this is a sweet little gift bag that Jamie made for me filled with my fave Junior Mints! The good Lord blessed me with a wonderful friend and opened my eyes to how important that is! Thank you so much for stopping by today. Make sure to come back tomorrow...for a MUCH shorter post...I need a nap...