Hello there! We had a great time at TNT!-Tips & Techniques last night! It was a small group, but it was a lot of fun:) We learned how to make several different sized boxes using the Envelope Punch Board.
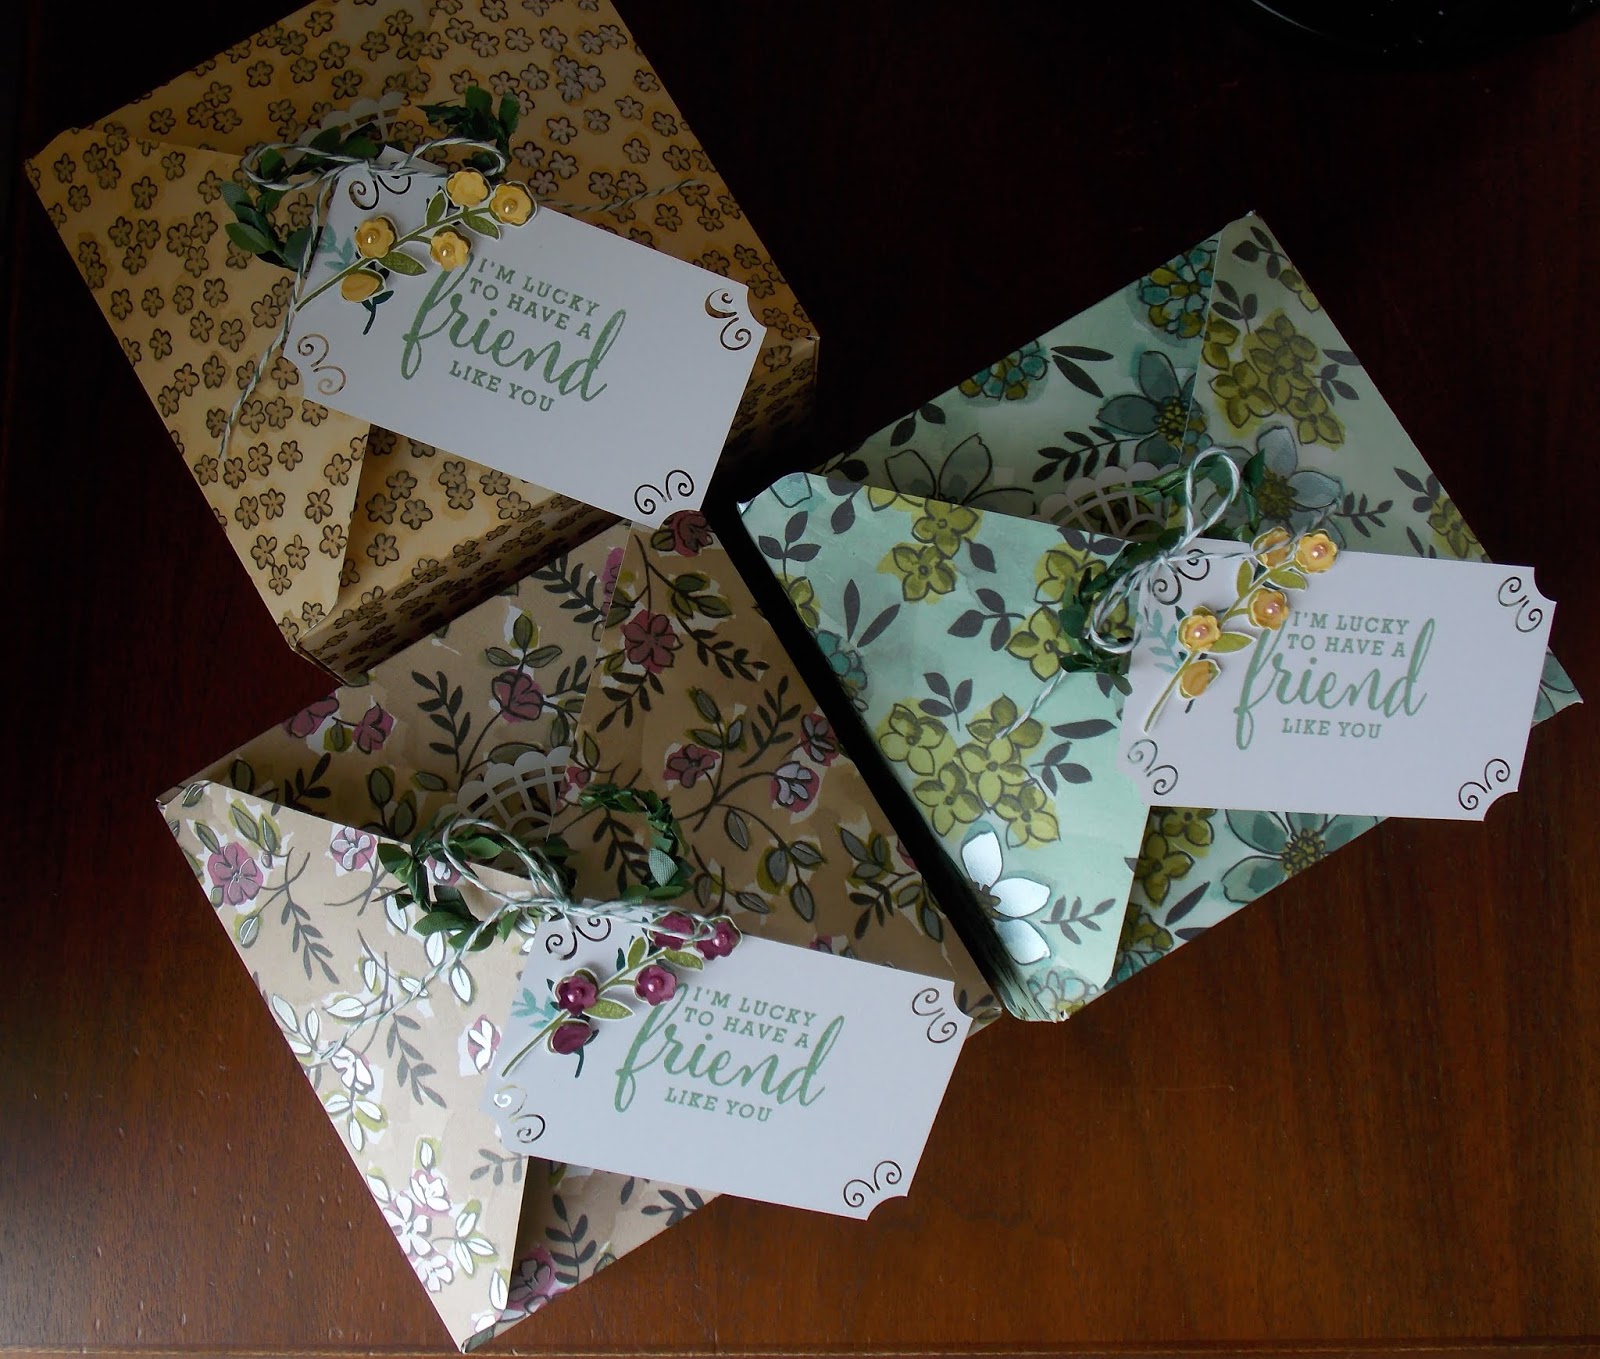
These were the favors I made for everyone who attended. I used products from the gorgeous Share What You Love Suite.
I started with a piece of 12" x 12" DSP from the Share What You Love pack. I lined the left edge of the paper to the 4" Score Line and punched & scored. I rotated it and punched & scored at the 4" mark on each side.
I then flipped the paper over and repeated the process on all 4 sides. I used the score line guide on the right side to add a second score line to form the sides of the box. I used a Bone Folder on all the score lines and assembled the box with Liquid Tombow. I put a big bag of Boom Chicka Pop Kettle Corn inside each box:)
I rounded the corners using the corner rounder punch on the Envelope Punch Board and punched holes in the top twp flaps using the 1/8" Handheld Circle Punch. I adhered one of the lovely Pearlized Doilies to the top of the box with Glue Dots. I then straightened out one of the Boxwood Wreath Embellishments and thread it through the holes. I gently twisted it and curved the ends.
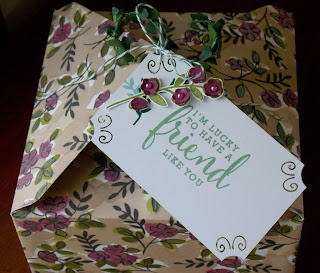
I used the larger tag from the Share What You Love Embellishment Kit. These laser cut tags are gorgeous! I'm on my second set already:) I stamped the sentiment with the Love What You Do stamp set using Mint Macaron ink. I stamped the background leaves with Tranquil Tide ink, stamping some off. Next I stamped the flower image with Old Olive ink onto Whisper White Cardstock and cut it out with Paper Snips. I stamped the flowers again onto Rich Razzleberry Cardstock using the same ink, and So Saffron ink onto the same cardstock. I used the Tree Builder Punch to punch them out & adhered them with rolled Glue Dots. I finished them off with Share What You Love Artisan Pearls to the centers. I attached the tags to the greenery with the Tranquil Tide Baker's Twine included with the Embellishment Kit.

We repeated the process for this smaller box starting with a piece of DSP measuring 8" x 8". We punched and scored at the 2 5/8" Score Line. The formula for these boxes is dividing the size of the DSP by 3 equal parts and punching & scoring on that line.
I added a Share What You Love Pearlized Doily to the top of the box with Glue Dots. I then cut a strip of Vellum Cardstock to 10" x 2" and punched the ends with the Scalloped Tag Topper Punch. I wrapped it around the box and creased it on the box edges. You could add a Glue Dot to one end temporarily to anchor the vellum in place to center it on the box. Next I thread a piece of the brand new Nature's Twine through the holes and tied a bow.
I used the smaller tag in the Embellishment Kit and stamped the sentiment from Love What You Do with Grapefruit Grove ink. I cut a leaf from the DSP with Paper Snips and stuck it to the bottom of one of the beautiful silver flowers included in the Embellsihment Kit. They're self-adhesive so all you have to do is peel off the backing and stick them in place! I attached the tag to the twine with the thread also included in the Embellishment Kit.
For this box we started with a 9" x 9" of Very Vanilla Cardstock. We punched & scored at 3" & repeated the same process that we used on the previous box.
We added pieces of the brand new Nature's Poem DSP to the box with Liquid Tombow. One of the many perks to being a demonstrator is being able to preorder products a month early and we had fun playing with a lot of brand new product last night! I wrapped a piece of Burlap Ribbon around the box and stapled it. I then wrapped a piece of the gorgeous new Petal Pink ribbon from the Metallic Ribbon Combo Pack and tied a bow.

We also broke out the brand new Rooted in Nature Bundle. I stamped the wood round with Crumb Cake ink onto Very Vanilla Cardstock and cut it out with Paper Snips. I stamped the sentiment with Early Espresso ink and attached it to the top of the box with Dimensionals. I cut out the leaf image with the coordinating Nature's Roots Framelits using Petal Pink Cardstock. These framelits are really cool in that they have leaf images that only emboss. So after cutting the leaf, I placed the embossed image on top of the die cut and ran it through the Big Shot again and got this lovely textured image. I finished it off with a Leaves Trinket which is part of the Rooted in Nature Suite.

We made this cute little box with a 6" x 6" piece of cardstock. We played with the new In Colors and each picked a different color. I used Lovely Lipstick for mine. I punched & scored at 2" and repeated the process for the other boxes. I showed them a different way to finish the box by standing it up instead of laying it flat. We trimmed the top flaps down a bit to make the fit into the box easier.

I covered the box with DSP from the 2018-2020 In Color 6" x 6" DSP Stack using Lovely Lipstick. I used the 1" Circle Punch to add a notch to the front of the box. I then stamped the sentiment using the new set Pick A Pennant. I stamped each letter with one of the new In Colors: Grapefruit Grove, Call Me Clover, Lovely Lipstick, Pineapple Punch & Blueberry Bushel. I stamped them onto Whisper White Cardstock and used the Cookie Cutter Builder Punch to punch them out. I punched out the banners with the Duet Banner Punch in Whisper White & Lovely Lipstick Cardstock. We each picked a different color of the 1/8" In Color Grosgrain Ribbon to tie around our box.
One of the gals commented that the box reminded her of a circus and we all agreed these would make adorable favors for a kids circus-themed birthday party!
We had a ball last night playing with all these new goodies. Remember, you can get lots of FREE product when you order the Share What You Love Bundles AND you get some extra freebies from me! See the details here: http://laurasworksofheart.blogspot.com/2018/05/share-what-you-love-early-release.html or go to the May 9th post and read all about this fun promotion. But the freebies are only included in this early release promotion. The products won't be bundled in the new catalog and you won't get the FREE products. Make sure you get in on the fun by May 31st! Thanks so much for stopping by:)


Awesome stuff; TFS!
ReplyDeleteThank you Donna:)
ReplyDelete