Hello there! We had a lot of fun at TNT! last night learning the Whitewash Technique. It was a full house & a little nutty, but we got 'er done:) This is the favor I made for everyone using the technique on the top of the box.
I filled a Clear Tiny Treat Box with chocolate & Sweet Soiree Ready Shreddie, and wrapped a strip of Sweet Soiree DSP around it.
I layered a Daffodil Delight square cut with the Stitched Shapes Framelits on top of a scalloped Whisper White square cut with the Layering Squares Framelits. I then punched two overlapping holes at the top using the 1/8" Handheld Circle Punch. I wrapped a piece of Old Olive Mini Chevron Ribbon around the DSP, threading the ribbon through the hole and tied a knot. I stamped the sentiment with Crumb Cake ink using the Hostess set Yay You. I flagged the bottom of the Whisper White Cardstock and tucked it under the squares using Liquid Tombow.
For the Whitewash Technique, I stamped the flowers & leaves from Falling Flowers with Whisper White Craft ink onto Crumb Cake Cardstock. I heat-embossed them using White Embossing Powder & the Heat Tool. I then made a Whitewash on a clear block using a few drops of ink from a Whisper White Craft Ink Refill, and added some water from an Aqua Painter. I then painted the leaves & flowers with the whitewash. I used the Heat Tool to speed up the drying time.
I pressed the lid together of a Calypso Coral stamp pad to get ink transfered to the lid and used an Aqua Painter to add color to the flower. I repeated the process with Marina Mist and Old Olive ink. I finished it off with a Gold Faceted Gem to the center.
This is the first card they made using the sets Hold on to Hope & Hello Easter from the Occasions Catalog.
For this card, we just did a subtle whitewash on the banner & scallops with an Aqua Painter. We stamped the floral image directly onto the clear block with the craft ink on it, and stamped it onto the card for a subtle background. You may need to stamp off once on Grid Paper to remove excess ink if it's too runny. It takes a little practice to get the right consistency.
Here's the inside of the card.
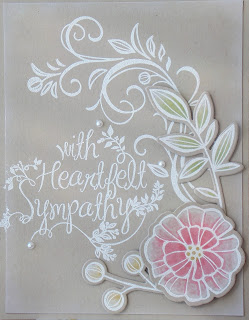
On this card we added color to the whitewashed images using Markers and Blender Pens. We colored the center of the flower with a Flirty Flamingo Marker and blended it with a Blender Pen, and then blended some Powder Pink to the edges. We used a Lemon Lime Twist Marker for the leaves & Daffodil Delight for the other flowers.
We softened it up a little more by adding some Whisper White Craft ink around the edges using a Sponge Dauber in the stamp pad.
A few Basic Pearls added the finishing touch.
The Whitewash Technique is so versatile. It's a great way to add a beautiful soft effect to your project, and it is also a means to add vibrant color to a dark background. I hope you'll give this gorgeous technique a try! Thanks so much for stopping by:)


No comments:
Post a Comment