Sunday, October 28, 2018

APPRECIATION EVENT:

Hello there! So sorry I've been gone for so long! We went to my nephews wedding in Colorado & then had a couple events to prep for, so I've been playing catch up. I had my Appreciation Event yesterday to show my gratitude for everyone who helped me this past year to earn the SU! Incentive Trip to the Greek Isles.

I wish I could smuggle each one in my suitcase & take them with me, but I guess cupcakes, melts & a discount will have to do:) My husband makes amazing candles & melts, so I gave everyone a melt wrapped up in this pretty packaging. The Striped Treat Bags made it easy to wrap a bunch and the Merry Merlot & Copper Reversible Ribbon really dressed up the bags.

The sentiment from Peaceful Place was perfect for the tags, and I got to save 15% on the stamp set-thank you Stampin' Up! I stamped it with Cajun Craze onto Petal Promenade DSP and added a banner made from Joyous Noel Glimmer Paper to the bottom. I punched a hole in the corner of the tag and thread a piece of Gold Cord through it, along with a Snowflakes & Stars Wire Element. I wanted the packaging to be beautiful & sparkling, just like all of these amazing friends who helped me achieve this amazing dream:)

My grandson Gabe was selling Scratch Cupcakes as a fundraiser for his school, so the timing was perfect to help him out & spoil my customers at the same time:) This is just a sampling of the dozens of varieties that they could pick from. There was just about anything you could think of from Bacon Maple to Strawberry Cheesecake. Every report was good! And I just noticed that some little finger sampled all the frostings before I took this picture-which was today, not yesterday, I promise, haha:() I also offered my 25% discount to everyone who helped me this past year. I don't usually give away my discount, but I wanted to do something extra special for this event for all who helped me achieve this milestone goal. If you ordered from me, attended events, encouraged or prayed for me this past year & want to take advantage of this amazing deal, please email or message me TODAY! I'll be putting in the order tonight and drawing a name from the Funtasy Football Board for a $50 Shopping Spree! Thanks again for your support this year & thanks for stopping by today!

Tuesday, October 16, 2018

FALLING FOR LEAVES MATCHBOOK:

Hello there! Here's a lovely Fall treatholder that I shared on my Facebook group page SU!P FRIENDS! yesterday. It features the Falling for Leaves Bundle, which is my Product of the Week. I'll be sharing another video over there today with some Tips & Techniques for this amazing bundle using the new Embossing Mats, so make sure to go check it out!

I started with a full sheet of Grapefruit Grove Cardstock, and scored it on the short side at 3/4", 4 1/2" & 5". I then turned it to the long side and cut it at 2 3/4". You'll get 4 matchbooks out of 1 sheet of cardstock, which worked perfectly as I needed to make several to put in customer orders as a thank you:) I covered the top part with Grapefruit Grove DSP from the '18-'20 In Color 6" x 6" DSP stack, measuring 3 1/2" x 2 3/4". The bottom strip is from the '17-'19 In Color collection, featuring Fresh Fig & cut at 2 3/4" x 3/4". I attached both with SNAIL. I then tucked the cover into the bottom strip to form a Matchbook & stapled it towards the bottom, making sure not to staple the cover.

Next I stamped the bottom leaf with Cajun Craze ink onto Cajun Craze Cardstock. I cut this out, along with the Fresh Fig leaf on top & the Coastal Cabana leaf on the bottom with the Detailed Leaves Thinlits. I stapled the top 2 leaves together on the stem and added the bottom leaf to the bottom with a couple of Glue Dots. I attached the Colored Doily to the Matchbook cover with Glue Dots and attached the leaves on top with Dimensionals.

I stamped the sentiment with Cajun Craze onto a 2 1/2" x 3/4" strip of Coastal Cabana Cardstock & flagged the end with Paper Snips. I adhered the sentiment with a Dimensional on the right side. I added a bow made from the Metallic Ribbon Combo Pack & attached it with a Glue Dot. I finished it off with a few Faceted Dots.

On the inside I added a couple of Glue Dots & attached a Ghiradelli Caramel on top. You could substitute it for Halloween candy and do a fun Halloween theme on the front instead instead if you wanted:)

I'll be sharing more ideas for this amazing Falling for Leaves Bundle this week, and make sure you get in on the Deal of the Week, which are the Colored Doilies FREE with a $30 order by Sunday, October 21st at midnight! You can order from my Online Store at: www.lauramellinger.stampinup.net and use HOST CODE TXN43B6F and your order will ship out right away & directly to you! I'll send the Colored Doilies to you separately. Thanks so much for stopping by!

Saturday, October 13, 2018

ANOTHER CARD BUFFET 6-PACK READY TO GO!:

Hello there! I just finished my second Card Buffet 6-Pack which is available as an immediate download. These are perfect for demonstrators who are short on time or creativity to help prep for events. And they help customers plan their orders by having all the supplies listed for each project. Each 6-Pack contains a color photo of each card, step-by-step instructions(which can be cut off & attached to tote lid), measurements for paper & ribbon & a list of all the supplies used. Each tutorial is $15 and will be emailed to you as soon as payment is received. If you're not familiar with how a Card Buffet works you can see a video on my Facebook SU!P FRIENDS! group page.

These 12 designs will be available to make for my local customers at my Appreciation Event on Saturday, October 27th from 11-1 at the Stampin' Pad. I'm in the process of coming up with 6 more designs for a total of 18 designs to pick from! I'm so grateful to everyone who helped me earn the SU! Incentive Trip to the Greek Isles so I wanted to show my appreciation by holding a special event for them! Here's what I'm planning:
   *Make 2 cards of your choice for FREE!
   *25% discount on your order that day!
   *Scratch Cupcakes!
   *A special gift!
PLEASE RSVP BY SUNDAY, OCTOBER 21ST so I know how many to plan for!!!

If you're local and supported me this part year by ordering, attending events or just praying for me, haha, I'd love to have you join me for this fun event! If you're interested in purchasing a Card Buffet 6-Pack Tutorial or have questions, please email me at lmel09@q.com or find me on Facebook on my group page SU!P FRIENDS! Thanks so much for stopping by:)

Monday, October 8, 2018

ITTY BITTY FAVOR:


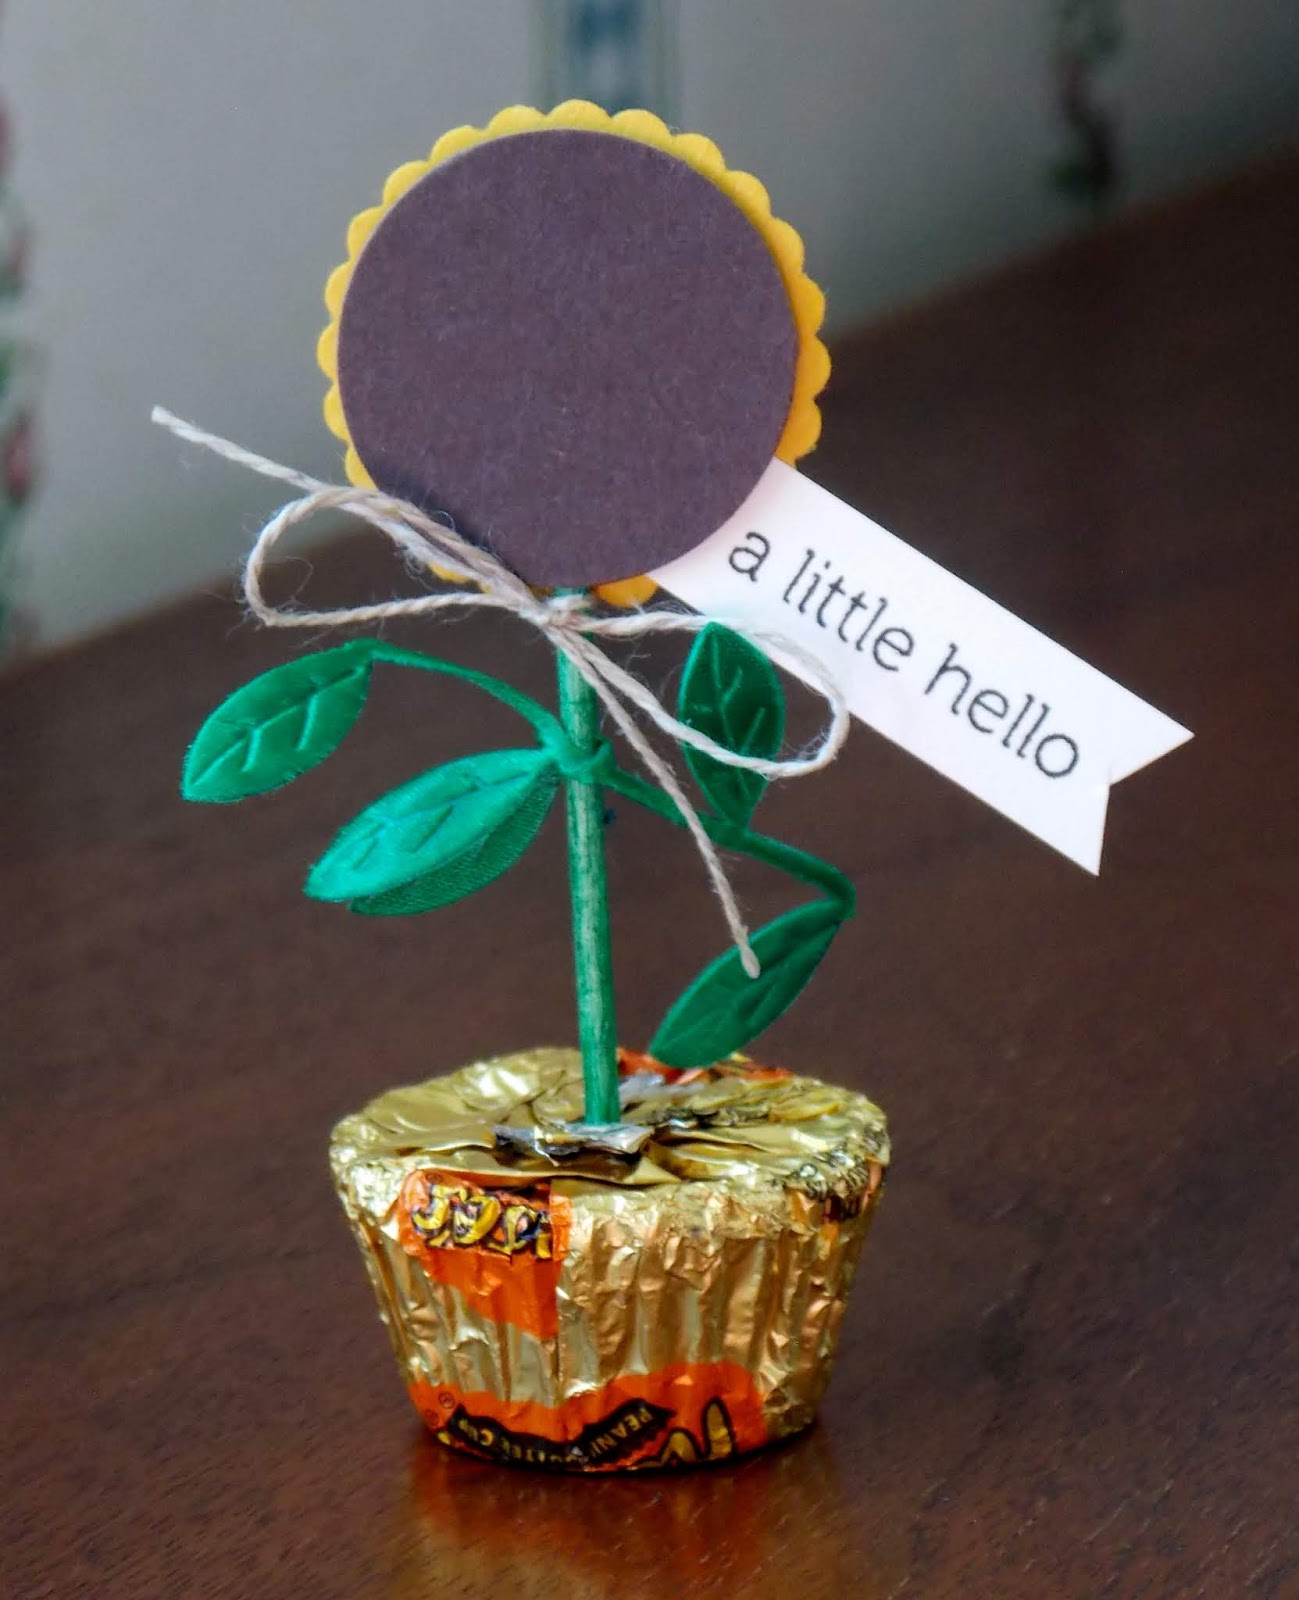
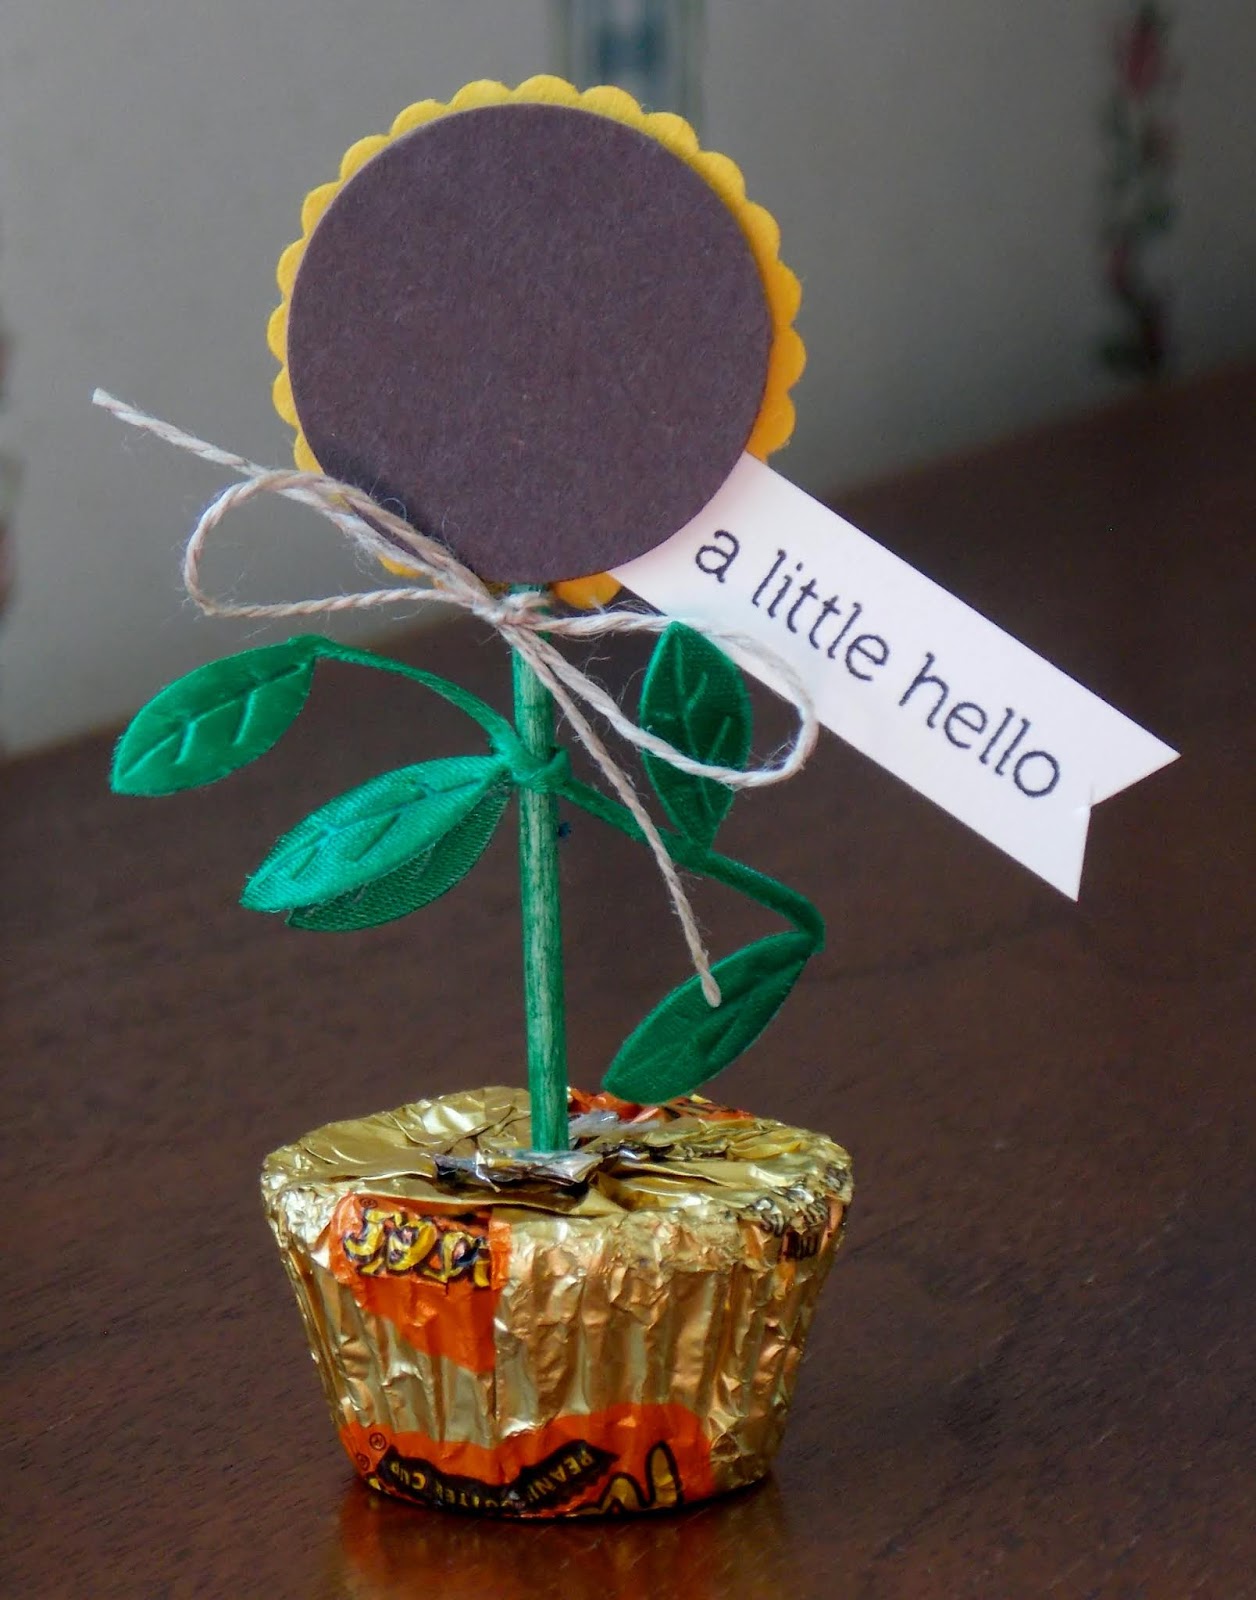
Hello there! Here's the sweet little favor I made for the attendees at Card Buffet last week using the set Itty Bitty Greetings. I added color to a toothpick with a Sponge Dauber and Call Me Clover ink. Once it dried I wrapped a 3" piece of Leaf Ribbon around it. I'm not gonna lie, those leaves aren't the easiest to work with, so it might be helpful to snip a couple of them off in the center before you try to tie it:)

Next I wrapped a piece of Linen Thread around the toothpick and tied a bow. I then stuck the toothpick into a small Reeses Peanut Butter Cup, or a Rolo would probably work too. I punched the center of the flower with a 1" Circle Punch using Early Espresso Cardstock. I punched the flower from Crushed Curry Cardstock using the 1 3/8" Scallop Circle Punch. I adhered them together with a Dimensional and stuck it onto the end of the toothpick.

I had a Workshop a couple of weeks ago and one of the guests added a few items to her order after she got home. She texted me and asked if the 1" Circle Punch and 1 1/8" Scallop Circle Punch worked together? I wanted to make sure they layered well before I answered her so I went up to my stamp room and tried them together and got this adorable little sunflower! When paired together they also make a perfect little sun. I don't know if I would have ever thought to pair them together, so thank you Mari for the wonderful idea!!!

Finally I stamped the cute little sentiment from Itty Bitty Greetings with Early Espresso ink onto Whisper White Cardstock. I punched it out with the Classic Label Punch, and used the end of the punch to flag the end of the cardstock. I attached the tag to the flower with a Glue Dot.


If you've been thinking about wanting to try out Paper Pumpkin, now is the time! Starting today you can get your first kit for $5 during the Flash Sale! It's only going on until October 10th, or when their supply runs out. It's also only for new subscribers, but if you use a different email address from a previous subscription, you'll get the discounted price...shhh, you didn't hear that from me;) I've heard that the October kit contains Cajun Craze, Coastal Cabana, Fresh Fig, Grapefruit Grove & Night of Navy, sounds gorgeous! If they run out of this kit, you'll get in on the November kit, which will be a Christmas kit, so it's a win-win! You'll need to enter promo code FLASH1018, and you can subscribe at my online store here: https://www.paperpumpkin.com/en-us/sign-up/?demoid=2030752
or go to www.lauramellinger.stampinup.net and click on Paper Pumpkin:)

And remember Funtasy Football is going on now! For every $30 order you get to pick a number and your name is placed on a square. When the board is full I'll draw a name for a $50 Shopping Spree! The board is filling up fast so get in on the action! Join me soon on my Facebook group page SU!P FRIENDS! where I'll be sharing more fun with you! Thanks so much for stopping by:)


Saturday, October 6, 2018

WINTER WOODS CARD:

Hello there! Here's the other card we made at TNT! a couple of weeks ago. I focused on techniques made with Embossing Folders. This is the Faux 3-D Technique...not sure if it has an official name, but that's what I called it:) I started with a Pool Party base and added a layer of Real Red Cardstock on top.

Next I opened up the Woodland Embossing Folder and on the side that has the SU! logo, I ran Balmy Blue ink across it with a Sponge Brayer, keeping the ink darker at the bottom. I then inked the tree image with Early Espresso ink and stamped it directly onto the folder on top of the Balmy Blue. I stamped once full strength & stamped it a second time, off-setting it a bit. I repeated this process a second time. Make sure to add the shading at the bottom of the trees as well.

I then stamped the 2 deer with Soft Suede ink, placing them so they're heads wouldn't be obstructed by the trees. Once the stamping was done, I carefully laid a piece of Whisper White Cardstock on top and ran it through the Big Shot. When you open it up you get this really cool effect which make the deer appear to be behind the trees & gives your project a lot of depth. Next I stamped the sentiment onto Real Red Cardstock using Early Espresso ink and flagged one end.

I stamped several pinecones with Soft Suede ink and the greenery with Mossy Meadow. I used the coordinating In the Woods Framelits to cut them out of Whisper White Cardstock, along with the sprig from Sparkle Glimmer Paper. Remember, you save 10% when you purchase the stamp set & dies together in a Bundle! I attached the sprig, greenery and a pinecone to the sentiment with Glue Dots. I attached a pinecone on top with a Mini Dimensional and attached the banner to the card with Dimensionals, making sure to place them on flat areas between the trees.

I added a few more pinecones to the right and colored them all with Wink of Stella to give them some shimmer. I finished it off with a bow made from Real Red 1/8" Solid Ribbon and attached it with a Glue Dot. This is a technique with a big Wow factor and was so much fun to open the embossing folder and see the results. I'd seen several examples on Pinterest, but this was the first time to make one of my own. It was a big hit:) Thanks so much for stopping by!


Friday, October 5, 2018

DASHING DEER CARD:

Hello there! Here's another project from my last TNT! class featuring the Faux Quilt Technique. I started with a Crumb Cake base. I then cut squares from the Dashing Along DSP & adhered them to a piece of Cherry Cobbler Cardstock with SNAIL. I ran it through the Big Shot using the Quilt Top Embossing Folder, adding the faux quilt texture.

Next I folded a piece of Striped Burlap Trim in half and stapled it to the Cherry Cobbler Cardstock. I angled the ends and stamped the sentiment onto a piece of Whisper White Cardstock with Garden green ink. I used the Darling Label Punch to punch it out and attached it over the burlap with Mini Dimensionals. I used one of the deer's antlers from the Detailed Deer Thinlits to cut out the swirls from Vellum Cardstock, and attached them to the back of the sentiment with Glue Dots.

I ran a piece of Silver/White Baker's Twine through a Galvanized Button and tied a bow. I attached it with a couple of rolled Glue Dots. I finished it off with a couple of Frosted & Clear Epoxy Droplets.

This technique is an oldie but a goodie. It's been around for at least 10 years but I still love it! The Dashing Along DSP was only around for a short while, but I had one friend earn a package with her Workshop and several customers who placed generous orders in September who will also be getting this gorgeous paper. I'm hoping they'll give this fun technique a try when they get their own package:) Thanks so much for stopping by!

Wednesday, October 3, 2018

COUNTRY HOME MINI GABLE BOX:

Hello there! This is the favor I made for my TNT! attendees a couple of weeks ago using the Silver Mini Gable Boxes and the Country Lane Suite. The class featured Embossing Folder Techniques and I added some great texture to this box using the Tin Tile Embossing Folder. I ran the flat box through the Big Shot only embossing part of the box.

I then antiqued the design by running a Sponge Dauber over it with Soft Suede ink. I then ran a piece of Best Route Washi Tape along the embossed edge on the front flap. Next I wrapped a piece of the luxurious Tranquil Tide Velvet Ribbon around the box & tied a bow...after I filled it with chocolate of course:) I then made a tag from the Country Lane DSP and flagged the bottom. I added a label on top made with Whisper White Cardstock that I stamped with Soft Suede ink.

I added a piece of Braided Linen Trim that I tied in a knot, frayed the ends & attached with a Glue Dot. On top of that I added a Galvanized Clip & a pair of pumpkins that I cut from the Country Lane DSP using Paper Snips. I finished it off with a couple Frosted & Clear Epoxy Droplets.

I then punched a hole through both layers using the 1/8" Circle Handheld Punch and tied it to the ribbon with Linen Thread. I'll have a couple more projects to share using some fun Embossing Folder Techniques so make sure to stop back tomorrow!

I've decided to make a few changes to my business with the start of the new Stampin' Up! year. I'm not going to hold TNT! or Happy Hour classes going forward as they caused me a good deal of stress and didn't yield consistent results. I'm going to instead do weekly videos on my Facebook group page SU!P FRIENDS! I'll focus on sharing Tips & Techniques there on Tuesday mornings. While Happy Hour was a fun class it ended up costing me money, so if you want to have fun, swap & drink wine with me join my Team LOL! We have a great time when we get together every month:) I'm going to continue with Card Buffet on the first Thursday of the month and Coffee Break on the fourth Saturday. Once I take some time off to clean my house, I'll plan quarterly events like BINGO!, Stamp-A-Stacks, Product-based  Classes/Classes To Go, and possibly a Play Day Retreat! So stay tuned, there's lots of fun & new things to come:) Thanks so much for stopping by!

Monday, October 1, 2018

CARD BUFFET 6-PACK:

Hello there! I'm excited to share something new with you today! I've been doing Card Buffets for several years and they are by far my most popular event. I'm offering a Card Buffet 6-Pack, which includes a tutorial for 6 cards. You'll get color pictures of each of the cards, along with step-by-step instructions for each. You'll also get a supply list of all the products used and measurements for all the kit components.

The cost is $15 for all 6 projects and the tutorial will be sent to you by way of email for you to download and work on at home, or use for class prep if you're a fellow demonstrator. I'll have 1 6-Pack each month, and possibly others available to choose from as well.

You can watch a video on my Facebook group page SU!P FRIENDS! You may need to add my name in the search, but it explains the Card Buffet process more in depth. This initial 6-Pack will be available later tonight or tomorrow. Feel free to email or message me with any questions you may have. This will be a great resource for fellow demonstrators who work other jobs & don't have a lot of time to plan classes or claim they aren't creative. It'a also perfect for customers who can't attend the live event or for those who want to recreate more of the cards at home. Thanks so much for stopping by!

WE DID IT!!!

Header_Incentive_Trip2019_Demo
I'm so very happy to announce that I earned the Stampin' Up! Incentive Trip to the Greek Isles! This has been a year-long effort and would not have been possible without you and your support! I want to thank you from the bottom of my heart for helping me achieve this goal and this dream! I'm planning an Appreciation event at the end of the month and will post more details soon:)

October is the start of the new Stampin' Up! year, actually it's 30th year!!! And we'll be celebrating what we love during the World Card Making Day Celebration! We'll technically be celebrating a day early at Card Buffet on Thursday, October 4th. Make plans to join me anytime between 4-8 or stay for the entire time! SU! is offering a 10% discount on select items so make sure to come to the Stampin' Pad on Thursday and check out the deals! But they're only around for a week, so make sure to take advantage by Sunday night!
This week I'll be focusing on the Stamparatus as the Product of the Week. You can see a video tomorrow morning on my Facebook group page SU!P FRIENDS! You can now order some accessories to go along with this amazing product, and I'm so excited that they'll be adding a case to carry it in later this year...stay tuned!

I'm kicking off the new Stampin' Up! year again with Funtasy Football! For the month of October you get to pick a number from 1-25 with every $30 order. I'll place a football on your square and keep track of your number(s). When the board is full I'll draw a name for a $50 Shopping Spree! You'll get to double-dip with my Deal of the Week as well! With a $30 order, you'll get a package of Note Cards & Envelopes in your choice of Whisper White or Very Vanilla for FREE! But your order needs to be in by Sunday, October 7th at midnight! Take advantage of the World Card Making Day Promotion and save 10% on a $30 order, PLUS get a package of Note Cards & Envelopes for FREE PLUS get a chance at a $50 Shopping Spree!

Go check out the deals at my online store at www.lauramellinger.stampinup.net and click on the World Card Making Day Banner. While you're there check out the new Stamparatus accessories! Thanks so much for stopping by!